Step by Step Guide on How to replace water heater

Many homeowners eventually face the task of replace water heater. 

Careful planning and execution are necessary when replacing a malfunctioning unit or upgrading to a more energy-efficient one. 

You will be guided through each step by this guide, ensuring you can confidently replace water heater.

1. Recognizing the Need for a New Water Heater

Water heaters are not designed to last forever. Typically, they have a lifespan of 8 to 12 years, nevertheless, this can change based on usage and maintenance. 

Consider a replacement if you notice that your replace water heater is no longer delivering hot water efficiently, making strange noises, or showing signs of rust and leaks. 

Postponing this choice may result in more serious problems like water damage or higher energy costs.

Preventing total failure of a water heater can help you avoid the anxiety and inconvenience of having to deal with an emergency. By monitoring your replace water heater performance and conducting regular maintenance, you can determine the right time for a replacement.

2. Preparing for the Replacement Process

It is crucial to prepare adequately before replace water heater with a tankless one. This preparation involves gathering the necessary tools, selecting the right water heater for your needs, and ensuring that you understand the basic steps involved in the installation.

A. Selecting the Right Water Heater

Furthermore, choosing the right water heater involves more than just picking a unit that fits your budget. Consider the size of your household and your typical hot water usage. 

For instance, a family of four requires a 50-gallon tank, while smaller households might suffice with a 40-gallon unit.

Depending on your home’s current use, you must decide between a gas and electric model. Each type has pros and cons; gas hot water tanks are more cost-effective in the long run, but electric water heaters require installation and maintenance.

B. Gathering Necessary Tools and Materials

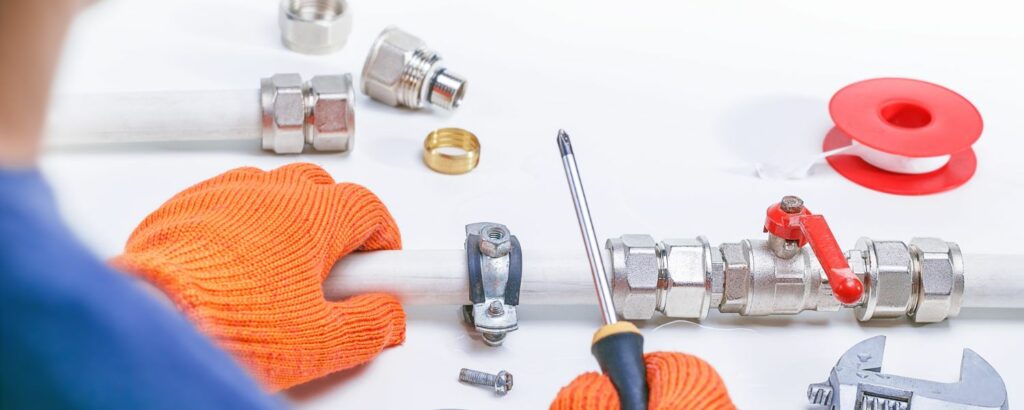
The right tools and materials will make the replacement process smoother. Standard tools include an adjustable wrench, pipe wrench, screwdrivers, and pipe tape. 

You’ll also need safety gear, such as gloves and goggles, when the installation is happening, keep yourself safe.

3. Ensuring Safety Before Starting

Safety should be your top priority when replace water heater. Before you begin, turn off the power supply at the circuit breaker if you have an electric heater or the gas supply if you have a gas heater. It’s also essential to shut off the water supply to prevent any potential flooding during the replacement process.

Draining the tankless electric water heaters is a critical step before removal. However, to do this, attach a garden hose to the drainage valve at the unit’s bottom, direct the hose to a suitable draining location, and open the valve. Allow the water to flow out until the unit is empty.

4. Disconnecting the Old Water Heater

With the tank drained, you can begin disconnecting the old water heater. Start by detaching the water supply lines. Using an adjustable wrench, loosen the nuts connecting the cold and hot water pipes to the heater. Carefully remove the lines, keeping a bucket handy to catch any remaining water.

Next, disconnect the power or gas lines. If you have an electric heater, you must detach the electrical wiring. Please take note of the connections so you can quickly reconnect them later. For gas heaters, use a pipe wrench to disconnect the gas line, ensuring the gas water heater installation is shut off beforehand.

After everything is disconnected, you can remove the old water heater. Given the tank’s weight and size, this may require assistance. Carefully move the old unit out of its location to avoid damaging your home.

5. Installing the New Water Heater

With the old heater out of the way, it’s time to install the new one. Position the new unit in the same spot as the old one, ensuring it is level and stable. Initially, this is crucial for the proper functioning of the heater.

A. Reconnecting the Water and Power or Gas Lines

Start by reconnecting the water lines. Additionally, apply the plumber’s tape to the threads of the connectors to make sure the seal is tight and prevent leaks. Once the water lines are securely attached, you can reconnect the power or gas lines.

For electric heaters, connect the wiring according to the notes you took earlier. Ensure that all connections are secure and that there is no risk of electrical hazards. For gas heaters, reconnect the gas line using a pipe wrench, ensuring all connections are tight and secure.

B. Filling the Tank and Testing for Leaks

Fill the tank with water before you turn on the power or gas supply. Moreover, open the cold water supply valve and allow the tank to fill. As the tank fills, check all the connections for leaks. If you notice any drips, tighten the connections as necessary.

You can turn on the power or gas supply once the tank is full and there are no leaks. For electric heaters, switch the circuit breaker back on. 

For gas heaters, reignite the pilot light and set the thermostat to your desired temperature. After the heater has warmed up, test the water temperature at a nearby faucet to ensure everything works correctly.

6. Maintaining Your New Water Heater

Moreover, proper maintenance is critical to extending the life of your new water heater and ensuring its efficient operation. Regular maintenance tasks include flushing the tank, checking the pressure relief valve, and looking over the anode rod.

A. Flushing the Tank

Sediment buildup inside the tank of hot water boilers can reduce the efficiency of your water heater and lead to damage over time. To prevent this, it’s recommended to flush the tank every six months. This process involves draining a few gallons of water from the tank to remove any sedimentation that has settled at the bottom.

B. Inspecting the Pressure Relief Valve

However, the pressure relief valve is a crucial safety feature that prevents the tank from excessive pressure. Test the valve periodically by lifting the lever and checking if water is released. If the valve doesn’t work correctly, it may need to be replaced.

C. Checking the Anode Rod

However, the anode rod is designed to attract corrosive elements in the water, helping to prevent the tank from rusting. Over time, the rod can become corroded and less effective. 

Inspect the anode rod annually and replace it if it’s heavily corroded. Moreover, this simple maintenance task can significantly extend the life of your water heater.

Conclusion

Replacing a water heater might seem intimidating, but with cautious preparation and implementation, it’s a task that many homeowners can handle themselves. 

Following the steps outlined in this guide, you can ensure a successful installation, providing your home with reliable hot water for years. 

Daily maintenance will keep your water heater running efficiently and help you avoid unexpected breakdowns, saving you time and money in the long run.

How long does it take to replace a water heater

Replacing a water heater is a common home improvement project that many homeowners face at some point to replace a water heater. 

Whether your current unit is malfunctioning, inefficient, or simply too old, understanding the process and time involved in replacing a water heater is essential. 

Knowing how long it takes to replace a water heater can help you plan accordingly, minimize disruption, and ensure that you get back to your routine with hot water as quickly as possible.

In this comprehensive guide, we’ll break down the entire process of replacing a water heater, from the initial steps to completion. We’ll explore what you need to do first, the average time it takes to replace a water heater, factors that can extend this time, and the benefits of professional installation. We’ll also compare the installation times of different types of water heaters, such as electric and tankless models, and discuss when you should consider replacing your water heater.

1. What Do You Do First?

Before you can replace your water heater, there are several important steps you need to take to prepare for the installation. These initial steps are crucial to ensuring that the process goes smoothly and that you choose the right replacement unit for your needs.

A. Assess Your Current Water Heater

The first step is to assess the condition of your current water heater. If your water heater is not producing hot water, making strange noises, or leaking, it may be time for a replacement. For issues that aren’t severe, consider water heater repair. Additionally, if your water heater is more than 10-15 years old, it’s likely nearing the end of its lifespan.

B. Determine the Type of Water Heater You Need

Next, you’ll need to determine what type of water heater you want to install. There are several options available, including traditional tank water heaters (electric or gas) and tankless water heaters. Your choice will depend on factors such as your household’s hot water needs, energy efficiency preferences, and budget.

C. Choose the Right Size

If you’re opting for a traditional tank water heater, you’ll need to choose the right size for your household. A common size for many homes is the 40-gallon hot water heater, which is suitable for a family of four. However, larger families may need a larger tank, while smaller households can opt for a smaller unit.

D. Check Local Building Codes

Before proceeding, check your local building codes and regulations. Some areas have specific requirements for water heater installation, such as safety measures, venting, and energy efficiency standards. Ensuring compliance with these codes is essential to avoid potential issues later.

E. Prepare the Installation Site

Finally, prepare the installation site by clearing the area around your current water heater. Ensure that there is enough space for the new unit and that the area is clean and free of obstacles. If necessary, shut off the water supply and power to the existing water heater before starting the replacement.

2. How Long Does It Take?

The time it takes to replace a water heater can vary depending on several factors, including the type of water heater, the complexity of the installation, and whether you’re doing it yourself or hiring a professional. On average, how long does it take to replace a water heater?

A. Average Replacement Time

For most standard installations, replacing a water heater typically takes between 2 to 4 hours. This timeframe includes the time needed to remove the old water heater, install the new one, and test it to ensure it’s working correctly. However, this estimate can vary based on the specific circumstances of your installation.

B. Professional vs. DIY Installation

If you’re hiring a professional plumber or technician to replace your water heater, the process is generally quicker and more efficient. A skilled professional can usually complete the installation within the 2 to 4-hour window. On the other hand, if you’re attempting a DIY installation, it may take longer, especially if you’re not familiar with plumbing or electrical work.

3. What Can Make It Take Longer?

While the average replacement time is relatively short, several factors, including the need for emergency water heater repair, can extend the time it takes to replace a water heater. Understanding these potential delays can help you better prepare for the installation.

A. Complexity of the Installation

If the installation site requires additional work, such as relocating the water heater, upgrading electrical or gas lines, or installing new venting, the process can take longer. These tasks add to the complexity of the installation and may require more time to complete.

B. Unexpected Issues

During the replacement process, you may encounter unexpected issues, such as corroded pipes, leaks, or problems with the water heater connections. Addressing these issues can add time to the installation, as they may require additional repairs or parts.

C. Permits and Inspections

In some cases, local building codes may require permits and inspections for water heater installation. Obtaining permits and scheduling inspections can add time to the overall process, especially if there are delays in approval.

D. Availability of Parts

If your water heater requires specific parts or components that are not readily available, it may take longer to complete the installation. Ordering and waiting for parts to arrive can delay the process, particularly if you’re working with a less common or specialized model.

E. Drainage Time

One aspect that many homeowners overlook is the time it takes to drain the old water heater. How long does it take to drain a water heater? This can vary depending on the size of the tank and the water pressure in your home. Draining a large tank can take anywhere from 30 minutes to an hour, depending on these factors.

4. Is It Time for a New Water Heater?

Deciding whether it’s time to replace your water heater is an important decision. There are several signs that indicate it may be time for a new unit, and understanding these signs can help you avoid unexpected breakdowns and ensure you have reliable hot water.

A. Age of the Water Heater

One of the most significant indicators that it’s time for a new water heater is its age. How long does a water heater last? On average, traditional tank water heaters last between 10 to 15 years, while tankless water heaters can last up to 20 years or more. If your water heater is approaching or exceeding this age range, it’s likely time to start considering a replacement.

B. Decreased Efficiency

As water heaters age, they often become less efficient, leading to higher energy bills and longer heating times. If you’ve noticed a significant increase in your energy costs or if your water heater is struggling to provide consistent hot water, it may be time to replace a water heater. Consider professional water heater service to ensure a smooth installation of a more energy-efficient model.

C. Frequent Repairs

If your water heater requires frequent repairs, it’s a sign that it’s nearing the end of its lifespan. Constantly fixing leaks, replacing components, or dealing with other issues can become costly over time. In many cases, it makes more sense to invest in a new water heater rather than continuing to repair an old, unreliable unit.

D. Rust and Corrosion

If you notice rust or corrosion on your water heater or in your hot water, it’s a sign of significant internal damage. Rusty water can indicate that the tank is deteriorating, and once rust starts to appear, it’s usually only a matter of time before the unit fails completely.

E. Inadequate Hot Water Supply

If your water heater is no longer providing enough hot water to meet your household’s needs, it may be time for a replacement. This is especially true if your family has grown or your hot water usage has increased since the original installation.

5. What Is the Duration for Water Heater Installation?

The duration of water heater installation can vary based on the type of unit being installed, the installation site, and whether you’re hiring a professional or doing it yourself. Below, we’ll explore the typical installation times for different types of water heaters.

A. Traditional Tank Water Heaters

For a standard electric or gas tank water heater, the installation time is generally between 2 to 4 hours. This includes the time needed to remove the old unit, set up the new one, connect it to the water and power supply, and test the system.

How long does it take to replace an electric water heater? The installation time for an electric water heater is typically on the shorter end of this range, as electric units are generally easier to install compared to gas models.

How long does it take to replace a gas water heater? Replacing a gas water heater may take a bit longer due to the additional steps involved in connecting the gas line and ensuring proper venting.

B. Tankless Water Heaters

Installing a tankless water heater can take longer than a traditional tank unit, especially if this is the first time a tankless system is being installed in your home. The installation time for a tankless water heater can range from 4 to 8 hours or more, depending on the complexity of the setup.

How long does it take to replace a tankless water heater? If you’re simply replacing an existing tankless unit with a new one, the installation time may be shorter, closer to 3 to 5 hours. However, if you’re upgrading from a tank to a tankless system, additional work such as rerouting pipes and electrical connections can extend the installation time.

6. Electric Water Heater Tank vs. Tankless Water Heaters

The type of water heater you choose can significantly impact the installation time. Let’s compare the installation times for electric water heater tanks and tankless water heaters.

A. Electric Water Heater Tank

Electric water heater tanks are relatively straightforward to install, particularly if you’re replacing an existing electric unit. The installation process typically involves disconnecting the old water heater, draining the tank, and then connecting the new unit to the existing water and electrical lines.

For a 40-gallon hot water heater, which is a common size for many households, the installation time is usually around 2 to 3 hours. This makes electric water heater tanks one of the quicker options for replacement.

B. Tankless Water Heaters

Tankless water heaters, while more energy-efficient and space-saving, require a more complex installation process. Unlike tank units, which store hot water for immediate use, tankless systems heat water on demand. This requires precise connections to both the water supply and the power source (which may be gas or electric).

The installation of a tankless water heater can take anywhere from 4 to 8 hours, depending on factors such as the layout of your home, the location of the unit, and whether any additional infrastructure (such as new gas lines or electrical upgrades) is needed. While the installation time is longer, the benefits of a tankless system, including endless hot water and reduced energy costs, often outweigh the inconvenience of a longer installation.

7. Factors That Can Affect the Installation Time

Several factors can influence how long it takes to replace a water heater. Understanding these factors can help you better estimate the time required and plan for any potential delays.

A. Type of Water Heater

As discussed earlier, the type of water heater (electric, gas, tankless) plays a significant role in determining the installation time. Electric models are generally quicker to install, while gas and tankless models may require more time due to additional connections and safety considerations.

B. Location of the Water Heater

The location of the water heater in your home can also affect the installation time. If the unit is located in a hard-to-reach area, such as a cramped utility closet or basement, it may take longer to remove the old unit and install the new one. Additionally, if the water heater needs to be relocated to a different part of the home, this can add significant time to the installation process.

C. Condition of Existing Connections

If the existing plumbing, gas, or electrical connections are in good condition, the installation process will be quicker. However, if there are issues with these connections, such as leaks, corrosion, or outdated wiring, additional repairs or upgrades may be necessary before the new water heater can be installed. These repairs can add time to the overall process.

D. Permits and Inspections

As mentioned earlier, some areas require permits and inspections for water heater installations. The time it takes to obtain these permits and schedule inspections can vary depending on your location and the efficiency of your local building department. Be sure to factor this into your installation timeline.

E. Drainage and Disposal of Old Unit

Draining the old water heater and disposing of it can add time to the installation process. How long does it take to drain a water heater? This can vary depending on the size of the tank and your home’s water pressure. Additionally, if the old unit needs to be transported to a disposal site, this can further extend the time required.

8. The Benefits of a Professional Installation

While it may be tempting to save money by attempting a DIY water heater installation, there are several benefits to hiring a professional for the job. These benefits can often outweigh the cost of professional installation and provide peace of mind knowing that the job is done correctly.

A. Expertise and Experience

Professional plumbers and technicians have the expertise and experience needed to install water heaters safely and efficiently. They are familiar with local building codes, safety regulations, and the best practices for installation, ensuring that your new water heater is installed correctly.

B. Time Savings

As we’ve discussed, professional installation is generally quicker than a DIY approach. Professionals can complete the installation in a shorter amount of time, minimizing disruption to your home and getting your hot water back up and running as quickly as possible.

C. Warranty Protection

Many water heater manufacturers require professional installation for their warranties to remain valid. If you install the unit yourself and something goes wrong, you may void the warranty, leaving you responsible for any repairs or replacements. Hiring a professional ensures that your warranty remains intact.

D. Safety

Installing a water heater involves working with water, electricity, and sometimes gas. These elements can be dangerous if not handled properly. Professional installers are trained to manage these risks, ensuring that the installation is done safely and that your home is protected from potential hazards.

E. Proper Sizing and Placement

A professional installer can help you choose the right size and type of water heater for your home. They can also ensure that the unit is placed in the optimal location for efficiency and ease of maintenance. This can help prevent issues such as inadequate hot water supply or energy inefficiency.

9. When Should You Replace Your Water Heater?

Knowing when to replace your water heater is crucial to avoiding unexpected breakdowns and ensuring that you have a reliable supply of hot water. Several signs can indicate that it’s time for a replacement.

A. Age of the Unit

As mentioned earlier, the age of your water heater is one of the most important factors to consider. How long does a water heating last? If your unit is more than 10-15 years old, it’s likely nearing the end of its useful life and should be replaced before it fails.

B. Increased Energy Bills

If you’ve noticed a significant increase in your energy bills, it could be due to an inefficient water heater. As water heaters age, they often become less efficient, requiring more energy to heat the same amount of water. Replacing an old, inefficient unit with a new, energy-efficient model can help lower your energy costs.

C. Inconsistent Water Temperature

If your water heater is no longer providing consistent hot water, it may be time for a replacement. This can be caused by a variety of issues, including sediment buildup in the tank, a failing heating element, or a malfunctioning thermostat.

D. Leaks and Water Damage

If you notice water pooling around your water heater or signs of water damage near the unit, it’s a sign that the tank may be leaking. Leaks can lead to significant water damage in your home and should be addressed immediately. In most cases, a leaking tank will need to be replaced.

E. Rusty Water

If you notice rust or discoloration in your hot water, it could be a sign of corrosion inside the water heater. Rusty water is a serious issue that can indicate the tank is deteriorating from the inside. Once rust begins to form, it’s usually only a matter of time before the tank fails, so replacement is recommended.

Conclusion

Replacing a water heater is a significant home improvement project that requires careful planning and consideration.

Understanding how long it takes to replace a water heater and the factors that can affect the installation time can help you prepare for the process and ensure a smooth transition to a new unit.

Whether you’re replacing a 40-gallon hot water heater, an electric unit, a gas model, or upgrading to a tankless system, the time required will vary based on several factors, including the type of water heater, the complexity of the installation, and whether you’re hiring a professional.

While it may be tempting to attempt a DIY installation, there are several benefits to hiring a professional, including time savings, safety, and warranty protection.

Additionally, knowing when to replace your water heater is crucial to avoiding unexpected breakdowns and ensuring that you have a reliable supply of hot water.

In summary, replacing a water heater is a task that most homeowners will face at some point. By understanding the process, the time involved, and the benefits of professional installation, you can make informed decisions and ensure that your home remains comfortable and efficient.

Whether you’re dealing with an aging unit, increased energy bills, or inconsistent hot water, replacing your water heater can provide long-term benefits and peace of mind.

Life Mechanical provides expert assistance in replacing water heaters, ensuring a smooth and efficient process. Their skilled technicians handle everything from removing the old unit to installing the new one, minimizing downtime. With their expertise, you can trust that your water heater will be installed safely and correctly, ensuring reliable hot water.

Troubleshooting Tips for a Tankless Water Heater Beeping

A Tankless Water Heater Beeping is a modern solution for providing continuous hot water without the need for a bulky storage tank. 

Unlike traditional water heaters, these systems heat water on demand, making them energy-efficient and space-saving. 

However, one common issue that homeowners may face with these units is a persistent beeping sound. 

This sound is often an indicator that something isn’t quite right with your water heater.

In this guide, we’ll walk you through the various reasons why your tankless water heater might be beeping, how to fix it, and steps to ensure it operates smoothly.

1. Understanding Tankless Water Heater Beeping

When your tankless water heater starts beeping, it’s essentially trying to communicate that there is a problem that needs your attention. 

The beeping could be related to several issues, such as a warning of potential damage, a safety precaution, or simply a maintenance reminder. 

For example, a Rinnai tankless water heater with no error code might indicate something as simple as a low water flow or a more complex issue like a sensor malfunction. Is your tankless water heater beeping? 

Understanding the specific reason for the beeping can help you address the problem effectively and may require water heater repair.

2. Common Reasons for Tankless Water Heater Beeping

Several factors can cause your tankless water heater to beep. Here are some of the most common reasons:

A. Low Water Flow

One of the most frequent causes of a tankless water heater is low water flow. This could happen due to clogged filters, a closed valve, or an issue with the water supply.

B. Error Codes

Many modern tankless water heaters are equipped with a digital display that shows error codes when something goes wrong. For example, a tankless water heater beeping 11 might indicate an ignition failure, which means the unit is having trouble starting the heating process.

C. No Hot Water

If your tankless water heater is accompanied by a lack of hot water, there could be an issue with the heating element, a gas supply problem, or a malfunctioning sensor.

D. Overheating

Sometimes, a tankless water heater could indicate that the unit is overheating, which could be due to a faulty thermostat or a problem with the venting system.

E. Electrical Issues

An electric tankless water heater beeping might suggest an electrical problem, such as a wiring issue or a problem with the power supply.

F. Water Leaks

Although less common, a tankless water heater but no leak could occur if the system detects moisture or condensation inside the unit, which could trigger a sensor.

3. Understanding Tankless Water Heater Error Codes

Most tankless water heaters come with a display that shows error codes when the unit detects a problem, which can help diagnose the issue. If you’re experiencing tankless water heater, it could indicate a need for emergency water heater repair. Here’s a brief overview of what some common error codes might mean:

A. Error Code 11

This code often appears when there’s an ignition failure. If your tankless water heater beeping 11, it’s likely that the system is struggling to ignite the gas to heat the water. This could be due to a gas supply issue, a problem with the igniter, or a blocked vent.

B. Error Code 12

This indicates a flame failure, meaning the heater is unable to maintain a flame to keep the water heated. The tankless water heater beeping might continue until the issue is resolved.

C. Error Code 29

This code usually relates to a water flow problem. The tankless water heater could be because the flow sensor is not detecting sufficient water flow to safely heat the water.

D. Error Code 63

This code typically points to an over-temperature warning. If your tankless water heater indicates this code, it could mean the water temperature is too high, potentially due to a faulty thermostat or sensor.

4. Troubleshooting Tankless Water Heater Beeping

If your tankless water heater is beeping, there are several steps you can take to troubleshoot the problem:

A. Check the Error Code

If your unit has a display, start by checking the error code. Refer to the user manual to understand what the code means and follow the recommended steps for resolving it.

B. Inspect the Water Flow

Ensure that there’s sufficient water flow through the heater. Check for clogged filters, ensure all valves are open, and that there’s no obstruction in the water supply line.

C. Reset the Unit

Sometimes, simply resetting the tankless water heater can stop the beeping. Turn off the power to the unit, wait a few minutes, and then turn it back on.

D. Check for Leaks

Inspect the unit and surrounding area for any signs of leaks. Even if the tankless water heater beeping but no leak is apparent, moisture could be causing a false alarm.

E. Examine the Power Supply

For an electric tankless water heater beeping, check the power supply. Ensure that the unit is properly plugged in and that there are no tripped breakers or blown fuses.

F. Inspect the Venting

If your tankless water heater beeping is due to an overheating issue, check the venting system to ensure it’s not blocked or obstructed.

5. Regular Maintenance to Prevent Tankless Water Heater Beeping

Regular maintenance is key to preventing issues that can cause your tankless water heater to beep. Here are some maintenance tips:

A. Clean the Filters

Over time, filters can become clogged with sediment and debris, leading to low water flow and potentially causing the tankless water heater beeping. Clean or replace the filters regularly to maintain proper water flow.

B. Descale the Unit

Mineral buildup inside the heater can affect its efficiency and lead to beeping issues. Descaling the unit annually can help prevent this.

C. Inspect the Venting System

Regularly check the venting system for blockages or damage that could cause overheating and trigger the tankless water heater beeping.

D. Check the Gas Supply

Ensure that the gas supply is steady and sufficient. A disruption in the gas flow can cause the tankless water heater beeping due to ignition or flame failures.

E. Test the Thermostat

Periodically test the thermostat to ensure it’s functioning correctly. A faulty thermostat can cause the unit to overheat and result in beeping.

6. Calling a Professional for Tankless Water Heater Repairs

While some issues with a tankless water heater beeping can be resolved through basic troubleshooting, others may require professional assistance. If you’ve tried the above steps and the beeping persists, or if you’re unsure how to fix the problem, it’s best to call a professional. A qualified technician can diagnose the issue accurately, perform any necessary repairs, and ensure your water heater is operating safely and efficiently.

7. Replacing a Faulty Component in Your Tankless Water Heater

If the beeping is due to a faulty component, such as a malfunctioning sensor or thermostat, it may need to be replaced. Replacing a faulty component can stop the beeping and restore the unit’s functionality. It’s important to use genuine parts recommended by the manufacturer for your specific model to ensure compatibility and safety.

8. Upgrading to a New Tankless Water Heater

Is your tankless water heater beeping? Discover common causes, solutions, and when to call for water heater service to keep it running smoothly. If your tankless water heater is older or if you’re frequently dealing with beeping issues, it might be time to consider upgrading to a new model. Modern tankless water heaters come with advanced features, better energy efficiency, and enhanced safety mechanisms that can reduce the likelihood of beeping issues.

9. Tips for a Quieter Tankless Water Heater

To minimize the noise from your tankless water heater, consider the following tips:

A. Proper Installation

Ensure that the unit is installed correctly and securely to minimize vibrations that could cause noise.

B. Insulate the Unit

Adding insulation around the water heater can help reduce noise from the unit’s operation.

C. Routine Maintenance

Regular maintenance can prevent issues that might cause the unit to beep or make other noises.

D. Choose a Quiet Model

If noise is a concern, consider upgrading to a model known for its quiet operation.

10. Tankless Water Heater Safety: Ensuring Safe Operation

Safety should always be a priority when dealing with a tankless water heater. Here are some safety tips:

A. Regular Inspections

Have your water heater inspected by a professional at least once a year to ensure it’s in safe working condition.

B. Install a Carbon Monoxide Detector

If you have a gas-powered tankless water heater, install a carbon monoxide detector near the unit to alert you in case of a gas leak.

C. Follow Manufacturer’s Instructions

Always follow the manufacturer’s instructions for installation, operation, and maintenance to ensure safe use of your water heater.

11. Advantages of Tankless Water Heaters

Tankless water heaters offer several advantages over traditional water heaters, including:

A. Energy Efficiency

Because they heat water on demand, tankless water heaters use less energy, which can lead to lower utility bills.

B. Space-Saving

These units are compact and can be installed in smaller spaces, freeing up room in your home.

C. Continuous Hot Water

Tankless water heaters provide a continuous supply of hot water, so you’ll never run out during a shower or while doing dishes.

D. Longer Lifespan

Tankless water heaters typically last longer than traditional tank-style water heaters, making them a better long-term investment.

E. Reduced Risk of Leaks

With no storage tank, the risk of leaks that can cause water damage is significantly reduced.

12. Choosing the Right Tankless Water Heater for Your Home

When selecting a tankless water heater for your home, consider the following factors:

A. Size and Capacity

Choose a unit that can meet the hot water demands of your household. Consider the flow rate (measured in gallons per minute) and the temperature rise needed.

B. Fuel Type

Decide whether you want a gas or electric tankless water heater. Gas models typically offer higher flow rates, but electric models are easier to install.

C. Energy Efficiency

Look for models with high energy efficiency ratings, which can help you save on utility bills.

D. Features

Consider features like remote control operation, advanced safety mechanisms, and noise reduction technology.

E. Brand and Warranty

Choose a reputable brand with a good warranty to ensure you’re getting a reliable product.

Conclusion

A tankless water heater beeping can be a cause for concern, but understanding the reasons behind it and how to troubleshoot the issue can help you resolve the problem quickly.

Whether it’s a Rinnai tankless water heater beeping, a Rheem tankless water heater beeping, or any other brand, the key is to address the issue promptly to avoid further complications.

Regular maintenance, timely repairs, and, if necessary, upgrading to a new unit can ensure that your tankless water heater operates efficiently and provides you with continuous hot water without the annoyance of beeping sounds.

By following these tips and guidelines, you can keep your tankless water heater running smoothly and enjoy all the benefits it has to offer. Life Mechanical can assist with tankless water heater beeping by providing expert diagnostics and repair services. T

heir trained technicians can identify the cause of the beeping, whether it’s due to low water flow, error codes, or other issues, and offer prompt solutions to ensure your water heater operates smoothly and efficiently.

Expert Tips on How to Flush Water Heater Tank

Flush water heater tank annually is an important maintenance task that helps extend the life of your water heater, improves its efficiency, and ensures the quality of the hot water in your home. 

Over time, sediment and mineral deposits build up inside the tank, which can lead to various issues if not addressed. 

In this guide, we will explain why flushing your water heater tank is essential, how to know when it needs to be done, and provide a step-by-step process to help you perform this task safely and effectively.

1. How to Know That Your Water Heater Needs to Be Flushed

It’s important to recognize the signs that indicate your water heater needs to be flushed. Common hot water heater sediment symptoms include:

A. Reduced Hot Water Supply

If you notice that your hot water doesn’t last as long as it used to, sediment buildup might be the culprit.

B. Strange Noises

Popping, rumbling, or banging sounds coming from your water heater are often caused by sediment that has accumulated at the bottom of the tank.

C. Cloudy or Rusty Water

Discolored water or water with a metallic taste is a clear sign that sediment is affecting your water quality.

D. Increased Energy Bills

A water heater struggling with sediment buildup has to work harder, leading to higher energy consumption and costs.

Recognizing these symptoms early can help you avoid more serious issues and ensure your water heater operates efficiently.

2. Safety Considerations

Before you begin the process of flushing your water heater tank, it’s crucial to consider safety.

Water heaters deal with high temperatures and pressure, so taking the right precautions is essential to prevent accidents. 

Always refer to the manufacturer’s instructions and safety guidelines specific to your water heater model.

3. Turn Off the Power Source

Turning off the power source is a crucial first step in flushing your water heater tank to prevent accidents and ensure your safety. 

For an electric water heater, this involves locating the circuit breaker panel in your home. Find the breaker labeled for the water heater and switch it to the “off” position. 

This action cuts off the electrical power to the unit, eliminating the risk of electric shock while you work on it. 

For a gas water heater, locate the thermostat dial on the heater itself. Turn the dial to the “Pilot” setting to prevent the burner from igniting while you drain and flush the tank. 

This step is critical because working with the water heater while it’s powered can lead to severe injuries or even fatalities. 

It’s also a good practice to double-check that the power is off by using a non-contact voltage tester for electric heaters or ensuring the pilot light is off for gas heaters. 

Safety should always be your priority, and turning off the power source is the first line of defense against potential hazards. 

This practice is as essential as considering gas fireplace insert ideas for safe and efficient home heating.

4. Close the Water Supply Valve

The next important step is to close the water supply valve. This valve controls the flow of cold water into your water heater and is typically located at the top of the tank. 

Turn the valve clockwise to shut it off completely. This prevents new water from entering the tank while you are flushing it. 

Closing the water supply valve is essential because it allows you to drain the existing water and sediment from the tank without additional water refilling it during the process. 

If the valve is difficult to turn or stuck, avoid using excessive force as this could damage the valve or pipes. Instead, use a wrench for better leverage, but do so carefully. 

If the valve is damaged or doesn’t close properly, you may need to replace it before proceeding. 

Ensuring the water supply is cut off will make the flushing process more efficient and help prevent any potential water damage to your home.

5. Attach a Garden Hose to the Drain Valve

After turning off the power and closing the water supply, the next step is to attach a garden hose to the drain valve of your water heater. 

The drain valve is usually located near the bottom of the tank. Securely attach one end of a garden hose to this valve, making sure the connection is tight to prevent leaks. 

Place the other end of the hose in a suitable drainage area, such as a floor drain, driveway, or garden, where the hot water can safely flow without causing damage. 

Be mindful of the hose’s placement to ensure it remains secure and doesn’t move during the draining process. 

If you don’t have a long enough hose, you can use an extension or connect multiple hoses. 

This step is crucial because it directs the hot water and sediment away from your living space, preventing water damage and ensuring a safe and controlled draining process. 

Ensure that the hose is rated for hot water to avoid melting or damage. For those looking to clean their homemade gas fireplace glass cleaner, similar attention to detail and safety is recommended when dealing with hot components.

6. Open the Drain Valve to Drain the Water

With the garden hose securely attached, it’s time to open the drain valve to start draining the water from the tank. 

Turn the valve counterclockwise to open it. Water will begin to flow out of the tank through the hose. This water will be hot, so take care to avoid burns. 

To speed up the draining process and prevent a vacuum from forming inside the tank, open a hot water faucet in your home. 

This allows air to enter the tank, facilitating a smoother and quicker drain. The initial flow of water may be slow if there is significant sediment buildup, but it should gradually increase. 

Allow all the water to drain out of the tank. This process can take anywhere from a few minutes to an hour, depending on the size of your tank and the amount of sediment present.

Patience is key here; ensure the tank is completely empty before moving on to the next step.

7. Test the Water

Once the tank has drained, it’s important to test the water to ensure that most of the sediment has been removed. 

To do this, briefly turn on the cold water supply valve to let a small amount of water flow into the tank. Then, drain this water out through the hose. Repeat this process until the water runs clear. 

This indicates that the majority of the sediment has been flushed out of the tank. Testing the water in this manner helps ensure that your efforts to clean the tank have been successful and that no significant sediment remains. 

Clear water also means that the heater will operate more efficiently, providing you with better quality hot water. 

If the water is still cloudy or contains sediment, continue flushing until it becomes clear. 

This thorough step ensures optimal performance of your water heater after maintenance, similar to how thoughtful gas fireplace ideas can enhance the efficiency and ambiance of your living space.

8. Close the Drain Valve and Remove the Garden Hose

After confirming that the water runs clear and sediment-free, close the drain valve by turning it clockwise. This stops any further draining and secures the water heater tank. 

Carefully remove the garden hose from the valve, ensuring you avoid any residual hot water that may still be in the hose. 

It’s a good idea to have a bucket or towel nearby to catch any drips. Check the drain valve and surrounding area for any signs of leakage after removing the hose. 

If there are leaks, ensure the valve is tightly closed or consider replacing the valve if it’s faulty. 

Closing the drain valve properly is essential to prevent water from leaking out when you refill the tank. 

Removing the garden hose and ensuring the area is dry and leak-free prepares you for the next step, which is refilling the tank with fresh water.

9. Open the Water Supply Valve

The final step is to open the cold water supply valve to allow fresh water to fill the tank. Turn the valve counterclockwise to open it. 

As the tank begins to fill, you might hear the sound of water rushing in. To ensure all air is purged from the tank, keep a hot water faucet open in your home. 

Once water starts flowing steadily from the faucet, you know that the tank is full and the air has been expelled. 

This prevents air pockets from forming, which can cause issues with water flow and heater efficiency. After the tank is full, turn off the hot water faucet. For electric water heaters, switch the circuit breaker back on. 

For gas water heaters, turn the thermostat dial from “Pilot” back to your desired setting. Check the water heater and surrounding area for any leaks. 

If everything looks good, your water heater is ready for use. This step ensures your water heater is refilled and ready to provide hot water efficiently.

Conclusion

Regularly flush water heater tank is a simple yet effective way to maintain its performance and longevity. 

By removing sediment buildup, you can ensure your water heater operates efficiently, provides ample hot water, and reduces the risk of costly repairs. 

Whether you have a gas water heater or an electric water heater, the process of flush water heater tank is straightforward and can be done with basic tools.

Performing this maintenance task annually will help you avoid the dangers of sediment in your hot water tank, such as reduced efficiency, higher energy bills, and potential damage to the water heater. 

With this guide, you now have the knowledge and steps to safely flush your water heater tank and keep it running smoothly.

Life Mechanical can assist with flush water heater tank by providing professional expertise and equipment. 

Their technicians ensure safe, efficient removal of sediment, improving your water heater’s performance and longevity. With Life Mechanical, you can avoid potential DIY mishaps and maintain a reliable hot water supply.

Maintaining Safety: A Closer Look at Hot Water Tank Pressure Relief Valves

Plumbing

The pressure relief valve (PRV) is a critical safety component in any hot water tank system.

It is designed to prevent the potentially catastrophic effects of excessive pressure buildup.

This valve acts as a fail-safe, automatically opening to release water if the pressure or temperature inside the tank exceeds the safe operating limits, effectively preventing the tank from rupturing or exploding.

The proper functioning of the PRV is essential not only for the safety of the household but also for the longevity and efficiency of the hot water system itself.

The importance of the PRV cannot be overstated.

With this safety mechanism, the increasing pressure within the hot water tank could maintain the tank’s structural integrity.

This could lead to leaks, cracks, or, in the worst-case scenario, a violent tank failure that could cause significant property damage and pose serious risks to occupants.

Therefore, it is paramount for any homeowner to understand the pressure relief valve’s role in maintaining a safe and functional hot water system.

Regular checks and maintenance of the PRV ensure that it remains responsive to overpressure situations.

Signs of Pressure Relief Valve Dysfunction

Identifying the early signs of hot water tank pressure relief valve symptoms, including those related to hot water tank repair, is crucial in averting potential safety hazards and ensuring your hot water system’s continuous, efficient operation.

One of the most common indicators of a malfunctioning PRV is the water heater relief valve dripping or leaking, which may seem minor but can signify a deeper issue with pressure regulation within the tank. This symptom often necessitates prompt hot water tank repair services to prevent further damage and maintain system efficiency.

Continuous dripping or a slow leak from the valve might indicate that it is partially open.

This could be due to sediment buildup, corrosion, or a faulty valve mechanism failing to close properly.

This leads to water wastage and can be a precursor to more significant hot water tank pressure relief valve problems.

Sometimes, the valve might release water sporadically, confusing and misleading homeowners trying to diagnose the issue.

Another symptom to be aware of is the absence of water discharge when the tank is known to be under high pressure or temperature.

This could mean the valve is clogged or jammed, preventing it from opening as designed.

Such a scenario poses a significant risk, as the primary safety feature intended to relieve overpressure is rendered inoperative.

Unusual noises from the valve, such as hissing, whistling, or banging, can also indicate dysfunction.

These sounds may result from steam or water being forcibly expelled through a partially blocked or restricted valve opening, suggesting that the valve may not operate smoothly or efficiently.

Addressing these symptoms promptly is essential to maintaining the safety and integrity of your hot water system.

Ignoring such signs can lead to a complete valve failure, where the valve cannot discharge water regardless of the pressure levels.

This puts the entire system at risk of overpressurization and the potentially catastrophic consequences that could follow.

Importance of Regular Maintenance

The significance of regular maintenance for the pressure relief valve on your hot water tank cannot be overstated. This routine attention is not just about ensuring the operational efficiency of your water heating system but, more importantly, about safeguarding your home from the dangers associated with pressure buildup.

Regular maintenance helps identify and rectify hot water tank pressure relief valve problems before they escalate into serious issues. It’s also essential for the overall maintenance of related systems like in floor heating systems repair, ensuring all components function safely and efficiently.

Without periodic checks, the PRV can become susceptible to various issues, such as sediment buildup, corrosion, or wear and tear, which can impede its function.

This is particularly concerning because the PRV is the last line of defense against excessive pressure that could otherwise lead to tank failure or, in extreme cases, an explosion.

Hence, understanding the mechanics of the valve and ensuring its optimal performance through maintenance is crucial.

Maintenance involves inspecting the valve for any signs of wear or damage, testing its operation by lifting the test lever to ensure it opens and closes properly, and checking for leaks or continuous water heater relief valve dripping.

It’s also an opportunity to clear any debris or sediment that might obstruct the valve, a common cause of malfunction.

Furthermore, regular maintenance allows for the adjustment of the hot water tank pressure relief valve setting, ensuring it is aligned with the specific requirements of your system.

This is particularly relevant in regions with specific regulations or environmental conditions that might necessitate a unique setting, such as the Hot water tank pressure relief valve setting, which might differ from the other areas due to local water supply conditions or regulatory standards.

In essence, the proactive upkeep of the PRV extends the lifespan of your hot water system and plays a pivotal role in preventing potential disasters.

It’s a small investment of time and effort that can save considerable repair or replacement costs and protect your home and family from the risks of unchecked pressure in the hot water tank.

Safety Precautions Before Inspection

Before inspecting or maintaining your hot water tank’s pressure relief valve, it’s imperative to take certain safety precautions to prevent accidents or injuries.

Given the potential for high temperatures and pressures, ensuring a safe environment for inspection or maintenance activities is critical.

The first step is to turn off the power supply to the water heater.

This applies to electric and gas-powered water heaters, where the gas supply should be shut off.

This precaution is crucial to avoid electrical mishaps or gas leaks during inspection.

Additionally, allowing the water in the tank to cool down is essential before proceeding.

This reduces the risk of scalding from hot water or steam released when the pressure relief valve is opened.

For those wondering how to open a pressure relief valve on the water heater, it’s essential to proceed cautiously.

To ensure proper boiler heating system maintenance, the valve is typically equipped with a manual release lever, but it should be operated gently to avoid any sudden release of hot water or steam that could cause burns.

Wearing protective gloves and eyewear is advisable to protect against accidental splashes or steam exposure during maintenance.

It’s also essential to ensure that the area around the water heater is clear and that you have easy access to the water heater pressure relief valve pipe. This is where any discharged water will exit, and it’s essential to ensure it’s directed safely away from any electrical components or anything else that could be damaged by water.

Taking these precautions ensures your safety and helps accurately assess the valve’s condition.

A safe and controlled environment allows for a thorough inspection, ensuring that any maintenance or adjustments are carried out effectively and maintaining the operational integrity of the hot water system.

Step-by-Step Guide to Testing the Valve

Testing the pressure relief valve on your hot water tank is straightforward and crucial for ensuring the safety and efficiency of your water heating system.

Regular testing helps identify any issues with the valve’s functionality, such as blockages or mechanical failures, that could compromise the system’s safety.

The first step in testing the valve is to locate it in your hot water tank.

The valve is typically found near the top of the tank and has a lever or handle for manual operation.

Before proceeding, ensure that the power supply to the water heater is turned off and the water in the tank has been allowed to cool to a safe temperature to prevent scalding.

To test the valve, gently lift or press the lever on the valve. This should allow water to flow through the water heater pressure relief valve pipe.

The water flow indicates that the valve is operational, relieving pressure from the tank.

It’s essential to release the lever slowly and carefully to control the water flow and prevent any sudden discharge that could cause injury or damage.

If water flows out of the valve when the lever is lifted and stops when the lever is released, this is a good sign that the valve is functioning correctly.

However, if no water flows out when the lever is lifted, this could indicate a blockage or a malfunction within the valve, requiring further investigation or replacement.

It’s also essential to observe the condition of the water discharged during the test.

If the water appears dirty or contains sediment, this could indicate a buildup of debris within the valve or the tank, which can affect the valve’s operation and the overall quality of your hot water supply.

After testing, ensure that the lever is fully reset to its original position to prevent any unintended release of water. Regular testing of heat pump services, at least once a year, is recommended to ensure that the pressure relief valve remains in good working condition and is ready to perform its critical safety function when needed.4

Troubleshooting Common Issues

When troubleshooting hot water tank pressure relief valve problems, it’s essential to approach troubleshooting methodically.

Common issues can range from minor leaks to complete valve failure, each requiring a different resolution approach.

One of the first steps in troubleshooting is to identify the nature of the problem.

For instance, a water heater relief valve dripping might indicate a leak due to a faulty seal or valve seat.

In such cases, tightening the valve or replacing the seal might resolve the issue.

However, if the dripping persists, it may suggest a more significant problem, such as excessive pressure within the tank, requiring a more in-depth investigation.

If the valve fails to open, leading to no water discharge even when manually tested, this could indicate a blockage or a mechanical failure within the valve.

Sediment buildup is a common culprit, especially in areas with hard water.

Cleaning the valve might restore its function, but if the problem persists, it may need replacing.

Unusual noises from the valve, such as hissing or rumbling, can indicate that the valve struggles to maintain pressure levels within the tank.

This could be due to a partially obstructed valve or a malfunctioning mechanism.

Listening carefully to the sounds can provide clues to the nature of the problem, guiding further troubleshooting efforts.

If troubleshooting reveals significant issues or uncertainty about the valve’s condition, consider replacing it with a hot water tank pressure relief valve.

Replacing a malfunctioning valve is crucial to maintaining the safety and efficiency of your hot water system, and it’s often a straightforward task for those with some DIY experience.

However, if you are still unsure how to proceed, seeking professional advice is the best way to ensure the system’s safety and reliability.

DIY vs. Professional Replacement Considerations

Regarding hot water tank pressure relief valve replacement, homeowners choose between DIY or professional services.

Considerations include technical skills, system understanding, and replacement complexity.

DIY replacement involves:

  • Draining the tank.
  • Unscrewing the old valve.
  • Applying Teflon tape.
  • Securely installing the new valve.

However, incorrect installation may lead to leaks or damage. Factors like valve size and pressure setting require careful consideration.

Professional installation is recommended for those who need help with DIY skills or system specifications.

Professionals ensure correct installation, offer system insights, and provide safety assurance.

Ultimately, the choice between DIY and professional installation depends on individual capabilities and the desire for expert assurance.

Selecting the Right Replacement Valve

Choosing the correct replacement for your hot water tank’s pressure relief valve is crucial for safety and efficiency.

Here’s what to consider:

  1. Ensure compatibility with your system’s specifications, including size, pressure setting, and temperature rating.
  2.  The pressure relief valve setting must suit your system’s design and operating conditions for adequate relief.
  3.  Consider quality and reliability when selecting a replacement valve from reputable manufacturers.
  4.  Check for certifications or approvals from relevant standards organizations.
  5.  Install the replacement valve carefully to ensure a secure and leak-free connection, using Teflon tape for a watertight seal.
  6.  Test the valve to confirm proper operation and that there are no leaks.

With the correct replacement valve and proper installation, homeowners can maintain their hot water system’s safety and efficiency, ensuring reliable access to hot water and peace of mind.

Installation Guidelines for a New Valve

Installing a new pressure relief valve on your hot water tank is critical for safety and efficiency.

Here’s a brief guide:

  1. Prepare by turning off the power and letting the tank cool.
  2.  Drain partially to reduce pressure and water level.
  3.  Select a valve that matches the size and pressure settings.
  4.  Wrap Teflon tape around the valve’s threads for a tight seal.
  5.  Screw the valve in place, avoiding overtightening.
  6.  Test by lifting the lever to ensure proper operation and no leaks.

Proper installation ensures the safety and functionality of your water heating system. If you need clarification or help, seek professional assistance.

Long-Term Maintenance Strategies

Maintaining the pressure relief valve on your hot water tank ensures long-term safety and efficiency.

Regular testing, at least yearly, ensures correct operation. Keeping the area clean prevents sediment buildup while adjusting the valve setting as needed is crucial.

Professional inspections provide expert assessment and peace of mind. With these strategies, homeowners ensure their hot water systems remain safe, efficient, and reliable.

Conclusion:

In the intricate dance of household safety and comfort, the pressure relief valve safeguards against pressure buildup.

Understanding its role, detecting dysfunction, and ensuring maintenance highlight its importance.

Exploring valve symptoms and maintenance underscores the balance between vigilance and action in home safety.

Testing, troubleshooting, and replacement signify our commitment to safeguarding our homes.

Selecting the correct valve and adhering to installation guidelines and maintenance strategies demonstrate prudent stewardship.

Each decision fortifies our home’s safety net, ensuring security matches comfort.

As we conclude, let’s continue to learn about maintaining our valve and understanding its critical role.

May this empower us to uphold domestic tranquility and safeguard our homes.