Maintaining a leak-free home is crucial for avoiding costly repairs and ensuring the longevity of your plumbing tips.
Whether you’re a new homeowner or someone looking to sharpen their plumbing skills, understanding some essential plumbing tips and tricks can save you time, money, and frustration.
This guide will cover expert advice to keep your home’s plumbing in top shape, focusing on practical, easy-to-follow steps.
By implementing some straightforward strategies and learning basic plumbing tips for the beginner, you can prevent many common problems before they escalate.
This guide aims to provide you with essential insights and plumbing tips 2024 to ensure your plumbing system remains robust and leak-free.
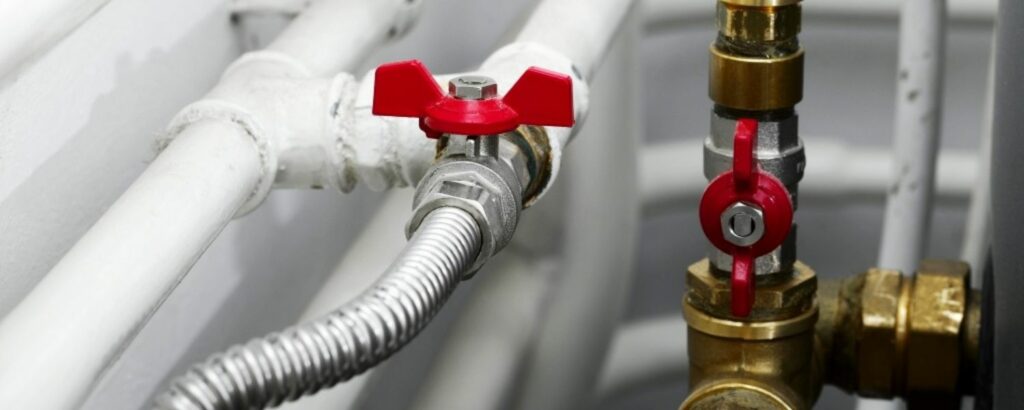
1. Know the Location of Shut-Off Valves
One of the most important plumbing tips for new homeowners is to know where your shut-off valves are located.
These valves control the flow of water to different parts of your home. If a pipe bursts or a fixture starts leaking, being able to quickly shut off the water supply can prevent extensive water damage.
Familiarize yourself with the main shut-off valve for your home and the individual valves for sinks, toilets, and appliances. Practice turning them off and on to ensure you’re comfortable using them in an emergency.
2. Be Careful to Not Puncture Pipes
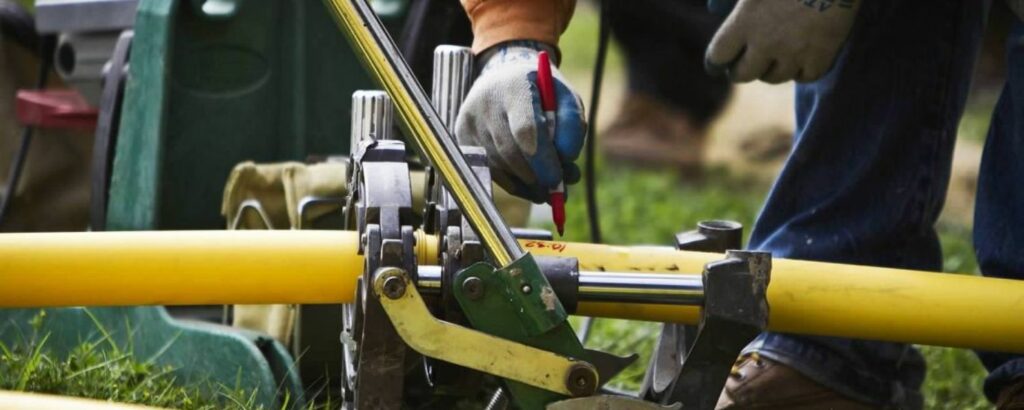
Accidentally puncturing a pipe while doing DIY home improvements or repairs is a common mistake. To avoid this, always be aware of where your pipes are located before starting any project. For instance, when installing gas fireplace insert ideas, it’s crucial to avoid hitting hidden pipes.
When drilling or hammering into walls, use a pipe locator tool or consult a professional to avoid hitting any hidden pipes. If you’re unsure, it’s best to call a plumber to ensure your project won’t inadvertently cause a leak.
3. Don’t Put Extra Food Waste Down the Drain
Your kitchen sink may seem like a convenient place to dispose of food scraps, but putting extra food waste down the drain can lead to clogs and plumbing issues. Even if you have a garbage disposal, it’s essential to use it properly.
Avoid putting large food scraps, grease, or fibrous vegetables (like celery) down the drain. Instead, use a compost bin or trash can for food waste. For grease, let it cool and solidify before disposing of it in the trash.
4. Only Two Things Are Flushable
When it comes to your toilet, remember the simple rule: only two things should be flushed – toilet paper and human waste. Many items that people flush, such as wipes, paper towels, and feminine hygiene products, can cause blockages and plumbing issues.
Place a trash bin next to the toilet to dispose of non-flushable items. Educate your family members about the importance of only flushing appropriate items to avoid clogs and damage.
And if you’re thinking about upgrading other parts of your home, consider looking into gas fireplace ideas for added comfort and style.
5. Use a Wet-Dry Vacuum
A wet-dry vacuum can be a lifesaver when dealing with plumbing issues. It’s a versatile tool that can help you clean up water spills, unclog drains, and even remove debris from pipes.
Keep a wet-dry vacuum handy for emergencies and routine maintenance. It’s especially useful for cleaning up after a minor leak or spill before it causes more significant damage.
6. Invest in Quality Plungers
Not all plungers are created equal. Investing in a high-quality plunger can make a significant difference when dealing with clogs. There are two main types of plungers: cup plungers and flange plungers.
A cup plunger is suitable for sinks and showers, while a flange plunger, with its extended flange, is better for toilets. For comprehensive home maintenance, it’s also useful to have a bottle of homemade gas fireplace glass cleaner on hand. Make sure you have both types of plungers in your home for different plumbing issues.
7. Don’t Ignore a Leak
Ignoring a small leak might seem like a harmless oversight, but even minor leaks can lead to significant water damage and higher utility bills. It’s crucial to address any signs of leaks as soon as you notice them.
Regularly check under sinks, around toilets, and in basements for signs of leaks. If you find a leak, fix it promptly or call a plumber to handle it. Early intervention can save you from more extensive repairs later.
8. Routinely Check for Leaks
Routine inspections are essential for maintaining a leak-free home. Regularly checking your plumbing system can help you catch problems before they become serious issues.
Schedule a monthly or quarterly inspection of your home’s plumbing system. Look for signs of leaks, water damage, or corrosion. Address any issues you find or call a professional for help.
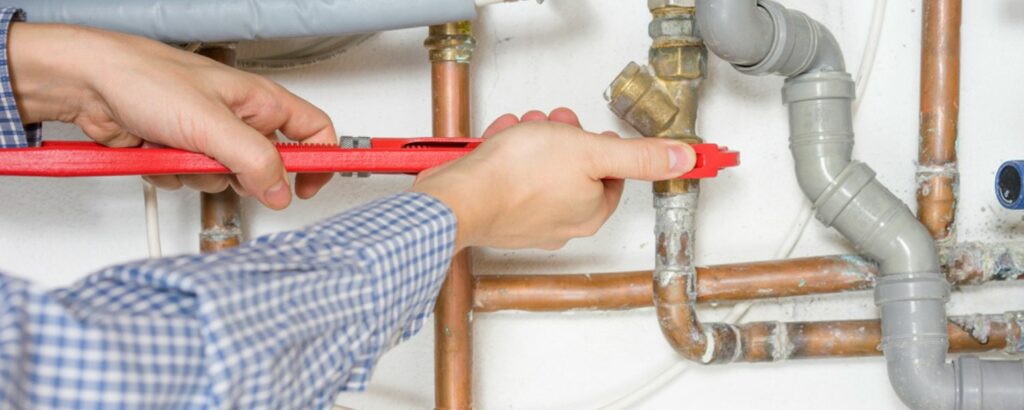
9. Don’t Tighten Too Much!
When tightening pipe fittings or connections, it’s important not to over-tighten them. Over-tightening can damage the fittings or pipes and lead to leaks.
Use the right tools and apply moderate pressure when tightening. If you’re unsure how tight is appropriate, consult the manufacturer’s recommendations or seek advice from a professional plumber.
10. Plumber’s Tape is Your Friend
Plumber’s tape, also known as Teflon tape, is a useful tool for preventing leaks in threaded pipe connections. It helps create a watertight seal and can be applied easily.
Wrap plumber’s tape around the threads of pipes before connecting them. Be sure to wrap it evenly and avoid using excessive tape, which can make it harder to tighten connections properly.
Conclusion
Maintaining a leak-free home involves a combination of knowledge, prevention, and timely action. By following these expert plumbing tips and tricks, you can ensure your plumbing system remains in good working order and avoid costly repairs.
Whether you’re a beginner looking for basic plumbing tips or someone interested in plumbing tips for freezing weather, these guidelines offer practical advice for various situations.
From knowing the location of shut-off valves to investing in quality plungers, each tip plays a role in keeping your home’s plumbing running smoothly.
Implementing these strategies will not only help you deal with common plumbing issues but also enhance your overall understanding of your home’s plumbing system.
Life mechanical expertise can significantly enhance plumbing tips and tricks by offering advanced solutions and tools for diagnosing and fixing plumbing issues.
Their knowledge helps in efficiently managing complex plumbing systems, preventing leaks, and ensuring proper installation and maintenance, making it easier to achieve a leak-free home.
As winter approaches, many homeowners turn to garage heaters to keep their workspaces warm and comfortable. A garage heater can be a practical solution to extend the usability of your garage during colder months.
However, using these devices safely is crucial to prevent accidents and ensure efficiency. In this guide, we’ll explore the top safety tips for using a garage heater, providing you with practical advice to maintain a warm and secure environment.
1. Understanding the Different Types of Garage Heaters
Before diving into safety tips, it’s essential to understand the various types of garage heaters available:
A. Electric Garage Heaters
Electric garage heaters are convenient and easy to install. They are typically wall-mounted or portable and offer a quick solution for heating smaller spaces. Moreover, they can be costly and require careful placement to avoid electrical hazards.
B. Natural Gas Garage Heaters
Natural gas heaters are efficient and can provide consistent heat for larger spaces. They usually require professional installation due to the need for gas lines and proper ventilation. These heaters can be more cost-effective in the long run but come with safety considerations.
C. Propane Garage Heaters
However, propane heaters are versatile and can be used in various settings. They are often portable and provide robust heating capabilities. However, they require regular fuel replacement and adequate ventilation to prevent the buildup of dangerous gases.
D. Radiant Garage Heaters
Radiant heaters warm objects and people directly rather than heating the air. They are efficient and can be either electric or gas-powered. These heaters are ideal for targeted heating but must be positioned carefully to avoid contact with flammable materials.
2. Key Safety Tips for Using a Garage Heater
A. Read the Manufacturer’s Instructions
Before using your garage heater, always read the manufacturer’s instructions carefully. This manual will provide specific installation, operation, and maintenance guidelines to ensure safe and best use.
B. Proper Ventilation
Adequate ventilation is crucial when using gas or propane heaters to prevent the accumulation of carbon monoxide (CO). Ensure your garage has proper ventilation, such as open windows or exhaust fans, to allow fresh air to circulate and harmful gases to escape.
C. Install Carbon Monoxide Detectors
Installing carbon monoxide detectors in your garage and adjacent living areas is essential. These detectors will alert you if CO levels become more dangerously high, allowing you to take immediate action to save your health and safety.
D. Keep Flammable Materials Away
Always keep flammable materials, such as gasoline, paint thinners, and cleaning supplies, safe from your heater. Maintain a clearance of at least three feet around the heater to prevent accidental fires.
E. Use the Right Power Source
Ensure your electric garage heater Canada is plugged into an appropriate outlet to handle its power requirements. Avoid using extension cords, which can overheat and pose a fire risk. If using a gas or propane heater, regularly check for leaks and ensure proper fuel connections.
F. Regular Maintenance and Inspection
Regular maintenance and inspection of your garage heater are vital to ensure it operates safely and efficiently.Homemade gas fireplace glass cleaners the heater’s components, checks for signs of wear or tear, and replaces any faulty parts. If you need help performing these tasks, consider hiring a professional technician.
G. Avoid Overloading Electrical Circuits
Electric heaters can draw a significant amount of power, overloading circuits and causing electrical fires. Ensure your garage’s electrical system can handle the heater’s load, and consider installing dedicated circuits if necessary.
H. Keep Children and Pets Away
Ensure that children and pets are kept away from the garage heater. Educate your family about the potential hazards and establish a safety zone around the heater to prevent accidental contact or burns.
I. Use Heaters with Safety Features
Opt for garage heaters with built-in safety features, such as automatic shut-off mechanisms, overheat protection, and tip-over switches. Moreover, these features can provide extra protection in case of malfunctions or accidents.
J. Never Leave the Heater Unattended
Never leave your garage heater unattended while it’s in use. Always turn off the heater when leaving the garage or before bed. Further, this simple practice can significantly reduce the risk of accidents and ensure safety.
K. Consider Insulating Your Garage
Insulating your garage can help retain heat and reduce the workload on your heater. Proper insulation will make your garage more energy-efficient, saving you money on heating costs and improving overall comfort.
L. Emergency Preparedness
Prepare for emergencies with a fire extinguisher and a first aid kit in your garage. Furthermore, familiarize yourself with emergency procedures and ensure that everyone in your house knows how to respond in case of agas fireplace insert ideas.
3. Benefits of Using a Garage Heater
Using a garage heater offers numerous benefits beyond just keeping your workspace warm. Here are some additional advantages:
A. Enhanced Comfort
Additionally, heated garage provides a comfortable environment for various activities, like as working on projects, exercising, or relaxing. Further, it allows you to use your garage year-round, regardless of outside weather.
B. Protection for Your Vehicle
Keeping your garage warm can protect your vehicle from cold weather damage. It helps prevent fluid freezing, battery drain, and wear and tear caused by down temperatures, ensuring your car starts easily and stays in good condition.
C. Increased Property Value
A well-maintained and heated garage can add value to your property. It enhances the appeal of your home to customers, offering them a functional and comfortable space that can be used for multiple purposes.
D. Energy Efficiency
By using a garage heater, you can improve your home’s overall energy efficiency. A warm garage can act as a buffer zone, reducing the amount of cold air entering your home and lowering your heating costs.
4. Tips for Choosing the Right Garage Heater
Selecting the right garage heater is crucial for safety and efficiency. Here are some factors to consider when choosing a heater for your garage:
A. Garage Size and Layout
However, the size and layout of your garage will determine the type and capacity of the heater you need. More oversized garages may require more powerful heaters or multiple units to ensure evenradiator heating pros and cons.
B. Heating Capacity
Check the heating capacity of the heater, usually measured in British Thermal Units (BTUs) for gas heaters or watts for electric heaters. Choose a heater with sufficient capacity to heat your garage effectively.
C. Energy Source
Additionally, consider the availability and cost of the energy source you’ll be using. Natural gas and propane heaters are typically more cost-effective for larger spaces, while electric heaters are convenient for smaller garages.
D. Installation Requirements
Evaluate the heater’s installation requirements. Some heaters, especially gas and propane units, may require professional installation. Ensure you have the necessary infrastructure and expertise to safely install and maintain the heater.
E. Safety Features
However, look for heaters with built-in safety features, such as overheat protection, tip-over switches, and automatic shut-off mechanisms. Further, these features can prevent accidents and enhance the overall safety of your garage heating system.
F. Cost and Efficiency
Consider the heater’s initial cost, operating costs, and energy efficiency. While some heaters may have a higher upfront cost, moreover, they can save you money in the long run through lower energy consumption and maintenance expenses.
5. Common Myths About Garage Heaters
There are several misconceptions about garage heaters that can lead to unsafe practices. Let’s debunk some common myths:
A. All Garage Heaters Are Unsafe
While any heating device carries some risk, modern garage heaters are designed with safety features to minimize hazards. You can safely use a garage heater by following the manufacturer’s instructions and adhering to safety guidelines.
B. Ventilation Isn’t Necessary for Gas Heaters
Proper ventilation is crucial for gas heaters to prevent the buildup of bad gases, like carbon monoxide. Always ensure your garage has adequate ventilation when using gas or propane heaters.
C. Electric Heaters Are Always Safe to Use
While electric heaters don’t produce carbon monoxide, they can still pose fire risks if misused. Avoid overloading electrical circuits, use the right power source, and keep flammable materials away from the heater.
D. Bigger Heaters Are Better
It is essential to choose a heater with a suitable capacity for your garage. A heater that’s too large can waste energy, while one that’s too small won’t provide adequate heating. Select a heater based on your garage’s size and heating needs.
E. It’s Safe to Leave a Garage Heater Unattended
Never leave a garage heater unattended, especially when it’s running. Always turn off the heater when not in the garage to prevent accidents and ensure safety.
6. Maintaining Your Garage Heater
Daily maintenance is vital to keeping your garage heater operating safely and efficiently. Here are some maintenance tips:
A. Clean the Heater Regularly
Moreover, dust and debris can accumulate on your heater, reducing its efficiency and posing a fire risk. To ensure optimal performance, clean the heater’s surface, vents, and filters regularly.
B. Inspect for Damage
However, regularly inspect your heater for signs of damage, such as cracks, corrosion, or loose connections. Address any issues promptly to prevent malfunctions and ensure safe operation.
C. Check Fuel Lines and Connections
Regularly check fuel lines and connections for gas and propane heater leaks or damage. Use soapy water to test for leaks and tighten connections as needed. If you need help performing these checks, seek professional assistance.
D. Replace Worn Parts
However, replace any worn or damaged parts promptly to maintain the heater’s efficiency and safety. Refer to the manufacturer’s guidelines for recommended replacement parts and procedures.
E. Professional Servicing
Consider having your garage heater professionally serviced at least once a year. Additionally, a qualified technician can thoroughly inspect and clean internal components and ensure the heater operates safely and efficiently.
Conclusion
Using a garage heater can significantly enhance the comfort and usability of your garage during colder months. Following these top safety tips ensures your heater operates efficiently and safely, protecting your property and loved ones.
Remember to choose the right type of heater for your space, maintain proper ventilation, and regularly inspect and maintain your heating equipment. Proper precautions allow you to enjoy a warm and secure garage environment all winter.
Plumbing issues can be a significant headache, whether you’re a homeowner or a tenant.
From minor inconveniences to major emergencies, understanding common plumbing issues and how to fix them can save you time, money, and stress. This guide covers various plumbing problems you might encounter, offering practical solutions and tips for addressing each one.
Introduction
Plumbing problems are an inevitable part of home maintenance. Whether you live in a house, apartment, or condo, you’ll likely face common plumbing issues at some point.
These issues range from minor annoyances, like a dripping faucet, to major emergencies, such as a broken water line. Understanding these problems and knowing how to fix them can make a big difference in maintaining a smooth-running household.
1. What to Do in a Plumbing Emergency
In any plumbing emergency, the first step is to stay calm. Emergencies like burst pipes or severe leaks can cause significant damage if not handled quickly. Here’s a step-by-step guide to managing a plumbing emergency:
A. Shut Off the Water
Locate your home’s main water shut-off valve and turn it off immediately to stop the flow of water.
B. Turn Off Electricity
If the leak is near electrical outlets or appliances, turn off the power at the circuit breaker to avoid electrical hazards.
C. Assess the Situation
Determine the extent of the problem. Is it a small leak or a major flood? This will help you decide whether to tackle the problem yourself or call a professional.
D. Call a Plumber
If the problem is beyond your expertise or involves significant damage, contact a licensed plumber right away.
E. Document the Damage
Take photos of any damage for insurance purposes, and keep records of any repairs or replacements.
For added comfort and warmth while you handle the emergency, consider exploring gas fireplace ideas to create a cozy atmosphere.
2. Dripping Faucet
A dripping faucet is not only annoying but can also waste a lot of water over time. This issue is often caused by a worn-out washer or O-ring inside the faucet. To fix a dripping faucet:
A. Turn Off the Water Supply
Locate the shut-off valves under the sink and turn them off.
B. Disassemble the Faucet
Remove the handle and other components to access the internal parts.
C. Replace the Washer or O-Ring
Inspect the washer or O-ring and replace them if they are damaged.
D. Reassemble the Faucet
Put the faucet back together and turn the water supply back on.
E. Test for Leaks
Turn the faucet on and check for any remaining drips.
3. Running Toilet
A running toilet is a common problem and can waste a significant amount of water. It is usually caused by a faulty flapper or a problem with the fill valve. To fix a running toilet:
A. Inspect the Flapper
Check the flapper at the bottom of the tank. If it’s worn or not sealing properly, replace it.
B. Adjust the Fill Valve
Ensure the fill valve is set correctly and isn’t allowing too much water into the tank.
C. Check the Flush Handle
Make sure the handle isn’t sticking or causing the flapper to remain open.
If you’re dealing with other home maintenance issues, like cleaning your fireplace, you might want to use homemade gas fireplace glass cleaner for a streak-free shine.
4. Clogged Toilet
A clogged toilet is a common issue and can be quite unpleasant. Here’s how to deal with a clogged toilet:
A. Use a Plunger
A plunger is your first line of defense. Make sure to use a plunger designed for toilets and create a good seal around the drain.
B. Try a Plumbing Snake
If plunging doesn’t work, a plumbing snake can help break up or remove the clog.
C. Avoid Chemical Cleaners
Chemical cleaners can damage your pipes and are not recommended for toilets.
D. Call a Plumber
If the clog persists or you suspect a more serious issue, contact a professional.
5. Slow or Clogged Drains
Slow or clogged drains can be caused by various issues, from minor debris to significant blockages in your plumbing system. To address slow or clogged drains:
A. Use a Plunger
For minor clogs, a plunger can help clear the blockage.
B. Clean the Drain Trap
If the drain is still slow, remove and clean the trap under the sink.
C. Use a Drain Snake
For deeper clogs, a drain snake can help clear the blockage.
D. Avoid Chemical Drain Cleaners
These can be harsh on your pipes and may not resolve the issue.
If you’re dealing with plumbing issues while planning upgrades like gas fireplace insert ideas, ensure that your home’s plumbing is in good condition to avoid any complications.
6. Water Heater Not Working
If your water heater is not working, it can disrupt your daily routine. Here’s how to troubleshoot:
A. Check the Power Supply
Ensure that the water heater is plugged in and the circuit breaker hasn’t tripped.
B. Inspect the Thermostat
Adjust the thermostat to ensure it’s set to the appropriate temperature.
C. Check for Leaks
Look for any signs of leaks around the water heater.
D. Flush the Tank
Sediment build-up can affect performance. Flushing the tank can help improve efficiency.
7. Leaky Pipes
Leaky pipes can cause water damage and lead to mold growth. To fix leaky pipes:
A. Identify the Leak
Locate the source of the leak and assess the damage.
B. Turn Off the Water
Shut off the water supply to the affected area.
C. Repair or Replace the Pipe
Depending on the severity of the leak, you may need to repair or replace the damaged section.
D. Use Pipe Sealant
For minor leaks, applying pipe sealant or tape can provide a temporary fix.
8. Low Water Pressure
Low water pressure can be frustrating and is often caused by clogged pipes or a problem with the water supply. To address low water pressure:
A. Check for Clogs
Inspect faucet aerators and showerheads for mineral deposits and clean them.
B. Inspect the Pressure Regulator
If your home has a pressure regulator, ensure it’s functioning correctly.
C. Check for Leaks
Leaks in your plumbing system can reduce water pressure. Inspect pipes and connections for leaks.
D. Contact a Plumber
If the problem persists, a plumber can help diagnose and fix the issue.
9. Main Water Line Break or Leak
A main water line break or leak is a serious issue that can cause significant water damage. To handle a main water line issue:
A. Shut Off the Water
Turn off the main water supply to stop the flow.
B. Contact a Professional
This type of repair typically requires professional expertise. Contact a plumber to handle the repair.
10. Sewer Line Issues
Sewer line issues can lead to unpleasant odors and potential health hazards. To address sewer line problems:
A. Check for Clogs
Use a plumbing snake to clear any blockages in the sewer line.
B. Inspect for Damage
Look for signs of damage or leaks around the sewer line.
C. Call a Plumber
For serious sewer line issues, professional help is required to perform repairs or replacements.
11. Expensive Water Bill
An expensive water bill can indicate a hidden leak or inefficiency in your plumbing system. To address high water bills:
A. Check for Leaks
Inspect all faucets, toilets, and pipes for leaks.
B. Monitor Water Usage
Track your water usage to identify any unusual spikes.
C. Inspect Water Appliances
Ensure that washing machines, dishwashers, and other appliances are functioning efficiently.
D. Contact a Plumber
If you can’t identify the issue, a plumber can help locate hidden leaks or inefficiencies.
12. Downspout Issues
Downspout issues can lead to improper water drainage and potential damage to your property. To fix downspout problems:
A. Clear Debris
Remove leaves and other debris from the downspout to ensure proper flow.
B. Inspect for Damage
Check for any cracks or damage in the downspout and repair or replace as needed.
C. Ensure Proper Drainage
Make sure the downspout directs water away from your home’s foundation.
13. Wet Spots on the Lawn
Wet spots on the lawn can indicate a plumbing leak or drainage issue. To address wet spots:
A. Inspect the Area
Look for signs of leaks or water pooling in the affected area.
B. Check for Broken Sprinklers
Ensure that sprinklers are functioning properly and not causing excessive watering.
C. Investigate Possible Leaks
If you suspect a plumbing issue, contact a plumber to check for leaks.
14. Overflowing Gutters
Overflowing gutters can lead to water damage and erosion around your home. To address overflowing gutters:
A. Clean Gutters
Remove leaves and debris from gutters to ensure proper water flow.
B. Inspect Downspouts
Ensure that downspouts are clear and directing water away from the foundation.
C. Check for Leaks
Look for any leaks or damage in the gutter system and repair as needed.
15. Water Stains in Basement
Water stains in the basement can be a sign of a leak or water intrusion. To address water stains:
A. Identify the Source
Look for leaks or sources of water intrusion, such as cracks in the walls or floors.
B. Seal Cracks
Use waterproof sealant to seal any cracks or gaps.
C. Improve Drainage
Ensure proper drainage around your home’s foundation to prevent future issues.
16. Mildew in the Attic
Mildew in the attic can be caused by poor ventilation or water leaks. To address mildew:
A. Improve Ventilation
Ensure that your attic has proper ventilation to prevent moisture build-up.
B. Inspect for Leaks
Check for any leaks in the roof or plumbing that could be causing moisture problems.
C. Clean and Remove Mildew
Use a mildew remover to clean affected areas and address any underlying moisture issues.
Conclusion
Dealing with common plumbing issues can be daunting, but with the right knowledge and tools, many problems can be managed effectively. From a dripping faucet to sewer line issues, understanding how to address these problems can save you time and money.
Always remember to take safety precautions and call a professional when needed. Proper maintenance and timely repairs can help keep your plumbing system in good working order and prevent future issues.
Heat pump water heater (HPWHs) represent a significant advancement in energy-efficient home technology. They leverage electricity to transfer heat from the surrounding air into a water storage tank.
This innovative process, like how a refrigerator operates in reverse, can make HPWHs two to 3 times more energy than traditional electric water heaters.
HPWHs offer a sustainable solution for meeting household hot water needs while reducing electricity consumption and operating costs by extracting heat from ambient air, even in cooler climates.
1. What Are Heat Pump Water Heaters?
HPWHs can be purchased as stand-alone units with built-in storage tanks and backup resistance heating elements. Alternatively, they can be retrofitted to work with existing conventional storage water heaters.
These systems must be installed in areas that maintain temperatures between 40º–90ºF (4.4º–32.2ºC) year-round and provide at least 1,000 cubic feet of air space around the unit.
2. Installation and Efficiency Considerations
Proper placement is crucial for HPWHs’ efficiency. They could be more efficient in cold spaces, as they tend to cool the surrounding air. Installing them in areas with excess heat, such as furnace rooms, can enhance efficiency.
Additionally, air-source heat pump water heater Canada systems can combine heating, cooling, and water heating, pulling heat from outside air in winter and inside air in summer, making them more effective in warm climates.
3. Geothermal Heat Pump Systems
Geothermal heat pumps, primarily used for home heating and cooling, can be adapted for water heating with a desuperheater. This auxiliary heat exchanger uses superheated gases from the heat pump’s compressor to heat water.
In summer, the desuperheater utilizes excess heat that would otherwise be expelled, potentially meeting most hot water needs. Additional heating from a storage or demand water heater may be required in cooler seasons.
Some manufacturers offer triple-function geothermal systems, providing heating, cooling, and hot water, efficiently meeting all household needs. For maintenance, ahomemade gas fireplace glass cleaner can effectively clean the desuperheater and maintain its efficiency.
4. How They Work
Heat Pump Water Heaters (HPWHs) operate on the principle that moving heat is more efficient than generating it directly.
Instead of producing heat through electric heat pump water heater resistance, HPWHs use electricity to transfer heat from the surrounding air to the water in the tank. This process is akin to how a refrigerator operates but in reverse.
5. Heat Transfer Process
A. Heat Extraction
Like a refrigerator, which removes heat from its interior, an HPWH extracts heat from the surrounding ambient air. This heat is absorbed by a refrigerant within the system.
B. Heat Transfer
The absorbed heat is transferred to water stored in an insulated tank. This raises the water’s temperature, providing hot water for household use.
C. Efficient Operation
HPWHs are designed to be energy-efficient. By leveraging ambient heat, they can produce hot water using significantly less electricity than traditional water heaters.
6. Operating Modes
HPWHs typically offer several operating modes to optimize energy usage and meet varying hot water demands:
A. Efficiency/Economy Mode
This mode maximizes energy efficiency by using the heat pump to heat water. It’s ideal for everyday use when hot water demand is moderate.
B. Auto/Hybrid Mode
The default setting combines hybrid heat pump water heater and electric resistance heating as needed. It ensures a consistent hot water supply with efficient energy usage.
C. Electric/Heater Mode
When there’s a high demand for hot water, this mode uses only the electric heating element. It’s less energy-efficient but provides rapid heating for increased demand periods.
D. Vacation & Timer Mode (select models)
Designed to save energy when you’re away from home, this mode places the HPWH in a low-power state until regular operation resumes.
7. Selecting a Heat Pump Water Heater
When choosing a water heating system for your home, a heat pump water heater (HPWH) can offer significant positive factors over traditional storage water heaters.
While they typically have higher initial costs, their lower operating expenses can make them a cost-effective choice in the long run.
pump water heaters are generally expensive to purchase and install than conventional water heaters.
However, their lower operational costs can help recover the initial investment over time. However, they extract heat from the nearby air and transfer it to the water in the tank, making them highly energy-efficient.
8. Considerations Before Purchase
A. Size and First Hour Rating
It’s crucial to select a heat pump water heater that matches your household’s hot water demands.
Additionally, consider the number of occupants and simultaneous water usage scenarios to determine the appropriate size. Moreover, the first-hour rating indicates how much hot water the heater can deliver during peak usage.
B. Fuel Type and Availability
Heat pump water heaters operate on electricity, utilizing ambient air heat. Ensure your home has adequate electrical service to support the unit’s requirements. However, they are most effective in moderate to warm climates with higher ambient air temperatures.
C. Energy Efficiency (Energy Factor)
A heat pump water heater’s energy factor (EF) measures its overall efficiency. Higher EF ratings indicate more significant energy efficiency and lower operating costs. Look for models with ENERGY STAR certification, which ensures they meet stringent energy efficiency guidelines.
D. Overall Costs
Calculate the total cost of ownership, including purchase, installation, and estimated operational expenses over the unit’s lifespan. Despite higher upfront costs, the energy savings can make HPWHs a financially viable option over time.
E. Integration with Home Systems
Some HPWHs can integrate with home heating and cooling systems, offering additional energy savings and convenience. Consider whether you want a system that provides space heating and cooling.
9. Reasons Why You Should Consider One
Heat pump water heaters offer a compelling array of benefits, making them an intelligent choice for environmentally-conscious homeowners looking to save on energy costs. Here’s why you should consider upgrading to a heat pump water heater:
A. Energy Efficient
Heat pump water heaters are not only heat pump water heater cost-effective but also eco-friendly. They employ Intelligent Adaptive Energy Saving technology, which monitors water usage patterns to optimize energy consumption.
Unlike traditional electric heaters that generate heat directly, heat pumps sends the heat from the air to the water using minimal electricity. This method makes them up to three times more energy-efficient, significantly reducing electricity bills.
B. Environmentally Friendly
Heat pump water heaters reduce reliance on fossil fuels and conventional electricity by harnessing natural heat sources like air, ground, or water. The use of R-134a refrigerant further minimizes greenhouse gas emissions from natural gas furnaces, contributing positively to environmental sustainability.
C. Longer Product Life
The durability of heat pump water heaters is enhanced by advanced features like a patented glass coating formula. This commercial-grade coating provides superior tank protection and corrosion resistance compared to standard glass linings.
It offers twice the corrosion resistance, ensuring a longer lifespan for your water heater. When comparingradiator heating pros and cons, this advanced coating stands out for its ability to significantly prolong the water heater’s lifespan.
10. Installation and Maintenance
Because of things like fuel type, climate considerations, local building rules, and safety laws, installing a heat pump water heating system requires experience. It is strongly advised to work with a licensed plumber, heating contractor, or geothermal heat pump system installer/designer for the installation procedure.
A. Request Written Estimates
Obtain comprehensive written cost estimates to comprehend the extent of the job and related expenses.
B. Request References
Ask previous customers for recommendations to evaluate the dependability and calibre of the contractor’s work.
C. Consult the Better Business Bureau
Check the contractor’s record with your local Better Business Bureau and any complaints lodged against them.
D. Verify Adherence
Verify whether the contractor will secure any required municipal permits.
E. Verify Compliance
Ensure the contractor follows local building codes and safety regulations and obtains any required local permits.
Regular maintenance is necessary to keep your water heating system operating efficiently and to increase its longevity. For precise maintenance instructions, please consult the owner’s handbook of your system.
Inspection and Cleaning guarantee ideal airflow and heat transfer, and routinely inspect and clean filters, coils, and fans. Please verify that the refrigerant levels are sufficient for effective operation by checking them.
Make sure all electrical connections are tight and operational. Test the thermostat and other controls to be sure that they are operating as intended.
11. 5 Ways to Improve Water Heater Efficiency
Ensuring your water heater operates efficiently reduces energy consumption and lowers utility bills. Here are five practical ways to boost your water heater’s efficiency:
A. Adjust the Thermostat’s Temperature for Efficiency
The thermostat setting on your water heater is crucial to energy usage. Most heaters come preset to 140 degrees Fahrenheit, but lowering it to 120 degrees can yield significant savings.
According to experts like Bill Ivey from Ivey Engineering, this temperature is safe and energy-efficient.
During warmer months or if your water heater is near showers, further reducing the temperature minimizes the energy needed to heat water without affecting the delivered temperature, thanks to shower valves adjusting the mix.
B. Install a Water-Heater Thermal Insulation Blanket
Heat loss through the walls of your water heater tank can be substantial, especially in colder areas or unheated spaces like garages. Installing a thermal insulation blanket made of fibreglass or foam is cost-effective.
These blankets create a barrier that traps heat inside the tank, significantly reducing standby heat loss. The Department of Energy (DOE) estimates this can cut water heating costs by 7 to 16 percent.
C. Ensure Proper Insulation of Hot Water Pipes
Insulating hot water pipes is as crucial as insulating the heater itself. Uninsulated pipes can lose heat as hot water travels through them, wasting energy and increasing wait times for hot water.
Foam pipe insulation is an inexpensive fix that is available at hardware stores. It minimizes heat loss and can increase water temperature by a few degrees, lowering the workload on your water heater.
D. Regular Maintenance and Flushing
So, sediment buildup in the tank can reduce efficiency by acting as an insulator, making your heater work harder. Regularly flushing the tank helps remove sediment and improves heating efficiency. Additionally, scheduling annual maintenance checks ensures your heater operates at peak performance.
E. Consider Upgrading to a High-Efficiency Water Heater
Suppose your water heater is aging or inefficient; upgrading to a modern, high-efficiency model can provide substantial energy savings. Nevertheless, newer models are designed to meet stricter energy efficiency standards and often have improved insulation and heating mechanisms.
Conclusion
In conclusion, heat pump water heaters are a compelling choice for environmentally-conscious homeowners seeking to minimize energy usage and lower utility bills.
Their ability to efficiently transfer heat from the air into water, combined with longer product life andgas fireplace insert ideas emissions, underscores their role in sustainable home technology.
While initial costs may be higher than conventional water heaters, the long-term savings and environmental benefits make HPWHs a wise investment.
As technology advances, and with ongoing improvements in efficiency and affordability, heat pump water heaters are poised to play a pivotal role in the future of residential water heating solutions.
By choosing an HPWH, homeowners contribute to energy conservation and enjoy reliable and cost-effective hot water solutions for years to come.
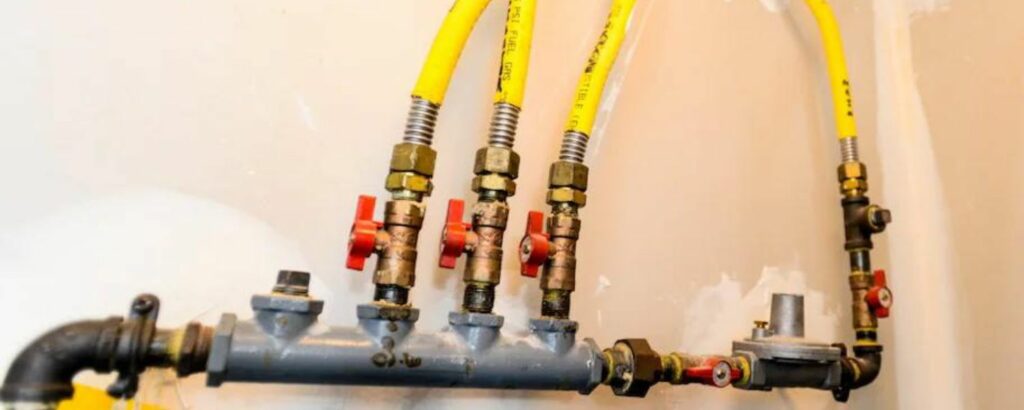
Gas lines are the lifelines that fuel our homes with natural gas line repair, powering everything from stoves to water heaters and furnaces. However, like all things, they require maintenance; sometimes, repairs are inevitable.
Understanding the line repair kit costs can help you plan and avoid unexpected expenses. In this comprehensive guide, we’ll break down the costs, factors affecting the price, signs that you might need a gas line repair, and what to expect from the repair process.
Understanding Gas Line Repair
Gas line repairs are essential for maintaining the safety and functionality of a home gas line repair or business. Any issue with gas lines should be treated urgently, whether caused by age, wear and tear, or external damage. Gas line repairs can range from minor leaks to significant replacements, each with varying costs and complexities. Before diving into costs, it’s crucial to understand what a gas line repair entails.
What is a Gas Line Repair?
A gas line repair involves fixing a damaged or leaking gas pipe that connects a property to the natural gas supply. Natural gas may be used to fuel appliances like a natural gas furnace.
Repairs may include sealing a small leak, replacing a section of pipe, water heater repair, or even a complete gas line replacement in severe cases. The repair process is highly technical and should only be done by qualified experts to guarantee safety and compliance with local regulations.
Common Causes of Gas Line Problems
Several factors can lead to gas line issues. These include:
Corrosion and Rust: Over time, gas lines constructed of metal are prone to corrosion and rust, which can erode the pipes and cause leakage.
Physical Damage: Construction work, landscaping, or accidental impact can damage gas lines.
Age and Wear: Like all infrastructure, gas lines have a lifespan. Older pipes may develop issues due to wear and tear.
Improper Installation: Poorly installed gas lines may not comply with safety standards and could lead to leaks or failures.
Gas Line Repair Costs: What to Expect
The cost of gas line repair can differ significantly based on some factors, such as the severity of the damage, location, and the type of materials required for the repair. Moreover, on average, homeowners can expect to pay between $150 to $3,000 for gas line repairs. However, the cost could be higher for more extensive repairs or replacements, including gas hot water tanks.
Factors Affecting Gas Line Repair Costs
Length of the Gas Line: The longer the gas line needs repair or replacement, the higher the cost. Costs can increase if the line runs through challenging terrain or under concrete.
Labor Costs: However, labor costs vary based on location, between $50 and $150 per hour. Moreover, urban areas tend to have higher labor costs.
Accessibility: If the gas line is difficult to access, such as being buried under concrete or near other utility lines, additional costs for excavation or special handling may apply.
Signs You Need a Gas Line Repair
Detecting gas line problems early can prevent costly repairs and ensure your home is safe. Here are some common signs that indicate you may need a gas line repair:
The Smell of Gas
The rotten egg odor is one of the most apparent signs of a gas leak. Natural gas is odorless, but utility companies add a mercaptan chemical to detect leaks. However, if you smell gas in your home, it is crucial to evacuate immediately and contact a professional.
Hissing or Whistling Sounds
Moreover, hearing a hissing or whistling sound near a gas line may indicate a leak. This sound often comes from a hole or crack in the line where gas is escaping under pressure.
Dead or Dying Vegetation
Initially, if you notice patches of dead or dying grass or plants in your yard, it could indicate an underground gas leak. Gas leaks can deprive plants of oxygen, causing them to wither and die.
Higher Than Normal Gas Bills
Additionally, a sudden spike in your gas bill without a corresponding increase in use might be a sign of a gas leak. Even small leaks can waste significant gas, leading to higher costs.
Physical Symptoms
Moreover, exposure to natural gas can cause physical symptoms such as headaches, dizziness, nausea, and breathing difficulties if you experience these symptoms at home, it could be due to a gas leak.
What to Expect During a Gas Line Repair
Understanding the process of gas line repair can help you feel more prepared and less stressed when facing this type of situation. Here’s what typically happens during a repair:
Inspection and Diagnosis
A licensed plumber or gas line repair specialist will examine your property to determine the issue’s cause. This involves using specialized equipment to detect leaks and assess the condition of the gas lines. Based on the findings, they will provide a repair estimate.
Obtaining Permits
In many jurisdictions, repairing or replacing a gas line requires permits from the local government. The professional handling the repair will usually obtain the necessary permits and arrange for inspections.
Repair or Replacement
The actual furnace repair services process depends on the extent of the damage. For minor leaks, a simple patch or seal may suffice. For more severe damage, a section of the gas line may need to be replaced, or the entire line may need rerouting.
Testing and Inspection
After the repair, the contractor will test the checking the gas line for leaks and the system is functioning correctly. An inspector may also need to verify the repair to meet local safety codes.
Tips for Reducing Gas Line Repair Costs
While gas line repairs can be expensive, there are several ways to reduce costs and manage expenses:
Regular Maintenance and Inspections
Routine inspections can help detect potential problems before they escalate into costly repairs. Consider scheduling annual gas line inspections as part of your home maintenance routine.
Bundle Repairs
If you have multiple plumbing or gas-related issues, consider bundling them together. Many companies offer discounts for various gas line repair services, which can reduce the overall cost.
Choose the Right Contractor
Always choose a licensed and experienced professional for line repairs. While it might be tempting to go with the cheapest option, poor-quality work can lead to more expensive repairs in the future.
Conclusion
Gas line repairs, including those related to your water heater tank, are not something to take lightly. They are critical for maintaining the safety and efficiency of your home’s natural gas system. Moreover, the cost of repairs, whether for gas lines or water heater tank repair, can vary significantly based on several factors. Still, understanding these costs, the repair process, and potential signs of trouble can help you make informed decisions and prepare financially.
By staying vigilant for signs of gas leaks, scheduling regular inspections, and choosing experienced professionals, you can reduce the dangers and expenses associated with gas line and water heater tank repairs. Furthermore, remember that safety should always be the priority when dealing with gas lines.
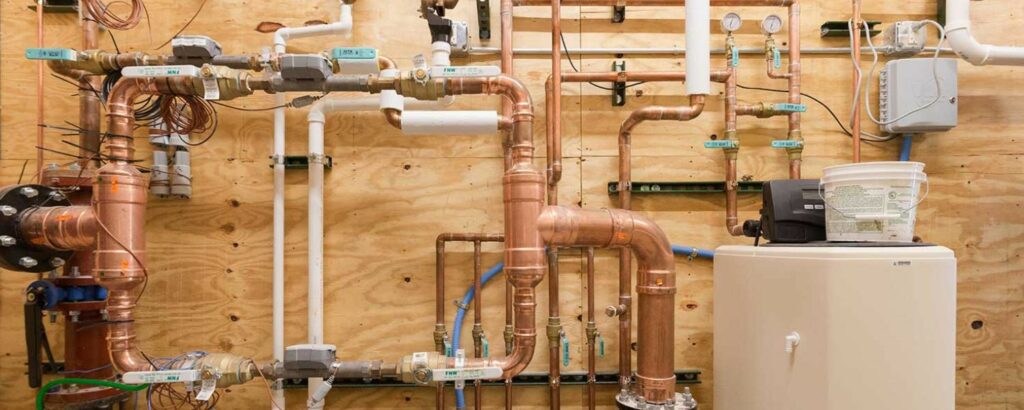
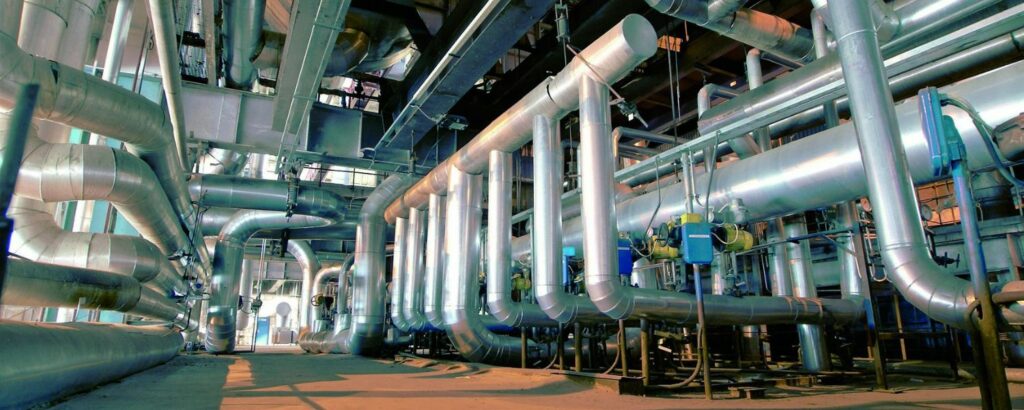
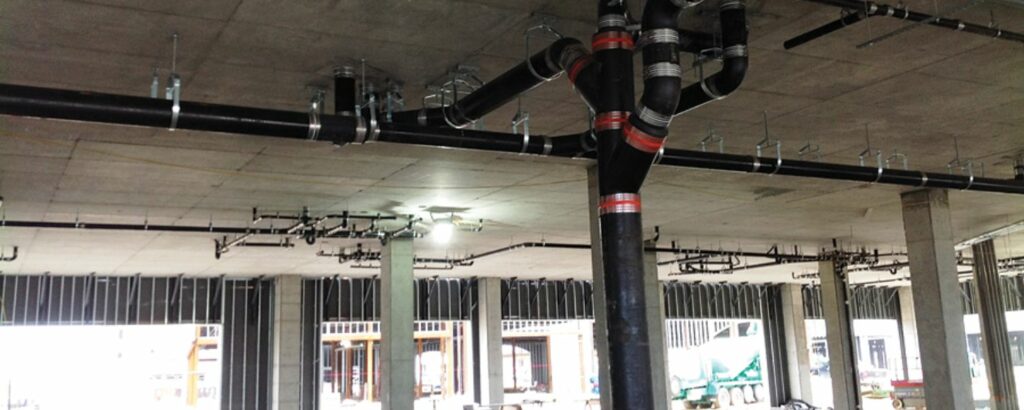
Maintaining a commercial plumbing system may only sometimes be the top priority for businesses, but ensuring uninterrupted operations and avoiding costly repairs is essential.
Regular maintenance of commercial plumbing systems plays a crucial role in preventing potential disasters, reducing operating costs, and extending the lifespan of plumbing infrastructure. By understanding and implementing regular maintenance practices, businesses can reap significant benefits and maintain a safe, efficient, and compliant facility.
Due to their size, usage demands, and specific requirements, commercial plumbing services are vastly more complex than residential ones. Moreover, regular maintenance is necessary to keep these systems running smoothly.
The scale of commercial plumbing systems requires a structured maintenance plan that focuses on prevention and early detection of potential problems. This saves money and minimizes the risk of significant disruptions to business operations.
Prevention of Major Plumbing Issues
Regular maintenance of commercial plumbing systems can prevent major issues from occurring. With proactive maintenance:
Early Detection of Leaks: Small leaks or clogs can develop into severe problems if not detected early. Routine inspections help spot these issues early.
Avoidance of Emergency Repairs: Scheduled check-ups minimize the likelihood of emergencies that often require costly, immediate attention.
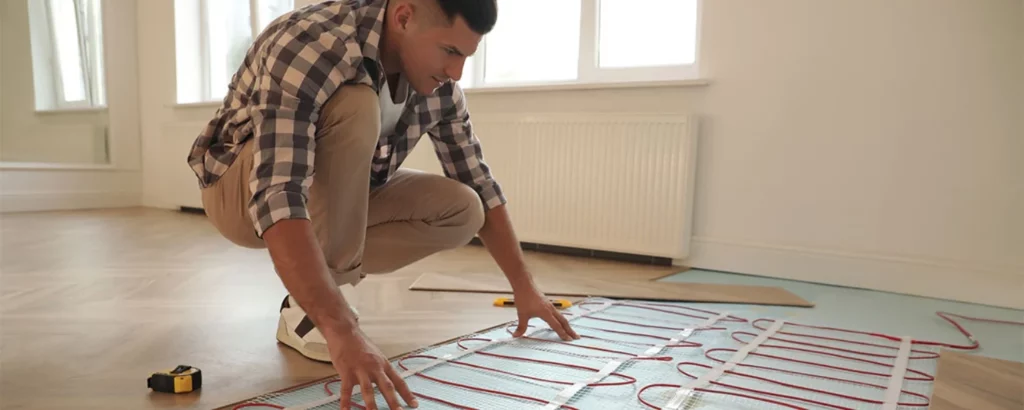
Early identification of leaks or weak points in pipes can prevent burst pipes or significant water damage, which can be disruptive and expensive to repair. A small investment in regular maintenance can save thousands in potential repair costs.
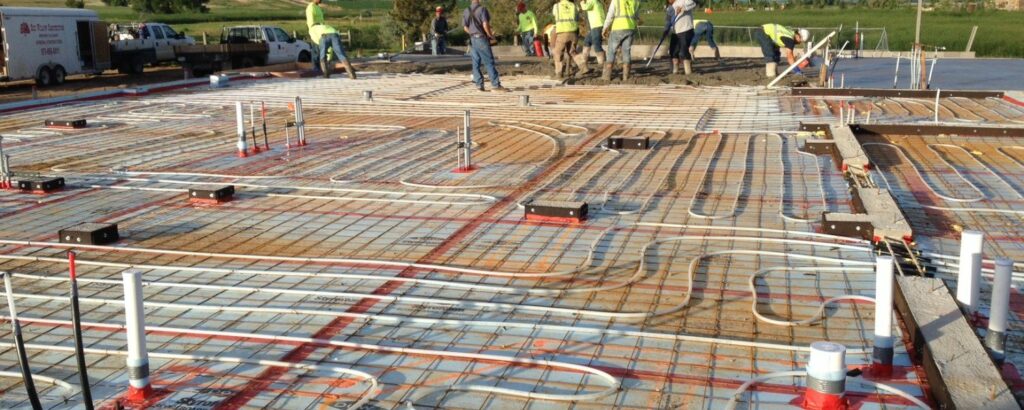
Cost Savings Through Preventive Maintenance
One of the critical advantages of regular maintenance, including home floor heating systems, is the cost savings associated with preventing severe plumbing issues. Regular inspections and minor repairs cost significantly less than emergency repairs or extensive replacements. For instance, if you regularly maintain your plumbing and heating systems, you may avoid the need for an emergency plumber in Victoria BC, which can be much more expensive.
Lower Repair Costs: Scheduled maintenance allows for the early detection and resolution of minor problems, avoiding costly emergency repairs.
Reduced Water and Energy Bills: Efficient plumbing systems use less water and energy, directly translating to lower utility bills.
Regular maintenance ensures that plumbing systems operate efficiently, reducing the amount of water wasted through leaks or inefficient fixtures. Moreover, well-maintained systems use less energy, as pumps, heaters, and other components operate smoothly without being overworked due to blockages or corrosion.
Prolonged Lifespan of Plumbing Systems
Commercial plumbing systems represent a significant investment for any business. With regular maintenance, commercial plumbing companies can extend the lifespan of their plumbing infrastructure:
Routine Pipe Inspections: Regular checks for corrosion, leaks, and potential blockages can help avoid premature pipe replacements.
Maintenance of Fixtures and Valves: Ensuring that faucets, toilets, and other fixtures function properly reduces wear and tear on the overall system.
Regular maintenance, including boiler maintenance services, reduces the stress on plumbing components, minimizing the chances of early deterioration. Moreover, over time, this leads to fewer replacements, saving both money and reducing the inconvenience caused by significant plumbing renovations.
Enhanced Operational Efficiency
Efficiency is crucial in commercial plumbing systems due to large buildings’ high demand and constant use of water systems. Regular maintenance helps in:
Optimized Water Pressure: Ensuring consistent water pressure throughout the building prevents operational inefficiencies.
Efficient Water Heater Performance: Regular checks and maintenance ensure that water heaters operate optimally, providing hot water without undue strain on the system.
Maintaining operational efficiency helps businesses avoid the disruption caused by water pressure problems or unexpected shutdowns of essential plumbing components. Regular maintenance ensures water heaters, pumps, and other plumbing infrastructure work optimally, reducing energy usage and costs.
Compliance with Health and Safety Regulations
Maintaining commercial plumbing systems is not just about preventing repairs; it also ensures compliance with health and safety regulations. Routine checks and maintenance help:
Prevent Health Hazards: Preventing leaks, clogs, and backups helps maintain a clean and secure setting and avoids potential health hazards.
Ensure Code Compliance: Regular maintenance ensures that plumbing systems adhere to local codes and regulations, avoiding fines and legal issues.
Health and safety are paramount in any commercial setting. By conducting regular maintenance, businesses can ensure that their plumbing systems are up to code, preventing the hazards included in failure to comply, such as fines, legal actions, and damage to reputation.
Improved Customer and Employee Satisfaction
Well-maintained commercial plumbing contractors significantly improve customers’ and employees’ comfort and satisfaction. Considerations include:
Reliable Restroom Facilities: Ensuring restrooms are always functional and clean is vital for customer satisfaction in public-facing businesses.
Safe and Hygienic Environment: A well-maintained plumbing system prevents issues like sewer backups and leaks, ensuring a healthy environment.
Maintaining reliable restroom facilities and commercial plumbing supply is crucial for business reputation in commercial environments, especially those with a high volume of people, such as restaurants, hotels, or retail stores. Poor plumbing can lead to customer complaints, negative reviews, and a decline in business.
Essential Maintenance Practices for Commercial Plumbing Systems
Several critical maintenance practices should be regularly performed to keep commercial plumbing systems running efficiently. These include:
Pipe and Sewer Line Inspections: Regular inspections help identify leaks, corrosion, and blockages early.
Routine Drain Cleaning: Prevents build-ups and clogs that can lead to backups and overflows.
Water Heater Maintenance: Ensures energy efficiency and consistent hot water supply by flushing tanks and checking components.
Implementing these practices as part of a structured maintenance plan can help prevent common plumbing issues and ensure the system’s longevity and efficiency.
Pipe and Sewer Line Inspections
Pipe and sewer line inspections are essential for detecting potential issues before they escalate. With modern technology, such as video inspections, businesses can conduct non-invasive checks to ensure everything is in good condition. These inspections help:
Identify Hidden Leaks or Corrosion: Video inspections can reveal internal pipe damage that is not visible externally.
Prevent Sewer Backups: Regular inspections prevent blockages leading to costly sewer line repairs or replacements.
Routine Drain Cleaning
Routine drain cleaning is critical for preventing clogs and backups, which can cause considerable harm and disruption in a commercial setting. Drain cleaning includes:
Clearing Debris and Build-ups: Regular cleaning prevents grease, hair, and debris from causing clogs.
Maintaining Optimal Drain Flow: Ensures water drains quickly and efficiently, preventing standing water issues.
By regularly cleaning drains, businesses can avoid emergency plumbing calls due to overflows and backups, which are not only costly but can also disrupt operations.
Water Heater Maintenance
Water heaters are a crucial component of commercial plumbing systems, providing hot water for various uses, from restrooms to kitchens. Regular water heatermaintenance includes:
Flushing Tanks to Remove Sediment: Sediment build-up can cause inefficiency and reduce the heater’s lifespan.
Checking Anode Rods and Valves: Ensuring these components are in good condition prevents corrosion and leaks.
Proper maintenance of water heaters ensures consistent performance and helps businesses avoid the high costs associated with replacing these critical components.
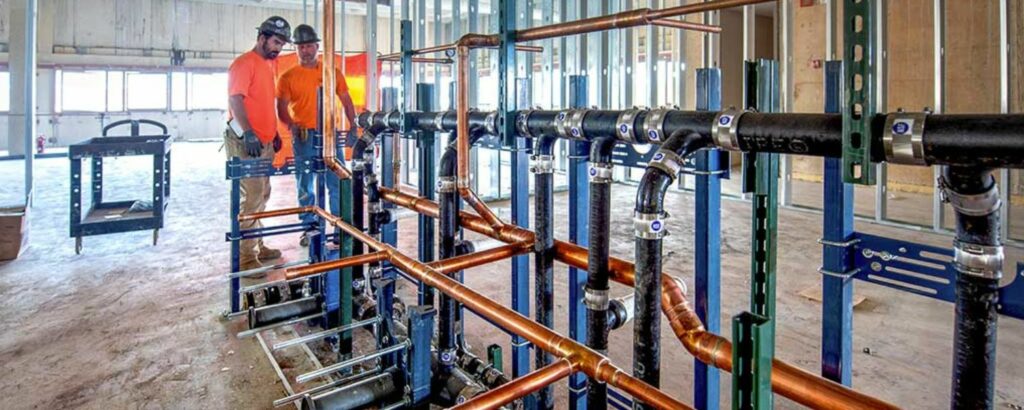
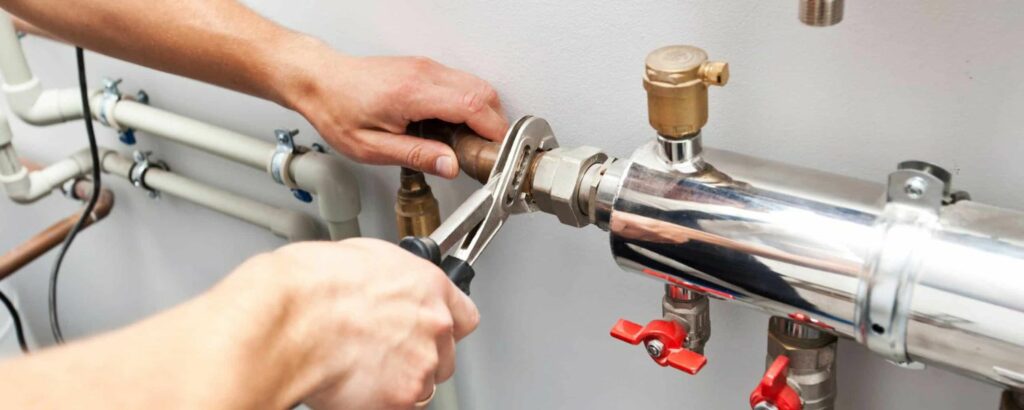
The Role of Professional Plumbers in Regular Maintenance
Hiring professional plumber services for regular maintenance is essential to ensure a comprehensive approach to commercial plumbing care. Professional plumbers provide:
Expert Inspections and Diagnosis: Trained professionals can detect issues that may not be obvious to untrained eyes.
Skilled Repair and Maintenance Services: Professionals can efficiently carry out necessary repairs, replacements, and routine checks to keep plumbing systems in optimal condition.
Professional plumbers have the tools, expertise, and experience to handle the complexity of commercial plumbing services, making them indispensable partners in maintaining efficient and safe plumbing infrastructure.
Conclusion
Investing in regular maintenance for commercial plumbing systems is a strategic decision that pays off in multiple ways. The benefits are extensive, from preventing commercial plumbing repair and ensuring operational efficiency to complying with health and safety regulations and prolonging the system’s lifespan.
Businesses prioritizing regular plumbing maintenance save money and create safer, more efficient, and more pleasant environments for their employees and customers.
As winter approaches, maintaining a warm and comfortable home becomes a top priority. Unfortunately, even the most reliable heating systems can experience problems, often at the most inconvenient times. Understanding how to troubleshoot common heater issues can save you time, money, and discomfort during the coldest months of the year.
In this comprehensive guide, we’ll explore some of the most common heater issues you may encounter, particularly during winter. Whether you’re dealing with a furnace that won’t ignite or a thermostat that’s not responding, this guide will help you identify and resolve these problems efficiently.
How to Use This Guide
This guide is organized to help you quickly identify and address common heater issues. We will begin by outlining 20 common heater issues in winter, followed by step-by-step troubleshooting tips for each problem. Each section will provide practical advice to help you resolve the issue or determine if it’s time to call a professional.
20 Common Winter Heating System Issues
Understanding the various heating problems in a house can be overwhelming, especially when you’re unsure what’s causing the issue. Below, we’ll discuss 20 common heater issues HVAC systems might face, particularly during the colder months.
1. Heating System Won’t Switch On
One of the most frustrating heater problems is when your heating system simply won’t turn on. This issue could be due to several factors, such as a power outage, a tripped circuit breaker, or a malfunctioning thermostat. Start by checking if your system is receiving power. If everything seems fine, your thermostat may need to be reset or replaced.
2. Furnace Does Not Ignite
If your furnace isn’t igniting, your home will remain cold despite the system being on. This can be due to a faulty ignition switch, a dirty burner, or a problem with the gas supply. If you suspect the issue lies with the gas supply, it’s best to contact a professional to avoid potential hazards.
3. Low or No Airflow from Vents
Troubleshooting central heating often involves dealing with low or no airflow from vents. This issue can result from blocked vents, a dirty air filter, or problems with the blower motor. Check for blockages first, and if the problem persists, it may be necessary to clean or replace the air filter.
4. Adjusting Your Thermostat Doesn’t Do Anything
When adjusting your thermostat does not affect the temperature, it could be a sign of a malfunctioning thermostat or wiring issues. Start by ensuring that the thermostat is set correctly and has working batteries. If the problem continues, you might need to replace the thermostat or check the wiring.
5. Cool Air Blows from Vents When the Furnace Operates
One of the reasons for central heating not working effectively is when cool air blows from the vents. This can happen if the furnace isn’t heating properly, which might be due to an issue with the pilot light, gas supply, or heat exchanger. You may need to inspect these components or call a professional for a more in-depth analysis.
6. Air Filter Clogs Quickly
A rapidly clogging air filter can lead to several heating problems in a house, including reduced airflow and efficiency. If you find that your air filter needs frequent replacing, it could be due to excessive dust or debris in your home, or it may indicate a more serious issue with the furnace or ductwork.
7. Thermostat Not Turning on or Appears Blank
A blank thermostat screen can be alarming, especially when you’re dealing with common heater issues. This problem could stem from dead batteries, a tripped circuit breaker, or a blown fuse. Try replacing the batteries first. If that doesn’t work, check your electrical panel to ensure the thermostat is receiving power.
8. Furnace Creating a Burning Smell
A burning smell coming from your furnace can indicate several heater problems, such as a dirty air filter, dust on the heat exchanger, or even electrical issues. If the smell persists after changing the filter, it’s crucial to have your furnace inspected by a professional to prevent any potential fire hazards.
9. Water Pooling Around Heating Equipment
Water pooling around your heating system is a sign that something is wrong. This could be due to a clogged condensate line, a malfunctioning humidifier, a leak in the heat exchanger, or a need for water heater repair. Since water damage can lead to further complications, it’s essential to address this issue as soon as possible.
10. Heat Pump Not Warming Your Home
Heat pumps are efficient, but they can sometimes fail to warm your home adequately. This problem might be due to low refrigerant levels, a frozen outdoor unit, or a malfunctioning compressor. Checking the outdoor unit for ice buildup and ensuring proper airflow can help resolve this issue.
11. Your Home Has Lots of Cold Spots
Experiencing cold spots in your home is one of the common heater issues in a house. This issue can arise from poor insulation, blocked vents, or an improperly sized heating system. Ensuring that all vents are open and unblocked and that your insulation is up to standard can help eliminate cold spots.
12. Heating System Short Cycles
When your heating system turns on and off frequently, it’s known as short cycling. This can be caused by an overheating furnace, a malfunctioning thermostat, or a blocked air filter. Short cycling not only makes your home less comfortable but can also lead to increased wear and tear on your system.
13. Furnace or Air Handler Interior Visibly Dirty
A dirty furnace or air handler interior can reduce efficiency and lead to various common heater issues HVAC systems experience. Regular maintenance, such as cleaning the components and replacing the air filter, can help keep your system running smoothly.
14. Excess Humidity in Your Home
Excess humidity can cause discomfort and contribute to heating problems in a house. If your home feels damp or the windows are frequently foggy, your heating system might not be removing enough moisture from the air. This could be due to a malfunctioning humidifier or poor ventilation.
15. Your Heating Bills Are High
A sudden spike in your heating bills is often a sign of common heater issues. This could be due to a dirty air filter, a malfunctioning thermostat, or poor insulation. Identifying and addressing the root cause can help you reduce energy consumption and save money.
16. Carbon Monoxide Detectors Sound Frequently
If your carbon monoxide detectors are sounding frequently, it’s a serious issue that needs immediate attention. Carbon monoxide is a dangerous gas that can be produced by a malfunctioning furnace or blocked chimney. If you suspect a carbon monoxide leak, evacuate your home and contact emergency services immediately. For your safety, it’s essential to schedule furnace repair and service to ensure your system is functioning properly and to prevent future issues.
17. Noisy Heating System
Unusual noises coming from your heating system, such as banging, rattling, or squealing, can indicate various heater problems. These noises may be caused by loose components, a failing blower motor, or debris in the ductwork. It’s essential to address these noises promptly to prevent further damage.
18. Furnace Needs More Repairs Than Normal
If you find yourself calling for repairs more often than usual, it may be a sign that your furnace is nearing the end of its lifespan. Frequent repairs can become costly, and it may be more economical to invest in a new heating system.
19. Furnace Stays On
A furnace that stays on continuously can lead to overheating and increased energy costs. This problem might be due to a malfunctioning thermostat, a stuck relay, or a blocked air filter. Resolving this issue quickly is important to avoid further damage to your system.
20. Thermostat Displays a Service Message
Some modern thermostats will display a service message when there’s an issue with your heating system. This message could indicate various problems, from a dirty air filter to more serious mechanical issues. It’s crucial to address any service messages promptly to ensure your heating system continues to function properly.
Conclusion
Dealing with common heater issues, including tankless water heater service, can be challenging, especially during the winter months when your heating system is most needed. However, understanding these common heater issues in winter and knowing how to troubleshoot them can help you maintain a warm and comfortable home. By addressing heating problems in a house as soon as they arise, you can prevent minor issues from becoming major, costly repairs.
Remember, while this guide provides comprehensive troubleshooting tips, some problems may require professional assistance. If you’re ever in doubt or dealing with a serious issue like a carbon monoxide leak, don’t hesitate to contact a qualified HVAC technician. Your safety and comfort are paramount, and taking prompt action can ensure your heating system operates efficiently throughout the winter.
Life Mechanical offers expert solutions for common heater issues, ensuring your heating system operates efficiently during winter. From diagnosing problems like low airflow or thermostat malfunctions to providing timely repairs and maintenance, their skilled technicians help you stay warm and comfortable, preventing costly breakdowns and enhancing your system’s performance.
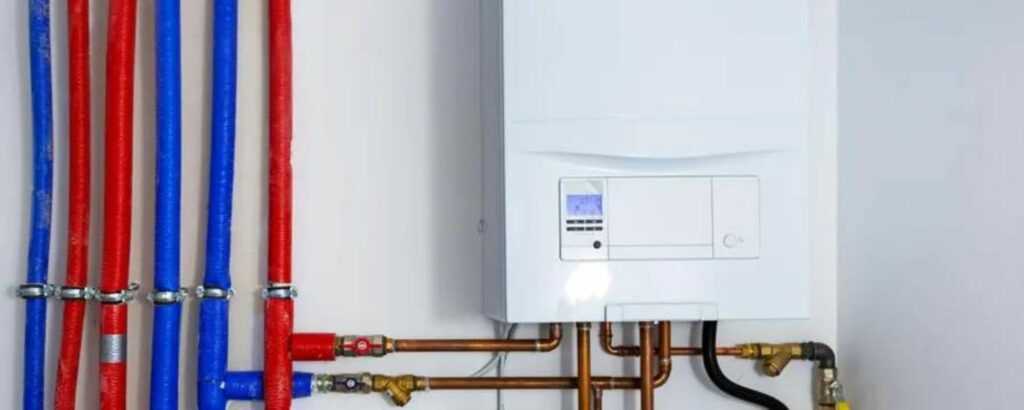
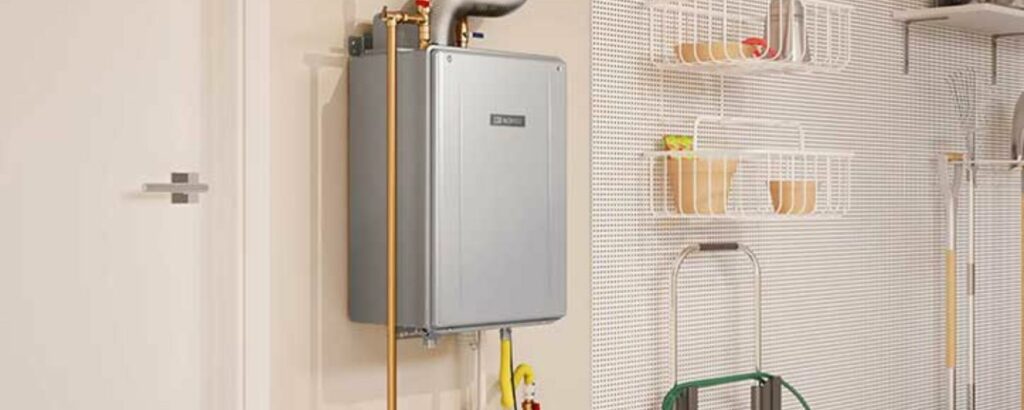
Tankless water heaters have gained popularity for their energy efficiency and space-saving design. Unlike traditional tank-style water heaters that store a large volume of hot water, tankless water heaters provide hot water on demand, which means they heat water only when you need it.
This can lead to significant energy savings and a more consistent supply of hot water. However, to keep your tankless water heater operating efficiently, regular maintenance is essential. In this guide, we’ll explore the key steps for tankless water heater maintenance, focusing on how to perform routine upkeep and address common issues.
What is a Tankless Water Heater?
A tankless water heater, also known as an on-demand water heater, heats water directly as it flows through the unit, bypassing the need for a storage tank. This design allows for an endless supply of hot water and reduces the risk of running out of hot water during peak usage times. Tankless water heaters come in various sizes and types, including electric and gas models, each with its specific maintenance needs.
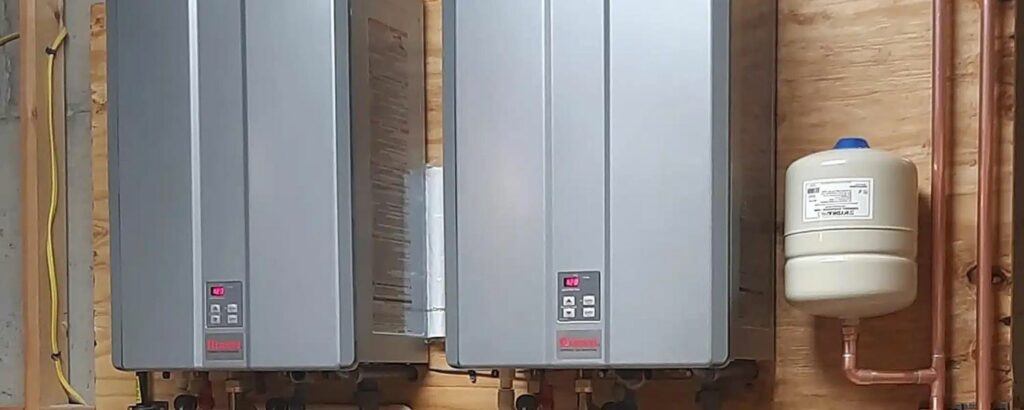
Steps for Maintaining a Tankless Water Heater
Proper maintenance of a tankless water heater ensures its longevity and optimal performance. Here are the essential steps to keep your unit running smoothly:
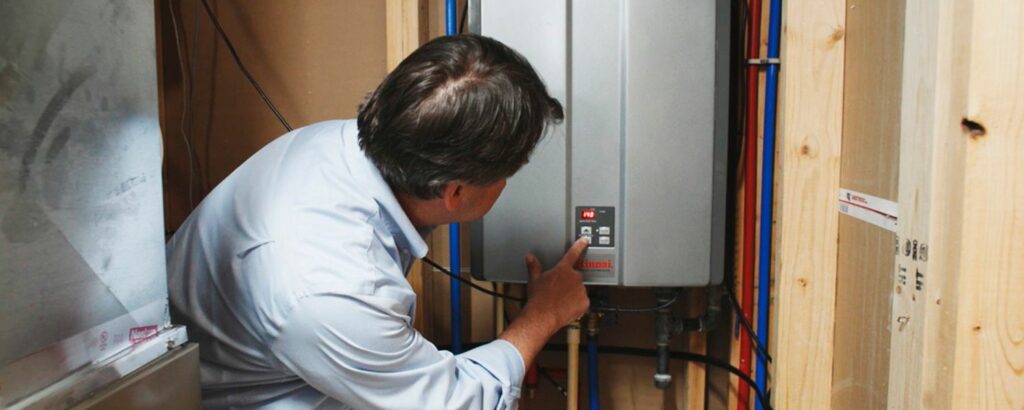
1. Turn Off The Energy Source
Before you begin any maintenance work on your tankless water heater, it’s crucial to turn off the energy source to ensure your safety. For electric models, switch off the power at the circuit breaker. For gas models, turn off the gas supply. This precaution helps prevent accidents and ensures you can work on the unit without any risk of electrical or gas-related hazards.
2. Close All Main Water Valves
Once the energy source is turned off, locate and close all main water valves connected to your tankless water heater service. This step is important to prevent water from flowing through the unit while you’re performing maintenance. By shutting off the water supply, you can avoid potential leaks and spills.
3. Remove Purge Port Valve Caps
Your tankless water heater will have purge port valves that are used for flushing the system. Locate these valves on the unit and carefully remove the purge port valve caps. These valves are typically found on the inlet and outlet pipes of the heater.
4. Attach Hoses To Each Valve
Next, attach hoses to each purge port valve. The hoses should lead to a drain or a bucket to collect the water and cleaning solution that will be flushed out. Make sure the hoses are securely connected to avoid any leaks during the flushing process.
5. Open the Port Valves
Once the hoses are in place, open the port valves to allow water to flow through the hoses. This step is necessary for flushing out any sediment or mineral buildup inside the tankless water heater. If you’re using a tankless water heater flush kit, follow the instructions provided with the kit for this part of the process.
6. Tankless Water Heater Valve Kits
Using a tankless water heater flush kit can simplify the maintenance process. These kits typically include everything you need to flush the system, such as hoses, connectors, and a pump. They are designed to help you clean the internal components of the heater more effectively. Make sure to use a tankless water heater flush kit compatible with your specific model.
7. Flushing The System
The flushing process involves circulating a cleaning solution through the tankless water heater to remove mineral deposits and sediment. Prepare the cleaning solution according to the manufacturer’s instructions, and pour it into the system through the hoses. Let the solution circulate for the recommended time, usually around 30 minutes to an hour. This step helps to prevent clogs and maintain the efficiency of your tankless water heater.
Conclusion
Maintaining your tankless water heater is essential for its performance and longevity. Regular maintenance, including annual flushing, can help prevent issues and ensure your unit operates efficiently. By following these steps and using a tankless water heater flush kit, you can keep your heater in top condition and avoid costly repairs.
Tankless water heater maintenance is an investment in the longevity and efficiency of your unit. Keeping up with the tankless water heater maintenance schedule will not only help you save on energy costs but also extend the life of your heater. Regular maintenance can prevent issues that might lead to higher tankless water heater flush costs and reduce the need for more extensive repairs.
If you have a Rinnai tankless water heater or any other brand, it’s important to refer to the manufacturer’s recommendations for specific maintenance requirements. Proper care, regular checks, and utilizing furnace repair services when needed will keep your tankless water heater running smoothly and provide you with a reliable source of hot water for years to come.
Life Mechanical provides expert tankless water heater maintenance services, ensuring efficient operation and longevity of your unit. Their skilled technicians perform thorough inspections, flush systems, and address issues promptly, reducing the risk of breakdowns and costly repairs. Trust Life Mechanical for reliable, professional care of your tankless water heater.
Heating and air conditioning (HVAC) systems are crucial in maintaining comfort within our homes and workplaces.
But have you ever wondered what exactly HVAC means? HVAC stands for Heating, Ventilation, and Air Conditioning.
Its system keeps your indoor environment comfortable by regulating temperature, humidity, and air quality.
What Does HVAC Mean?
HVAC stands for Heating, Ventilation, and Air Conditioning. It’s a system that regulates temperature, humidity, and air quality to keep indoor environments comfortable.
Whether it’s keeping your home warm in the winter or excellent in the summer, types of HVAC systems play a crucial role in maintaining comfort and health.
Components of an HVAC System
An emergency HVAC system is made up of several components, each serving a specific function:
1. Air Conditioner: An air conditioner is a vital component of an HVAC system, especially in warmer climates.
It removes heat from indoor air and transfers it outside, effectively cooling the indoor environment.
Using a refrigeration cycle, the heating and air service conditioner cools the air by passing it over coils filled with refrigerant, thus creating a comfortable atmosphere indoors.
Regular air conditioner maintenance, including cleaning the coils and checking refrigerant levels, is essential to ensure optimal performance and energy efficiency.
2. Heat Pump: A heat pump is versatile and has heating and cooling capabilities.
It works by extracting heat from the outside air (even in colder temperatures) and transferring it indoors during winter while reversing the process to cool indoor spaces during summer.
Heat pump air conditioners offer energy-efficient heating and air conditioning service solutions, making them suitable for moderate climates.
However, proper sizing and installation are crucial to ensure maximum efficiency and performance.
3. Furnace: The furnace is responsible for heating the air in an HVAC system.
It burns fuel such as natural gas wall furnace, oil, or propane to generate heat distributed throughout the home via ductwork.
Furnaces are commonly used in colder climates where heating is a primary concern.
Regular maintenance, including cleaning or replacing air filters and inspecting the ignition system, is essential for ensuring the furnace operates safely and efficiently.
4. Air Handler: The air handler is a crucial component that circulates conditioned air throughout the home.
It includes a blower fan and an evaporator coil, which distribute heated or cooled air through the ductwork system.
The air handler is typically indoors in a utility closet, attic, or basement. Proper air handler maintenance, such as cleaning or replacing filters and lubricating moving parts, helps ensure efficient operation and optimal indoor air quality.
5. Ductwork: Ductwork is the network of tubes or channels that distribute air throughout the home.
It carries heated or cooled air from the furnace, heat pump, or air conditioner to different rooms, ensuring even temperature distribution and comfort.
Adequately designed and sealed ductwork is essential for maximizing HVAC system efficiency and minimizing energy loss.
By regularly inspecting and cleaning your ductwork, you safeguard against leaks and blockages and ensure healthier indoor air quality, providing lasting comfort.
6. Thermostat: The thermostat serves as the control center of the HVAC system, allowing users to set and regulate the indoor temperature.
Modern thermostats often come with programmable features, allowing for energy-efficient temperature adjustments throughout the day.
Some thermostats also offer remote access and smart technology capabilities, enabling users to control their HVAC technician system from anywhere using a smartphone or other devices.
Proper programming and calibration of the thermostat are essential for ensuring accurate temperature control and maximizing energy savings.
Regular maintenance, such as replacing batteries and cleaning the thermostat, can help prevent malfunctions and ensure reliable operation.
For homes with infloor heating systems, additional considerations may apply to ensure compatibility and optimal performance within the HVAC system.
How Does an HVAC System Work?
1. Air Intake: The HVAC system begins by drawing air from either the outside environment or recirculating indoor air.
This intake process is crucial as it determines the quality of air that will be conditioned and distributed throughout the building.
Outdoor air may contain pollutants, allergens, or other contaminants that must be filtered to maintain clean indoor air quality.
On the other hand, recirculating indoor air allows the reuse of already conditioned air, which can be more energy-efficient but may require proper filtration to remove any accumulated pollutants or particles.
2. Ventilation: Once the air is drawn into the HVAC system, it undergoes a ventilation process where it is filtered and purified.
Ventilation removes contaminants such as dust, pollen, mold spores, and other airborne particles, ensuring indoor air quality remains clean and healthy.
Filters within the system capture these pollutants, preventing them from circulating back into the living spaces.
Proper ventilation is essential for maintaining comfort, promoting respiratory health, and reducing the risk of allergies and respiratory illnesses caused by poor indoor air quality.
3. Heating or Cooling: Depending on the desired indoor temperature, the HVAC system activates heating or cooling components to adjust the air temperature accordingly.
In colder weather, the heating system generates heat to warm the air, typically a furnace or heat pump. Furnaces use combustion of fuel sources like natural gas, oil, or propane, while heat pumps extract heat from the outdoor air and transfer it indoors.
Conversely, during hotter months, the cooling system, usually an air conditioner or heat pump, removes heat from indoor air, cooling it down before circulating it back into the living spaces.
This heating or cooling process is essential for maintaining comfort and regulating indoor temperature throughout the year.
4. Air Distribution: Once conditioned, the air is distributed throughout the building via a network of ductwork.
The air handler, an HVAC system working principle component, is crucial in circulating the conditioned air through the ducts to reach different rooms and areas within the building.
The air handler contains a blower fan, which forces the air through the ductwork, and an evaporator coil, which helps cool or heat the air as needed.
Proper air distribution ensures that every part of the building receives adequate heating or cooling, maintaining consistent comfort levels throughout the indoor spaces.
5. Temperature Regulation: The thermostat serves as the control center of the HVAC system, allowing users to set and regulate the indoor temperature according to their preferences.
Modern thermostats often feature programmable settings, enabling users to schedule temperature adjustments throughout the day for energy efficiency and convenience.
The thermostat accurately senses the indoor temperature and activates the heating or cooling components as needed, helping maintain a comfortable and consistent temperature level within the building.
Proper temperature regulation enhances comfort and contributes to energy savings by avoiding unnecessary heating or cooling when it’s superfluous, ultimately reducing utility costs and environmental impact.
6. Humidity Control: In addition to regulating temperature, HVAC systems help control indoor humidity levels for optimal comfort and health.
In humid climates, the system removes excess moisture from the air through condensation or dehumidification, preventing mold growth, musty odors, and discomfort.
Conversely, in dry climates or during winter, when indoor air tends to be dry, the HVAC system may add moisture to the air through humidification, preventing issues like dry skin, static electricity, and respiratory irritation.
By maintaining balanced humidity levels, the HVAC system creates a more comfortable and healthy indoor environment for occupants throughout the year.
Some HVAC systems may integrate with gas hot water tanks to efficiently provide heating and domestic hot water needs.
What HVAC System Is Right for Me?
Choosing the right HVAC system depends on your home’s size and layout, climate, and budget. Some standard HVAC systems include:
1. Central Air Conditioning: Central air conditioning systems are suitable for larger homes where consistent cooling throughout the house is necessary.
These systems use ductwork to distribute cooled air efficiently to every room.
They offer excellent cooling performance and can be integrated with heating systems for year-round comfort. However, installation can be more complex and costly, especially if ductwork needs to be installed or upgraded.
2. Ductless Mini-Split: Ductless mini-split systems are ideal for smaller spaces or homes without existing ductwork.
They consist of an outdoor compressor unit and one or more indoor air-handling units connected by refrigerant lines.
These systems offer targeted heating and cooling, allowing you to set different temperatures for individual rooms or zones.
They are energy-efficient, easy to install, and provide flexibility in room-by-room temperature control.
3. Heat Pump System: Heat pump systems are versatile options providing heating and cooling capabilities in one unit.
Depending on the season, they work by transferring heat indoors and outdoors.
Heat pumps are highly efficient in moderate climates but may require a supplemental heating source in colder regions.
They are cost-effective regarding energy consumption and offer consistent comfort throughout the year.
4. Geothermal Heat Pump: Geothermal heat pumps utilize the ground’s stable temperature to provide heating and cooling for your home.
They are highly efficient and environmentally friendly, as they harness renewable energy from the earth. While geothermal systems have higher upfront costs, they offer significant long-term savings on energy bills and reduce greenhouse electric hot water tank vs gas emissions.
They require sufficient space for installation and are best suited for homeowners committed to sustainability.
5. Dual Fuel System: Dual fuel systems combine a heat pump with a furnace, offering flexibility and energy efficiency in varying climates.
They automatically switch between the heat pump and the furnace based on outdoor temperatures, optimizing performance and minimizing energy consumption.
Dual fuel systems are ideal for regions with fluctuating weather conditions, where a heat pump may struggle to maintain efficiency in extreme cold.
They provide reliable heating and cooling year-round, ensuring comfort regardless of the weather.
Conclusion
Regular maintenance is essential for keeping your Heating and air conditioning process system running smoothly.
By understanding the components of your HVAC system and how they work together, you can ensure optimal performance and comfort in your home or workplace.
Whether you need a new system or are looking to maintain an existing one, prioritizing HVAC maintenance will help extend the lifespan of your equipment and save you money in the long run.
Are you tired of cold floors and high heating bills? Underfloor heating might be the solution for you!
This comprehensive guide will explore the workings of underfloor heating, the different types available, and their advantages and disadvantages.
How Does Underfloor Heating Work?
Underfloor heating uses heating elements installed beneath the floor surface to emit heat.
Depending on the type of underfloor heating system, these elements can be electrical cables or water-filled pipes.
When electricity flows through the wires, or warm water moves through the pipes, it heats the floor.
This warmth radiates upwards, heating the room evenly from the ground up.
The heat from underfloor heating systems is distributed more evenly than traditional radiators, creating a comfortable and cozy living space.
Electric or Water Underfloor Heating?
When choosing between Electric or Water Underfloor Heating, it’s crucial to consider cost, efficiency, installation requirements, and compatibility with your home’s heating system.
Electric heating systems use electrical cables or mats installed beneath the floor to generate warmth.
These infloor heating systemsare usually simpler and cheaper to install than water-based ones, so many people prefer them for smaller areas or when renovating.
Electric underfloor heating systems offer a distinct advantage over other heating systems. They can respond quickly to temperature changes and provide individual room control through thermostats.
On the other hand, water-based systems, also known as hydronic systems, rely on a network of water-filled pipes installed beneath the floor.
These pipes are connected to a central heating system, such as Viessmann boilers, which circulates hot water to provide heat.
Despite their higher initial costs and more complex installation processes, water-based systems can be a wise investment in the long run.
Their energy efficiency and cost-effectiveness are significant advantages, especially in larger spaces or new constructions.
Deciding between electric and water-based systems depends on what you need, how much you want to spend, and what you like.
Electric systems may be ideal if you prioritize ease of installation, responsiveness, and individual room control.
However, if energy efficiency, long-term savings, and compatibility with existing heating systems are paramount, water-based systems could be the better option.
Regardless of the chosen type, both systems offer the benefits of even heat distribution, compatibility with various floor finishes such as laminate, and the potential to integrate with renewable energy sources like heat pumps.
Ultimately, it would help if you decided based on thinking carefully about what your home needs for heating.
Electric Underfloor Heating Systems
Electric underfloor heating systems are popular due to their ease of use and effectiveness in various settings.
These systems, which consist of electrical cables or heating mats installed beneath the floor, provide efficient and reliable warmth.
These systems use electrical cables or mats laid evenly beneath the floor finish, such as tiles, laminate, or wood.
When electricity flows through these elements, they generate heat, warming the floor above.
Installation typically requires the expertise of professionals, such as those from maple plumbing and heating, to ensure safety and effectiveness.
They carefully lay out the heating elements according to the floor plan and connect them to a thermostat to control the temperature.
One key advantage of these systems is their compatibility with various floor finishes, making them suitable for different types of flooring, including laminate and wood.
Unlike hydronic systems, electric ones can be easily retrofitted into existing homes without extensive plumbing work.
When combined with Viessmann or Viessman boilers, these solutions can provide efficient and sustainable home heating.
These boilers work seamlessly with the electric setup to ensure optimal performance and energy efficiency.
Electric systems offer a reliable and effective way to warm your home, providing even heat distribution and comfort throughout the space.
Proper installation and maintenance can enhance the ambiance of your living environment while reducing energy consumption and costs.
Electric underfloor heating – How it works:
Electric underfloor heating uses electrical cables or mats installed beneath the floor surface to generate heat.
These heating elements are linked to an electrical power source and managed by an underfloor heating thermostat.
The process begins with installing the heating elements beneath the floor finish, such as tiles, laminate, or wood.
The cables or mats are evenly spaced to ensure uniform heat distribution throughout the room.
Once installed, electricity is supplied to the heating elements, causing them to generate heat.
As electricity passes through the cables or mats, they resist the flow of electrical current, converting electrical energy into heat energy.
This heat is then transferred to the floor surface, warming it up. The warmth radiates upwards, heating the room from the ground level.
An underfloor heating thermostat can control the temperature of the floor and the room, allowing for precise adjustments to suit individual preferences.
Some thermostats even offer programmable features, allowing users to set heating schedules based on their daily routines.
One key advantage of underfloor heating is its responsiveness to temperature changes.
Unlike traditional radiators, which can take time to heat up or cool down, electric underfloor heating systems can quickly adjust to changes in temperature, providing comfortable warmth when needed.
Electric underfloor heating systems are compatible with various floor finishes, making them suitable for almost any flooring material.
They are also relatively easy to install, particularly in retrofit projects or smaller spaces.
Electric underfloor heating is an efficient and effective way to heat your home, providing comfortable warmth and even heat distribution throughout the room.
It allows you to control temperatures precisely and is compatible with various floor finishes, making it a popular choice for modern homes.
Electric underfloor heating installation
Installing electric underfloor heating involves a few essential steps to ensure it works well and is safe.
Here’s a simple overview of what happens during the installation:
1. Planning and Design: Planning and designing everything carefully is essential before installing your underfloor heating system.
Consider factors such as the room’s size, the type of flooring, and any obstacles that may affect the installation process.
Determine the layout of the heating elements to ensure even heat distribution throughout the room.
2. Preparation: Clear the room of any furniture or obstacles to provide access to the floor surface.
Ensure that the subfloor is clean, level, and free of debris. Make any repairs or adjustments to the subfloor before proceeding with installation.
3. Installation of Heating Elements: Depending on the type of electric underfloor heating system chosen, install heating cables or mats according to the manufacturer’s instructions.
Lay the heating elements evenly across the floor surface, maintaining proper spacing between each component to ensure uniform heat distribution.
4. Connection to Power Supply: Once the heating elements are installed, connect them to the electrical power supply.
Follow the manufacturer’s guidelines and local electrical codes to ensure safe and proper wiring.
To avoid any electrical hazards, use a qualified electrician for this step.
5. Testing: Before proceeding with the final flooring installation, test the electric underfloor heating system to ensure it functions correctly.
Check for any defects or malfunctions and address them promptly.
6. Flooring Installation: Once the heating system has been tested and confirmed working, install the final flooring material.
This can include tiles, laminate, wood, or other suitable flooring options. Follow the manufacturer’s installation guidelines to ensure compatibility with the underfloor heating system.
7. Thermostat Installation: Conveniently install the underfloor heating thermostat within the room.
This device allows for temperature control and heating scheduled programming.
Follow the manufacturer’s instructions for installation and programming.
8. Final Checks: After finishing the installation, double-check everything to ensure everything works correctly.
Test the thermostat and heating system to verify proper operation. Make any necessary adjustments or repairs.
Benefits of using underfloor heating with heat pumps
Pairing underfloor heating with heat pumps offers several benefits, enhancing efficiency and sustainability while providing optimal home comfort.
1. Energy Efficiency: Heat pumps are super-efficient heaters using renewable energy from the ground or air to warm your home.
Combined with underfloor heating, they maximize energy efficiency by harnessing natural resources, reducing reliance on fossil fuels, and lowering carbon emissions.
2. Cost Savings: Underfloor heating with heat pumps can significantly reduce energy consumption and lower heating costs compared to traditional heating methods by utilizing renewable energy sources.
Heat pumps operate efficiently, converting a small amount of energy into a large amount of heat, resulting in lower utility bills over time.
3. Even Heat Distribution: Underfloor heating systems distribute heat evenly throughout the room, eliminating cold spots and ensuring consistent warmth from floor to ceiling.
This even heat distribution is enhanced when paired with heat pumps, providing a comfortable living environment without bulky radiators or forced-air systems.
4. Compatibility with Renewable Energy: Underfloor heating with heat pumps is compatible with renewable energy sources, making it an environmentally friendly heating solution.
This synergy aligns with sustainable living practices and reduces your home’s carbon footprint.
5. Year-Round Comfort: Underfloor heating with heat pumps provides efficient heating during the colder months and offers cooling capabilities during the summer.
Heat pumps can operate in reverse during warmer weather, extracting heat from your home and transferring it outside, keeping your living space comfortable year-round.
6. Quiet Operation: Heat pumps operate quietly compared to traditional heating systems, providing a peaceful and comfortable environment for your home.
This silent operation enhances your living space’s comfort and enjoyment without disruptive noise from heating equipment.
7. Long-Term Investment: Investing in underfloor heating with heat pumps is a long-term investment in your home’s comfort and energy efficiency.
With the proper setup and upkeep, these systems can provide dependable heating and cooling for a long time.
Pairing underfloor heating with heat pumps offers numerous benefits, including energy efficiency, cost savings, heat distribution, compatibility with renewable energy, year-round comfort, quiet operation, and long-term investment value.
This setup offers a green and cozy heating option for today’s houses by using renewable energy and improving heating technology.
Disadvantages of Underfloor Heating
While underfloor heating has many benefits, it’s essential to think about some possible downsides before putting it in your home:
1. Installation Costs: Installing underfloor heating might cost more than setting up traditional heating systems.
This is especially true for water-based underfloor heating, which may require extensive plumbing work and professional installation.
2. Retrofitting Challenges: Retrofitting underfloor heating into existing buildings can be challenging and costly.
It often involves lifting and replacing flooring, disrupting your living space, and adding to the project’s overall expense.
3. Flooring Constraints: Certain flooring materials may not be suitable for use with underfloor heating.
For example, thick carpets or materials with poor heat conductivity may inhibit heat transfer from the underfloor heating system, reducing its effectiveness.
4. Warm-Up Time: Underfloor heating systems typically take longer to warm up than traditional radiators or forced-air systems.
This means that it may take longer for the room to reach the desired temperature after the heating system is turned on.
5. Maintenance Requirements: While underfloor heating systems generally require less maintenance than traditional heating systems, they can still be prone to leaks or electrical faults.
Regular maintenance checks are essential to ensure the system keeps working well.
6. Limited Zoning Control: Zoning control allows you to independently adjust the temperature of individual rooms or areas of your home.
While underfloor heating systems can be zoned, the level of control may be more limited compared to traditional heating systems with separate radiators or thermostats for each room.
7. Incompatibility with Certain Flooring Types: Some flooring materials, such as certain types of hardwood or laminate, may not be compatible with underfloor heating due to concerns about expansion and contraction.
It’s essential to consult with an expert installer to determine the suitability of your chosen flooring material.
8. Potential for Overheating: Improper installation or usage of underfloor heating systems can lead to overheating, which may damage the flooring or other components of the system.
Following manufacturer guidelines and seeking professional installation is crucial to prevent such issues.
While these disadvantages are worth considering, many homeowners find that the benefits of underfloor heating outweigh the potential drawbacks.
Conclusion
Whether electric or water-based, underfloor heating systems offer a modern and efficient solution for keeping your home warm and cozy.
Underfloor heating distributes heat evenly throughout the space, creating a comfortable environment for you and your family.
However, consulting with professionals like Life Mechanical is crucial to ensure proper installation and compatibility with your chosen flooring material.
With their expertise and knowledge, you can rest assured that your underfloor heating system will provide optimal performance and comfort for years.
Trust Life Mechanical for all your heating needs and transform your living space into a haven of warmth and relaxation.