Common Heater Issues: Top Problems and How to Fix Them

Most common heater issues, Common heater issues in winter, Common heater issues in house, Heating problems in house, Common heater issues hvac, Reasons for central heating not working, Heater problems, Troubleshooting central heating,

As winter approaches, maintaining a warm and comfortable home becomes a top priority. Unfortunately, even the most reliable heating systems can experience problems, often at the most inconvenient times. Understanding how to troubleshoot common heater issues can save you time, money, and discomfort during the coldest months of the year.

In this comprehensive guide, we’ll explore some of the most common heater issues you may encounter, particularly during winter. Whether you’re dealing with a furnace that won’t ignite or a thermostat that’s not responding, this guide will help you identify and resolve these problems efficiently.

How to Use This Guide

Most common heater issues,
Common heater issues in winter,
Common heater issues in house,
Heating problems in house,
Common heater issues hvac,
Reasons for central heating not working,
Heater problems,
Troubleshooting central heating,

This guide is organized to help you quickly identify and address common heater issues. We will begin by outlining 20 common heater issues in winter, followed by step-by-step troubleshooting tips for each problem. Each section will provide practical advice to help you resolve the issue or determine if it’s time to call a professional.

20 Common Winter Heating System Issues

Most common heater issues,
Common heater issues in winter,
Common heater issues in house,
Heating problems in house,
Common heater issues hvac,
Reasons for central heating not working,
Heater problems,
Troubleshooting central heating,

Understanding the various heating problems in a house can be overwhelming, especially when you’re unsure what’s causing the issue. Below, we’ll discuss 20 common heater issues HVAC systems might face, particularly during the colder months.

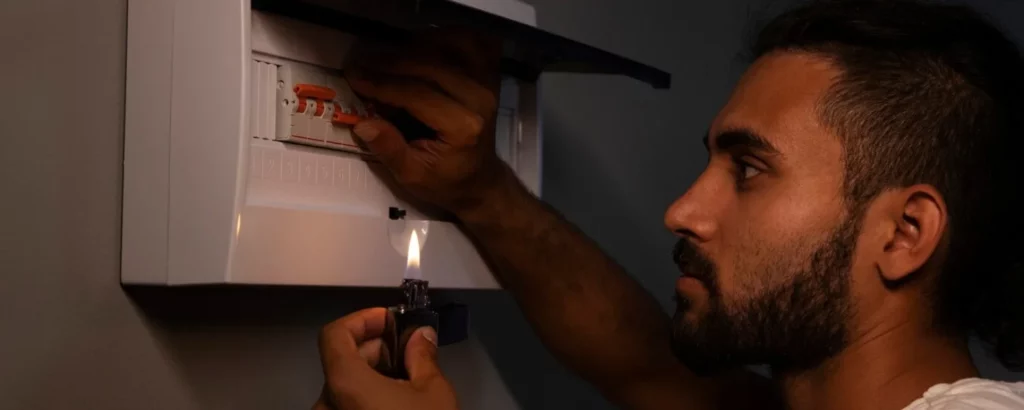
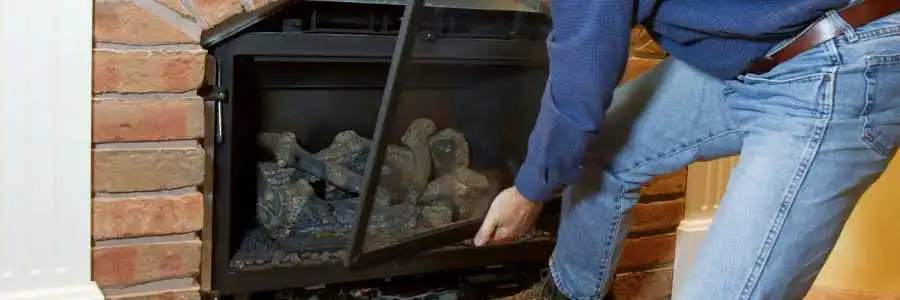
1. Heating System Won’t Switch On

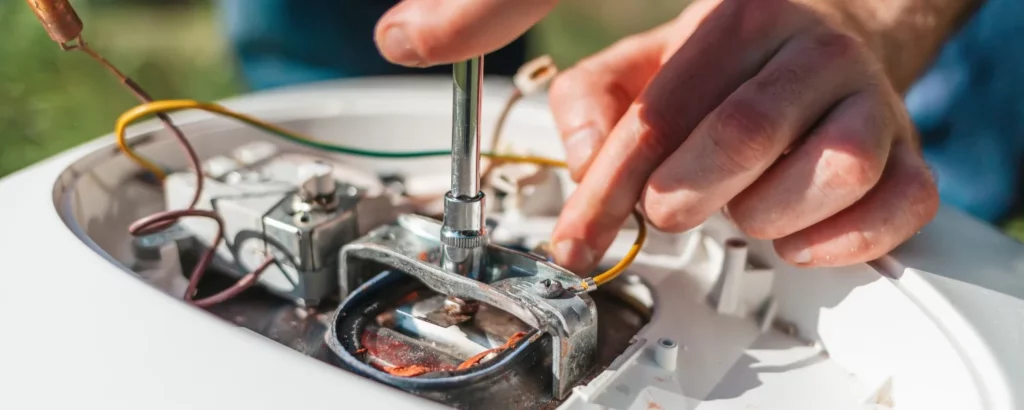
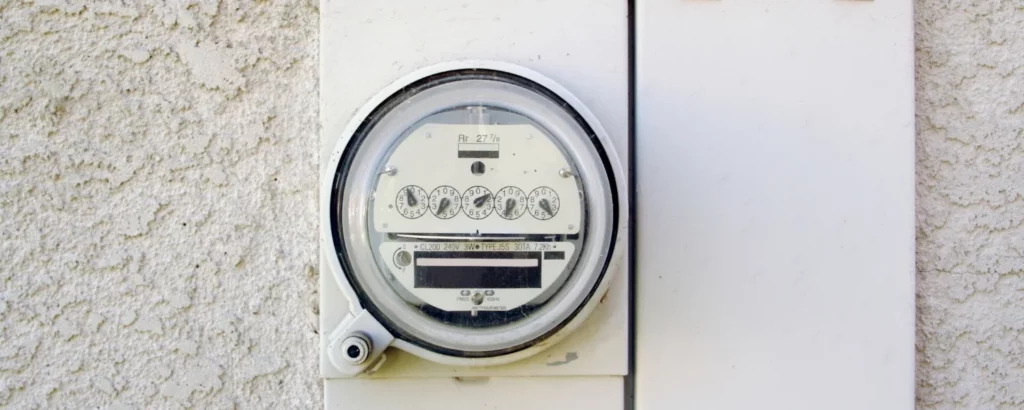
One of the most frustrating heater problems is when your heating system simply won’t turn on. This issue could be due to several factors, such as a power outage, a tripped circuit breaker, or a malfunctioning thermostat. Start by checking if your system is receiving power. If everything seems fine, your thermostat may need to be reset or replaced.

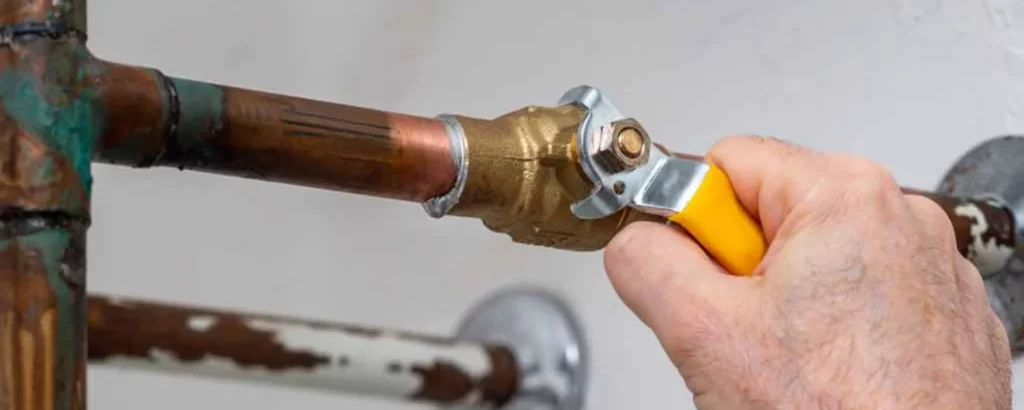
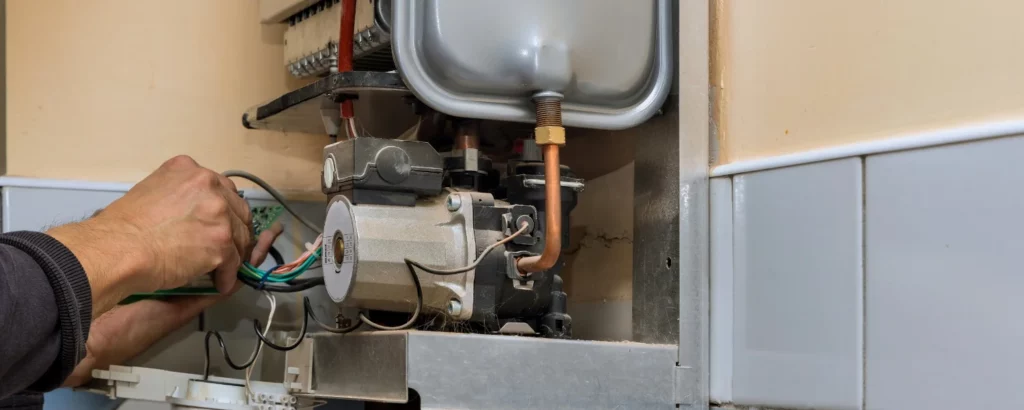
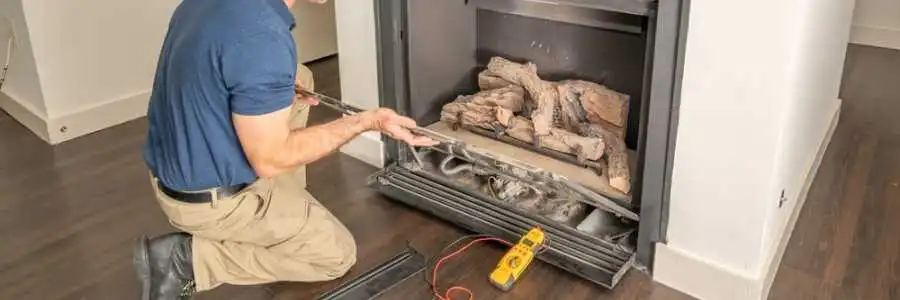
2. Furnace Does Not Ignite

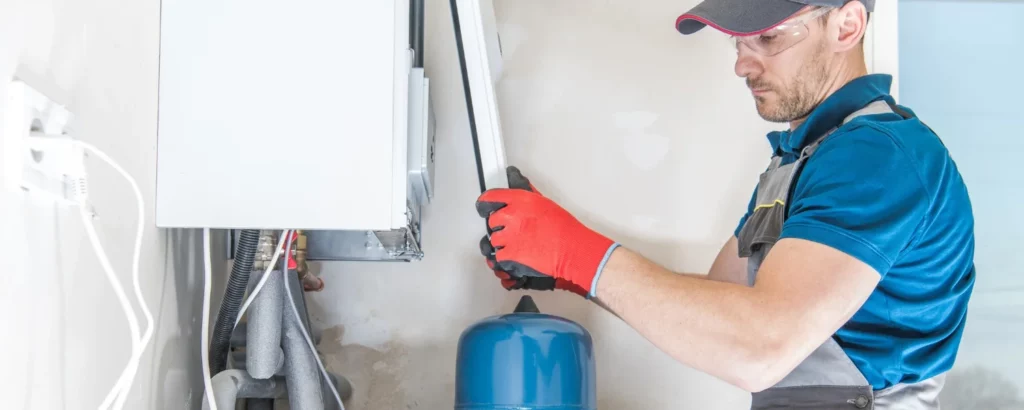
If your furnace isn’t igniting, your home will remain cold despite the system being on. This can be due to a faulty ignition switch, a dirty burner, or a problem with the gas supply. If you suspect the issue lies with the gas supply, it’s best to contact a professional to avoid potential hazards.

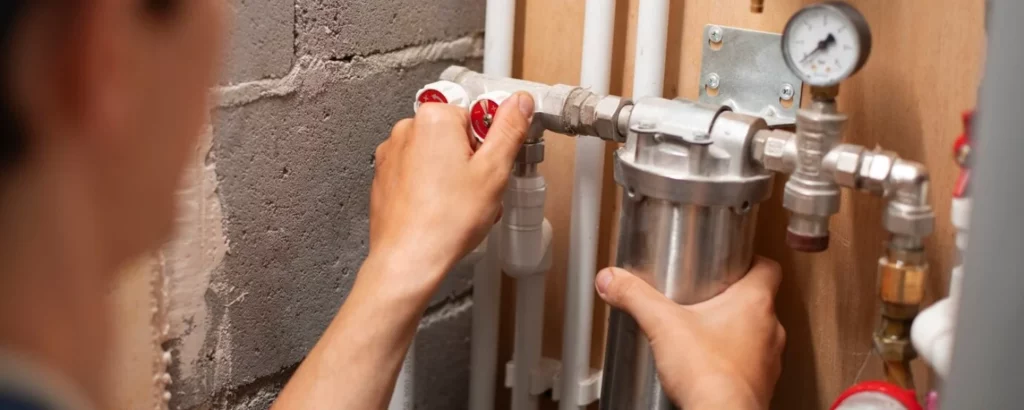
3. Low or No Airflow from Vents

Troubleshooting central heating often involves dealing with low or no airflow from vents. This issue can result from blocked vents, a dirty air filter, or problems with the blower motor. Check for blockages first, and if the problem persists, it may be necessary to clean or replace the air filter.

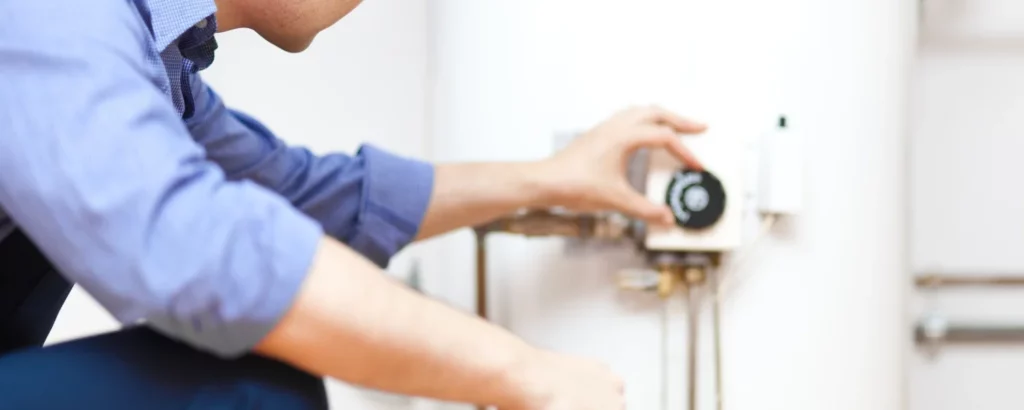
4. Adjusting Your Thermostat Doesn’t Do Anything

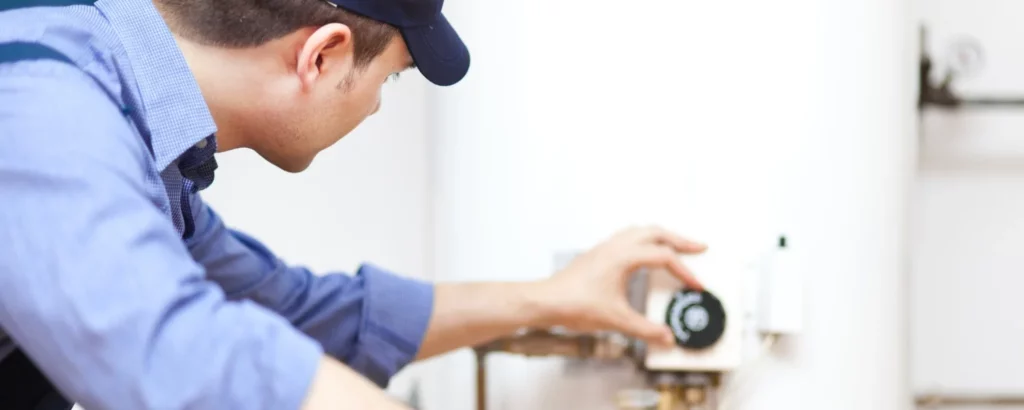
When adjusting your thermostat does not affect the temperature, it could be a sign of a malfunctioning thermostat or wiring issues. Start by ensuring that the thermostat is set correctly and has working batteries. If the problem continues, you might need to replace the thermostat or check the wiring.

5. Cool Air Blows from Vents When the Furnace Operates

One of the reasons for central heating not working effectively is when cool air blows from the vents. This can happen if the furnace isn’t heating properly, which might be due to an issue with the pilot light, gas supply, or heat exchanger. You may need to inspect these components or call a professional for a more in-depth analysis.

6. Air Filter Clogs Quickly

A rapidly clogging air filter can lead to several heating problems in a house, including reduced airflow and efficiency. If you find that your air filter needs frequent replacing, it could be due to excessive dust or debris in your home, or it may indicate a more serious issue with the furnace or ductwork.

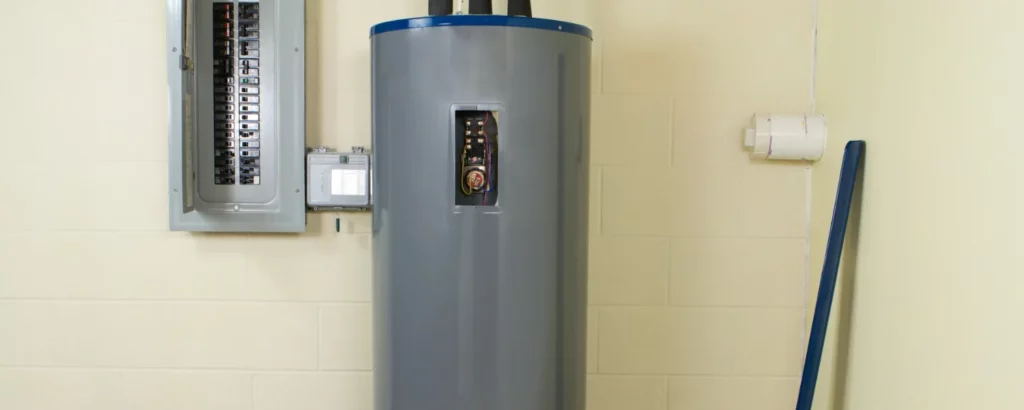
7. Thermostat Not Turning on or Appears Blank

A blank thermostat screen can be alarming, especially when you’re dealing with common heater issues. This problem could stem from dead batteries, a tripped circuit breaker, or a blown fuse. Try replacing the batteries first. If that doesn’t work, check your electrical panel to ensure the thermostat is receiving power.

8. Furnace Creating a Burning Smell

A burning smell coming from your furnace can indicate several heater problems, such as a dirty air filter, dust on the heat exchanger, or even electrical issues. If the smell persists after changing the filter, it’s crucial to have your furnace inspected by a professional to prevent any potential fire hazards.

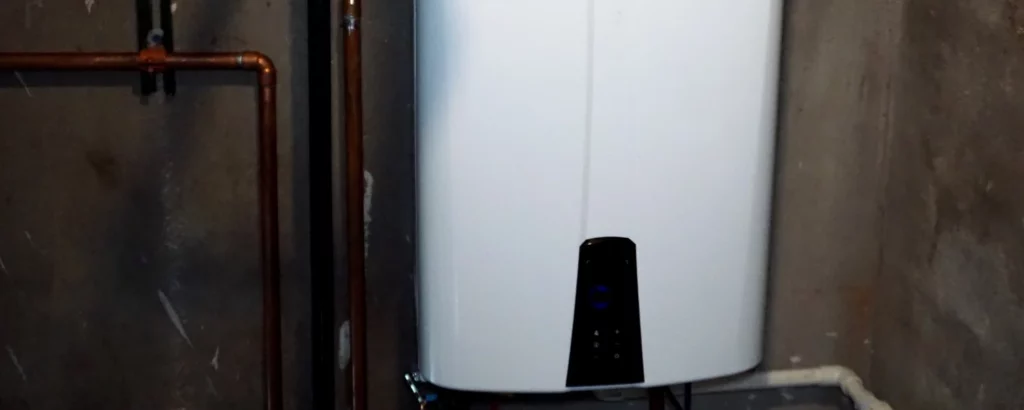
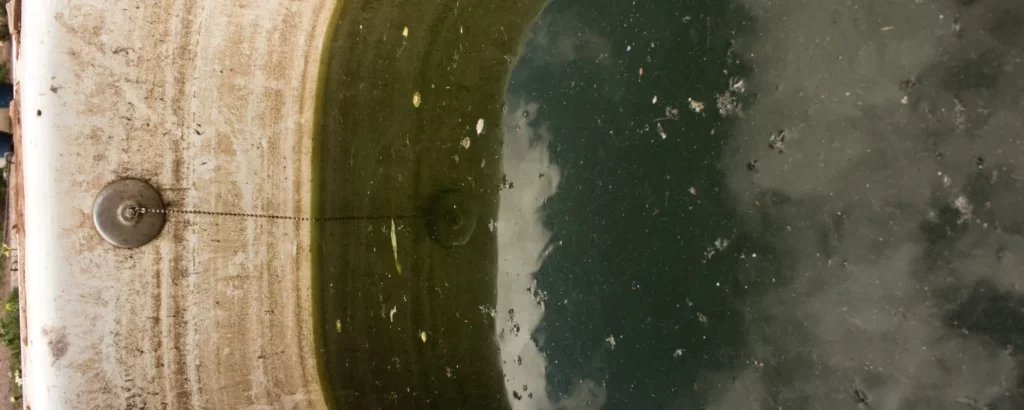
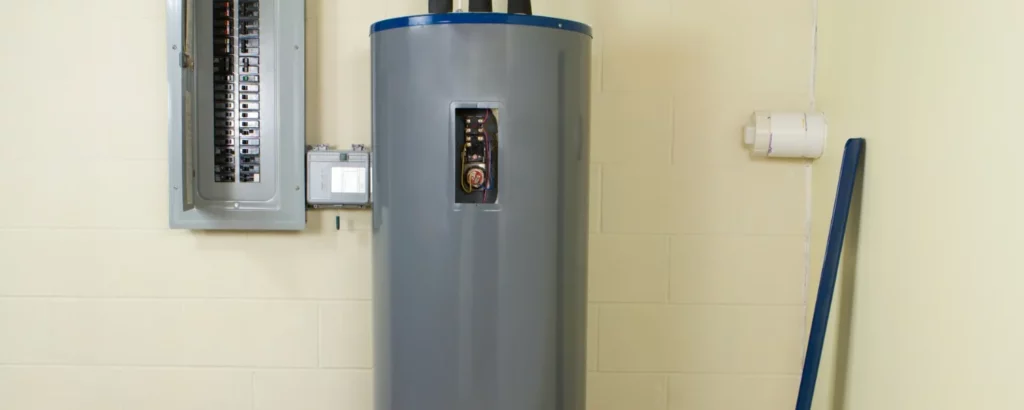
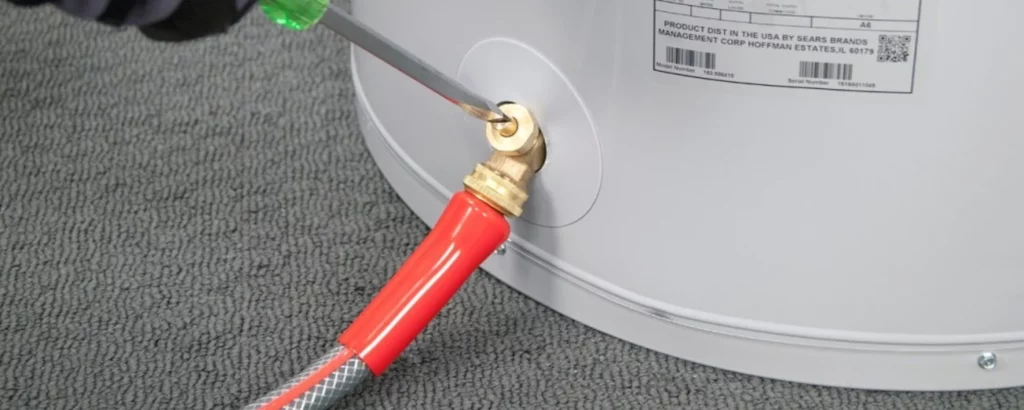
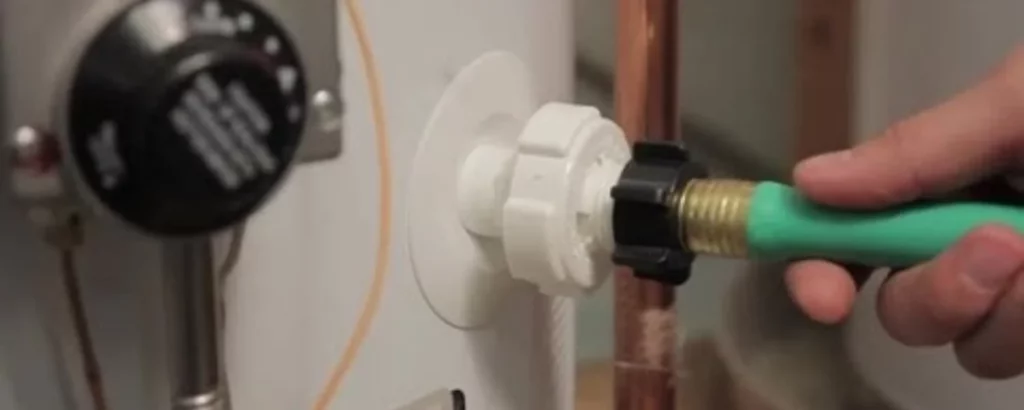
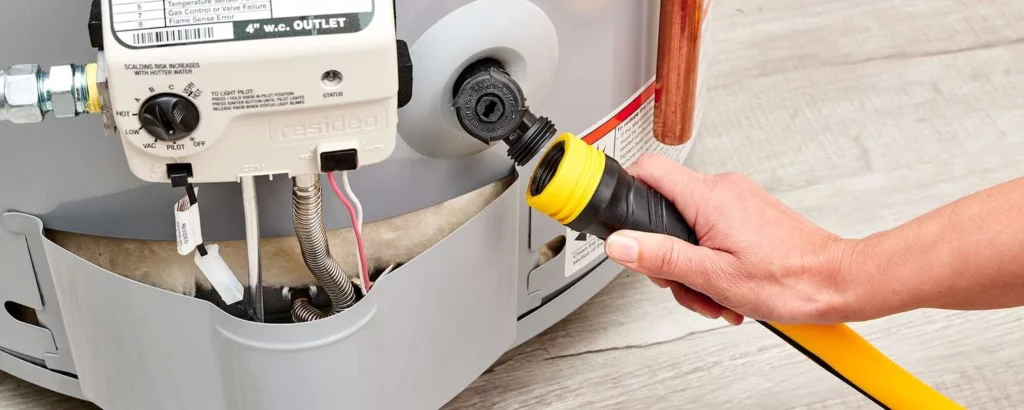
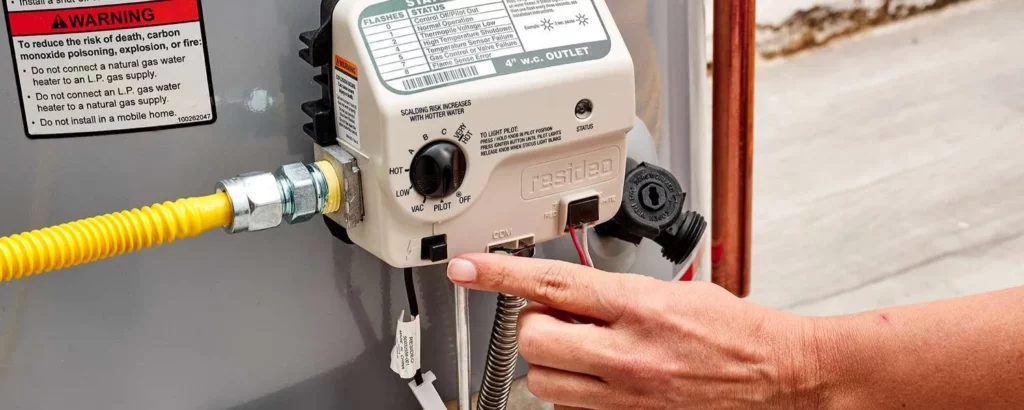
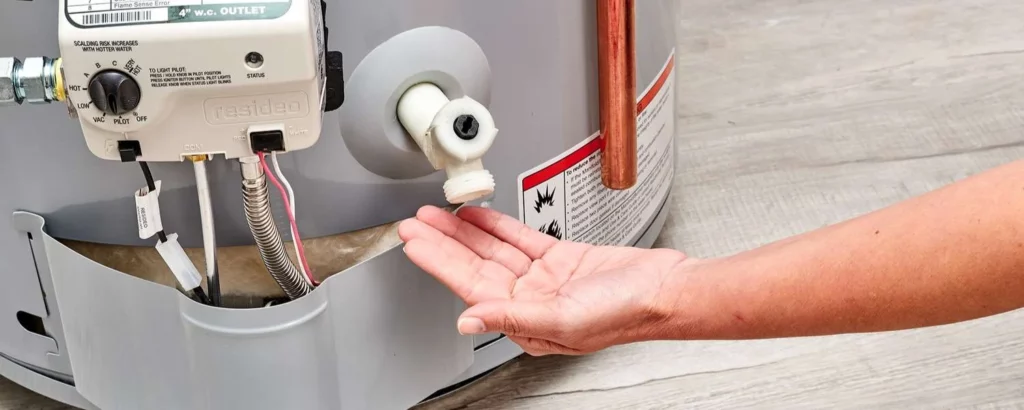
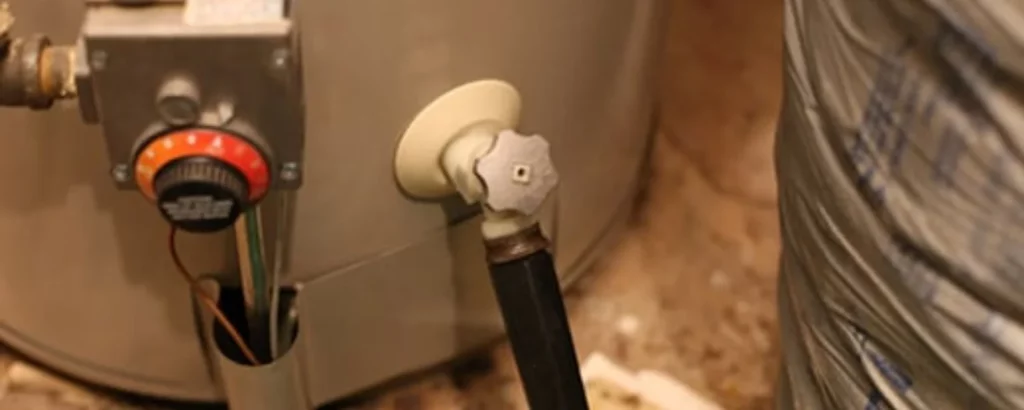
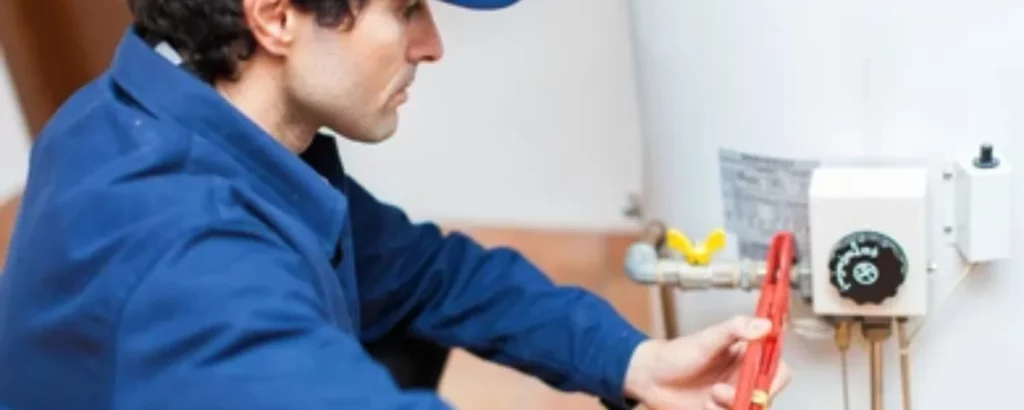
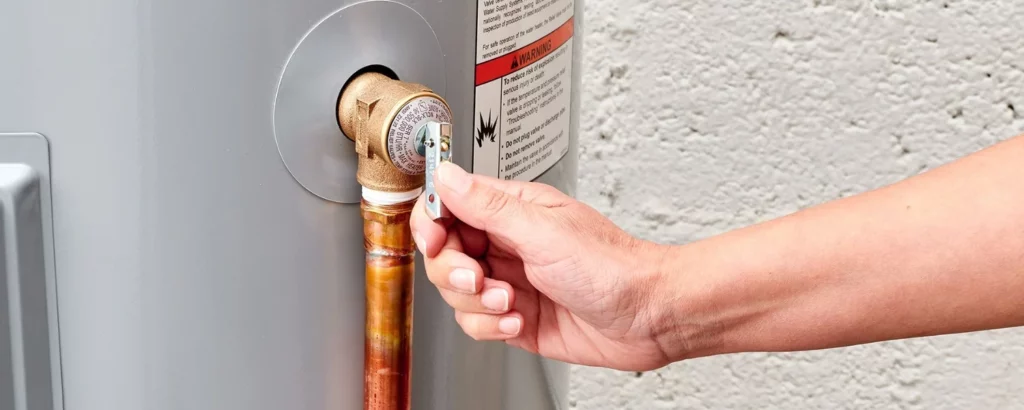
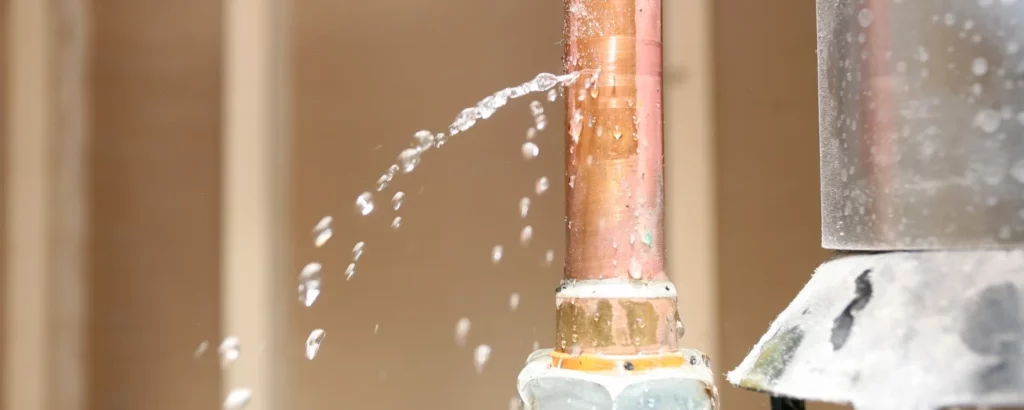
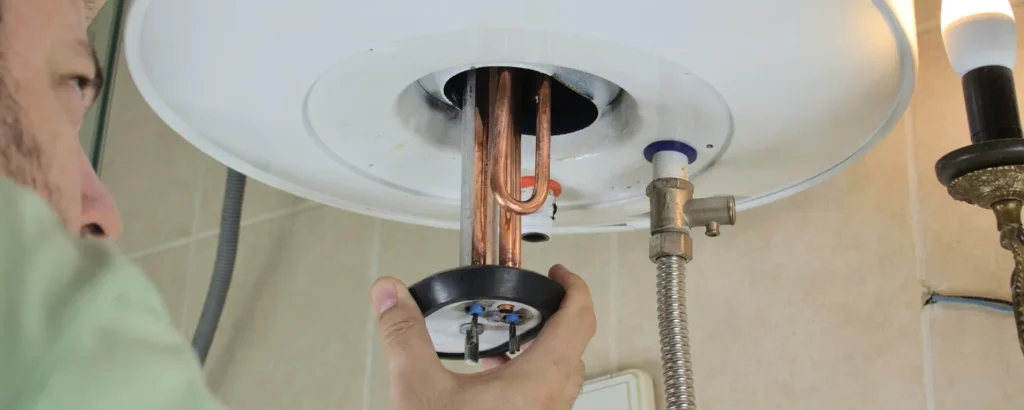
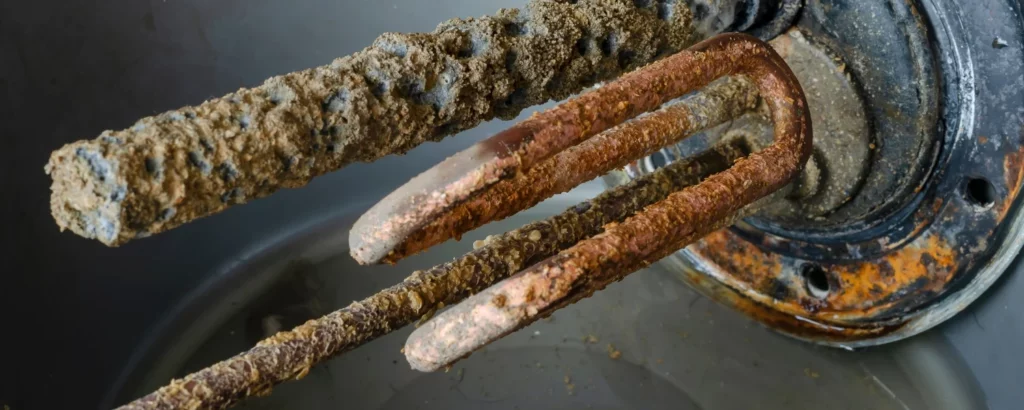
9. Water Pooling Around Heating Equipment

Water pooling around your heating system is a sign that something is wrong. This could be due to a clogged condensate line, a malfunctioning humidifier, a leak in the heat exchanger, or a need for water heater repair. Since water damage can lead to further complications, it’s essential to address this issue as soon as possible.

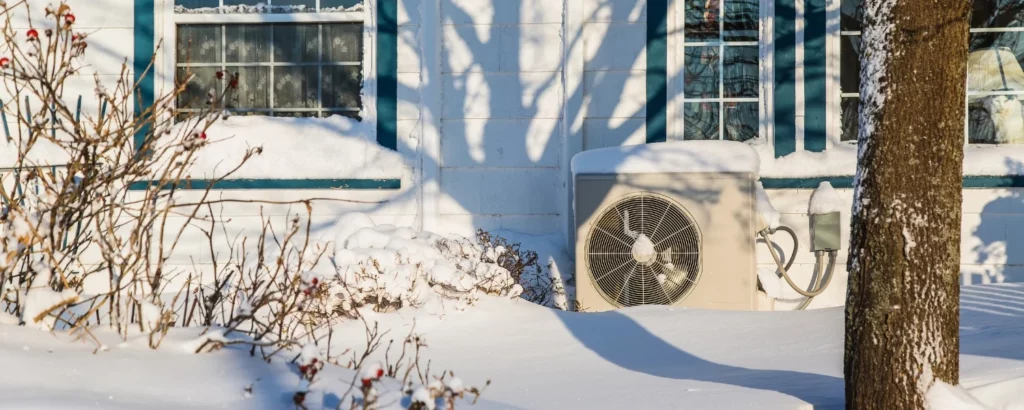
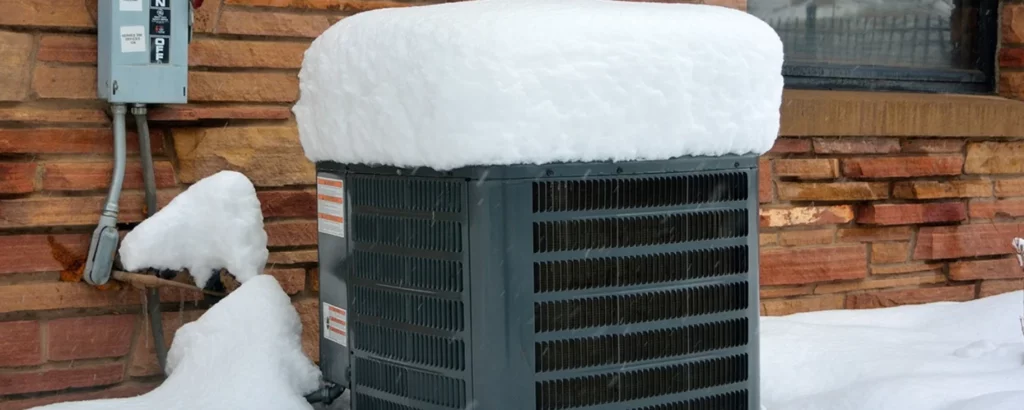
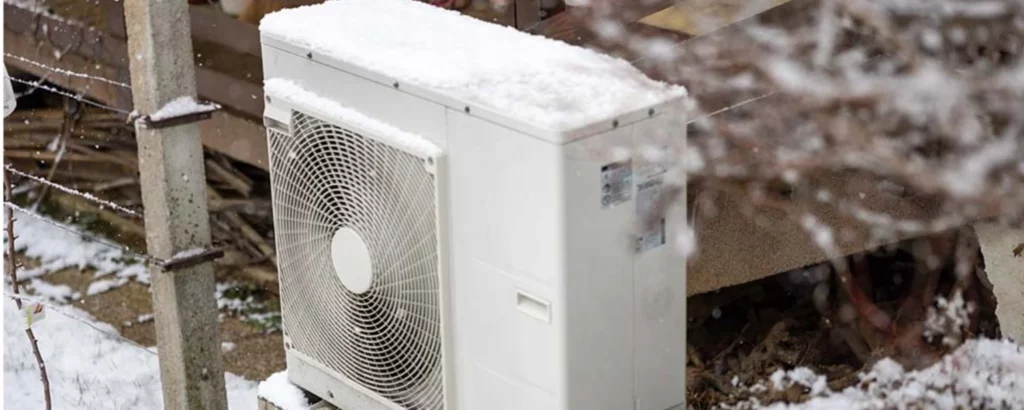
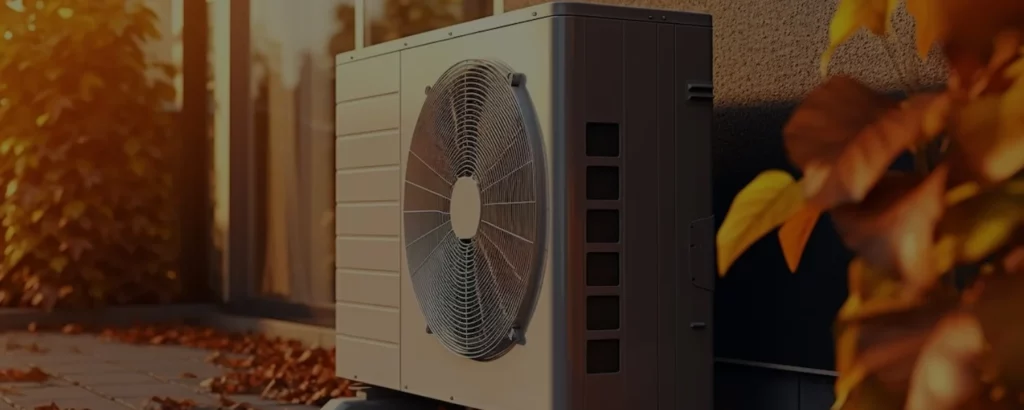
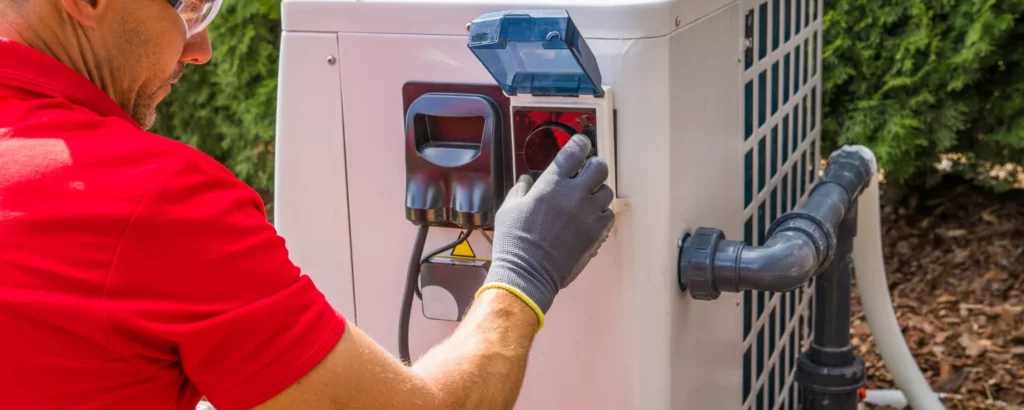
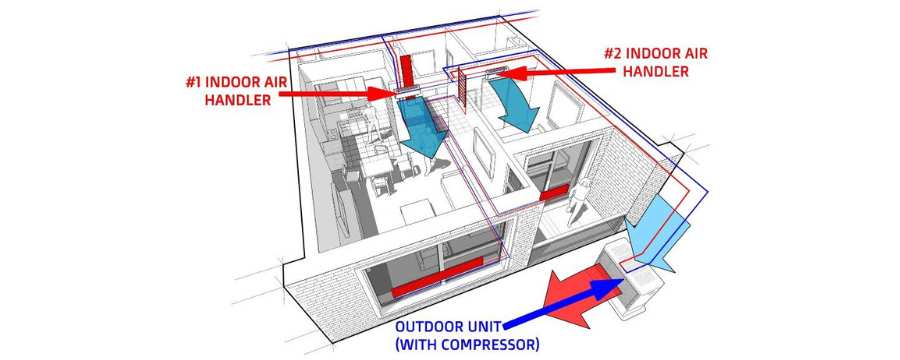
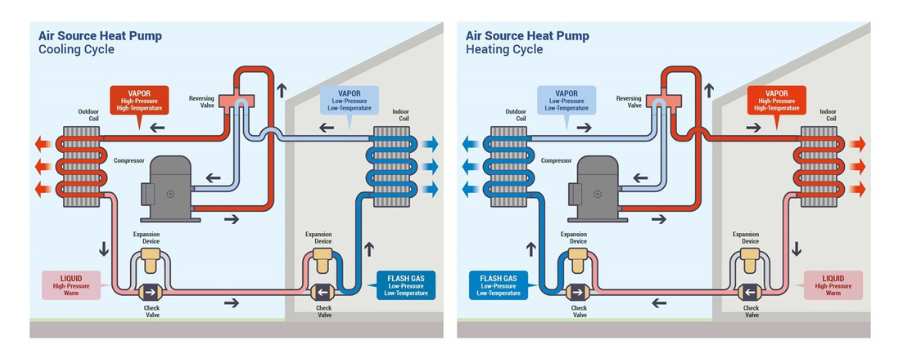
10. Heat Pump Not Warming Your Home

Heat pumps are efficient, but they can sometimes fail to warm your home adequately. This problem might be due to low refrigerant levels, a frozen outdoor unit, or a malfunctioning compressor. Checking the outdoor unit for ice buildup and ensuring proper airflow can help resolve this issue.

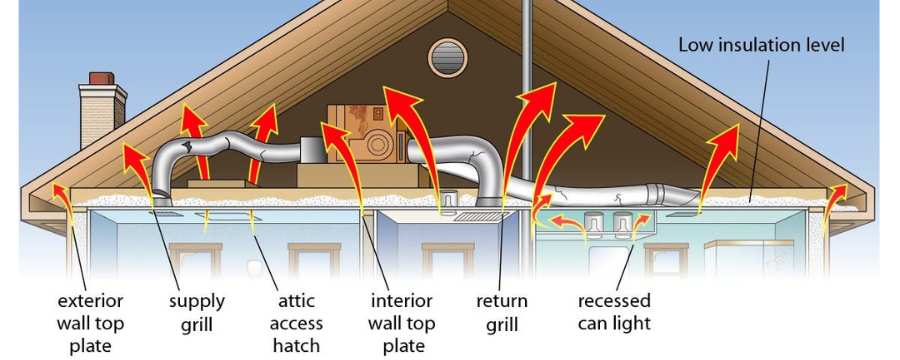
11. Your Home Has Lots of Cold Spots

Experiencing cold spots in your home is one of the common heater issues in a house. This issue can arise from poor insulation, blocked vents, or an improperly sized heating system. Ensuring that all vents are open and unblocked and that your insulation is up to standard can help eliminate cold spots.

12. Heating System Short Cycles

When your heating system turns on and off frequently, it’s known as short cycling. This can be caused by an overheating furnace, a malfunctioning thermostat, or a blocked air filter. Short cycling not only makes your home less comfortable but can also lead to increased wear and tear on your system.

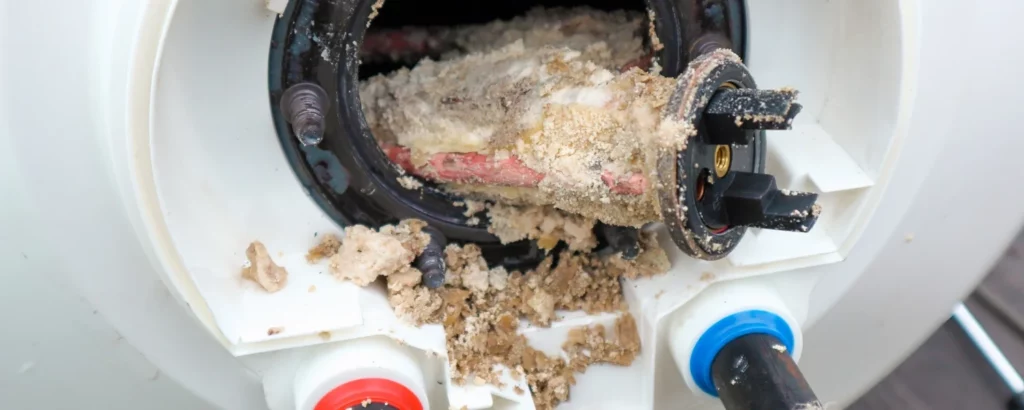
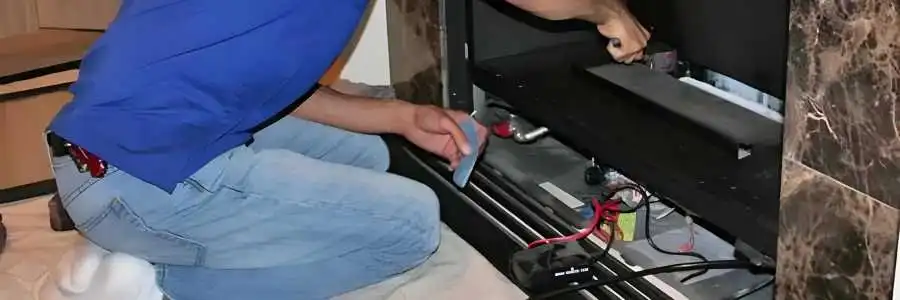
13. Furnace or Air Handler Interior Visibly Dirty

A dirty furnace or air handler interior can reduce efficiency and lead to various common heater issues HVAC systems experience. Regular maintenance, such as cleaning the components and replacing the air filter, can help keep your system running smoothly.

14. Excess Humidity in Your Home

Excess humidity can cause discomfort and contribute to heating problems in a house. If your home feels damp or the windows are frequently foggy, your heating system might not be removing enough moisture from the air. This could be due to a malfunctioning humidifier or poor ventilation.

15. Your Heating Bills Are High

A sudden spike in your heating bills is often a sign of common heater issues. This could be due to a dirty air filter, a malfunctioning thermostat, or poor insulation. Identifying and addressing the root cause can help you reduce energy consumption and save money.

16. Carbon Monoxide Detectors Sound Frequently

If your carbon monoxide detectors are sounding frequently, it’s a serious issue that needs immediate attention. Carbon monoxide is a dangerous gas that can be produced by a malfunctioning furnace or blocked chimney. If you suspect a carbon monoxide leak, evacuate your home and contact emergency services immediately. For your safety, it’s essential to schedule furnace repair and service to ensure your system is functioning properly and to prevent future issues.

17. Noisy Heating System

Unusual noises coming from your heating system, such as banging, rattling, or squealing, can indicate various heater problems. These noises may be caused by loose components, a failing blower motor, or debris in the ductwork. It’s essential to address these noises promptly to prevent further damage.

18. Furnace Needs More Repairs Than Normal

If you find yourself calling for repairs more often than usual, it may be a sign that your furnace is nearing the end of its lifespan. Frequent repairs can become costly, and it may be more economical to invest in a new heating system.

19. Furnace Stays On

A furnace that stays on continuously can lead to overheating and increased energy costs. This problem might be due to a malfunctioning thermostat, a stuck relay, or a blocked air filter. Resolving this issue quickly is important to avoid further damage to your system.

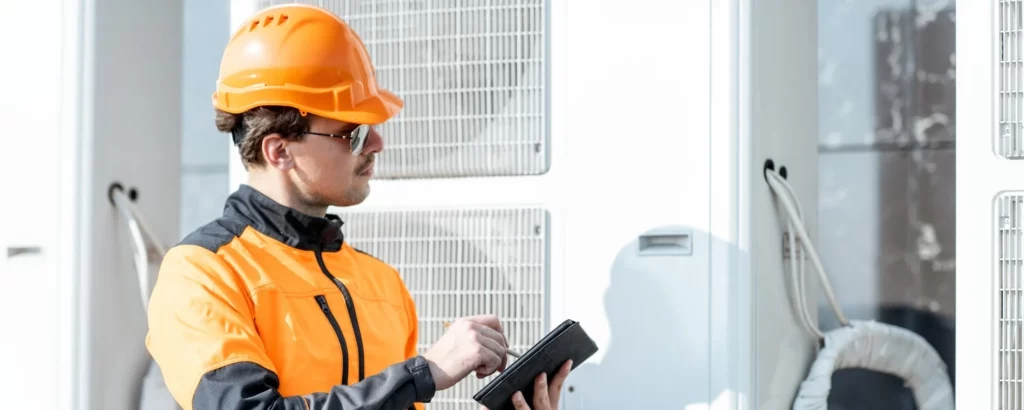
20. Thermostat Displays a Service Message

Some modern thermostats will display a service message when there’s an issue with your heating system. This message could indicate various problems, from a dirty air filter to more serious mechanical issues. It’s crucial to address any service messages promptly to ensure your heating system continues to function properly.

Conclusion

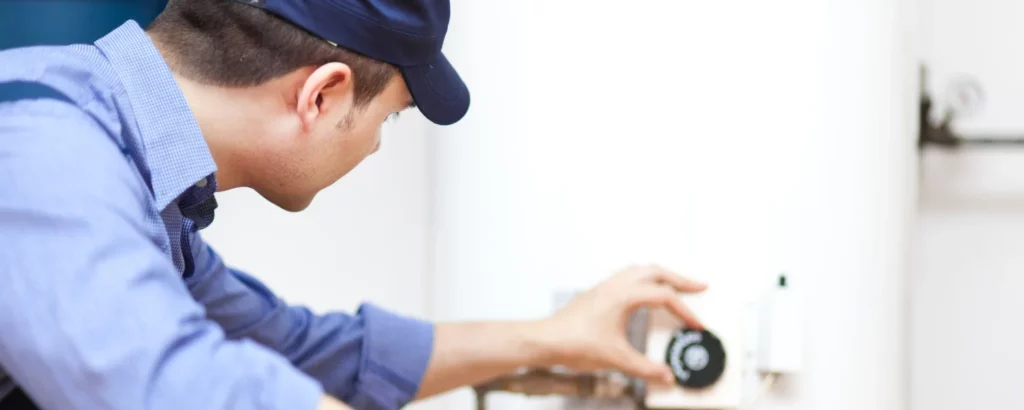
Dealing with common heater issues, including tankless water heater service, can be challenging, especially during the winter months when your heating system is most needed. However, understanding these common heater issues in winter and knowing how to troubleshoot them can help you maintain a warm and comfortable home. By addressing heating problems in a house as soon as they arise, you can prevent minor issues from becoming major, costly repairs.

Remember, while this guide provides comprehensive troubleshooting tips, some problems may require professional assistance. If you’re ever in doubt or dealing with a serious issue like a carbon monoxide leak, don’t hesitate to contact a qualified HVAC technician. Your safety and comfort are paramount, and taking prompt action can ensure your heating system operates efficiently throughout the winter.

Life Mechanical offers expert solutions for common heater issues, ensuring your heating system operates efficiently during winter. From diagnosing problems like low airflow or thermostat malfunctions to providing timely repairs and maintenance, their skilled technicians help you stay warm and comfortable, preventing costly breakdowns and enhancing your system’s performance.

Heating and Air Conditioning Maintenance Keeping Your System Running Smoothly

Heating and Air Conditioning

Heating and air conditioning (HVAC) systems are crucial in maintaining comfort within our homes and workplaces.

But have you ever wondered what exactly HVAC means? HVAC stands for Heating, Ventilation, and Air Conditioning.

Its system keeps your indoor environment comfortable by regulating temperature, humidity, and air quality.

What Does HVAC Mean?

HVAC stands for Heating, Ventilation, and Air Conditioning. It’s a system that regulates temperature, humidity, and air quality to keep indoor environments comfortable.

Whether it’s keeping your home warm in the winter or excellent in the summer, types of HVAC systems play a crucial role in maintaining comfort and health.

Components of an HVAC System

An emergency HVAC system is made up of several components, each serving a specific function:

1. Air Conditioner: An air conditioner is a vital component of an HVAC system, especially in warmer climates.

It removes heat from indoor air and transfers it outside, effectively cooling the indoor environment.

Using a refrigeration cycle, the heating and air service conditioner cools the air by passing it over coils filled with refrigerant, thus creating a comfortable atmosphere indoors.

Regular air conditioner maintenance, including cleaning the coils and checking refrigerant levels, is essential to ensure optimal performance and energy efficiency.

2. Heat Pump: A heat pump is versatile and has heating and cooling capabilities.

It works by extracting heat from the outside air (even in colder temperatures) and transferring it indoors during winter while reversing the process to cool indoor spaces during summer.

Heat pump air conditioners offer energy-efficient heating and air conditioning service solutions, making them suitable for moderate climates.

However, proper sizing and installation are crucial to ensure maximum efficiency and performance.

3. Furnace: The furnace is responsible for heating the air in an HVAC system.

It burns fuel such as natural gas wall furnace, oil, or propane to generate heat distributed throughout the home via ductwork.

Furnaces are commonly used in colder climates where heating is a primary concern.

Regular maintenance, including cleaning or replacing air filters and inspecting the ignition system, is essential for ensuring the furnace operates safely and efficiently.

4. Air Handler: The air handler is a crucial component that circulates conditioned air throughout the home.

It includes a blower fan and an evaporator coil, which distribute heated or cooled air through the ductwork system.

The air handler is typically indoors in a utility closet, attic, or basement. Proper air handler maintenance, such as cleaning or replacing filters and lubricating moving parts, helps ensure efficient operation and optimal indoor air quality.

5. Ductwork: Ductwork is the network of tubes or channels that distribute air throughout the home.

It carries heated or cooled air from the furnace, heat pump, or air conditioner to different rooms, ensuring even temperature distribution and comfort.

Adequately designed and sealed ductwork is essential for maximizing HVAC system efficiency and minimizing energy loss.

By regularly inspecting and cleaning your ductwork, you safeguard against leaks and blockages and ensure healthier indoor air quality, providing lasting comfort.

6. Thermostat: The thermostat serves as the control center of the HVAC system, allowing users to set and regulate the indoor temperature.

Modern thermostats often come with programmable features, allowing for energy-efficient temperature adjustments throughout the day.

Some thermostats also offer remote access and smart technology capabilities, enabling users to control their HVAC technician system from anywhere using a smartphone or other devices.

Proper programming and calibration of the thermostat are essential for ensuring accurate temperature control and maximizing energy savings.

Regular maintenance, such as replacing batteries and cleaning the thermostat, can help prevent malfunctions and ensure reliable operation.

For homes with infloor heating systems, additional considerations may apply to ensure compatibility and optimal performance within the HVAC system.

How Does an HVAC System Work?

1. Air Intake: The HVAC system begins by drawing air from either the outside environment or recirculating indoor air.

This intake process is crucial as it determines the quality of air that will be conditioned and distributed throughout the building.

Outdoor air may contain pollutants, allergens, or other contaminants that must be filtered to maintain clean indoor air quality.

On the other hand, recirculating indoor air allows the reuse of already conditioned air, which can be more energy-efficient but may require proper filtration to remove any accumulated pollutants or particles.

2. Ventilation: Once the air is drawn into the HVAC system, it undergoes a ventilation process where it is filtered and purified.

Ventilation removes contaminants such as dust, pollen, mold spores, and other airborne particles, ensuring indoor air quality remains clean and healthy.

Filters within the system capture these pollutants, preventing them from circulating back into the living spaces.

Proper ventilation is essential for maintaining comfort, promoting respiratory health, and reducing the risk of allergies and respiratory illnesses caused by poor indoor air quality.

3. Heating or Cooling: Depending on the desired indoor temperature, the HVAC system activates heating or cooling components to adjust the air temperature accordingly.

In colder weather, the heating system generates heat to warm the air, typically a furnace or heat pump. Furnaces use combustion of fuel sources like natural gas, oil, or propane, while heat pumps extract heat from the outdoor air and transfer it indoors.

Conversely, during hotter months, the cooling system, usually an air conditioner or heat pump, removes heat from indoor air, cooling it down before circulating it back into the living spaces.

This heating or cooling process is essential for maintaining comfort and regulating indoor temperature throughout the year.

4. Air Distribution: Once conditioned, the air is distributed throughout the building via a network of ductwork.

The air handler, an HVAC system working principle component, is crucial in circulating the conditioned air through the ducts to reach different rooms and areas within the building.

The air handler contains a blower fan, which forces the air through the ductwork, and an evaporator coil, which helps cool or heat the air as needed.

Proper air distribution ensures that every part of the building receives adequate heating or cooling, maintaining consistent comfort levels throughout the indoor spaces.

5. Temperature Regulation: The thermostat serves as the control center of the HVAC system, allowing users to set and regulate the indoor temperature according to their preferences.

Modern thermostats often feature programmable settings, enabling users to schedule temperature adjustments throughout the day for energy efficiency and convenience.

The thermostat accurately senses the indoor temperature and activates the heating or cooling components as needed, helping maintain a comfortable and consistent temperature level within the building.

Proper temperature regulation enhances comfort and contributes to energy savings by avoiding unnecessary heating or cooling when it’s superfluous, ultimately reducing utility costs and environmental impact.

6. Humidity Control: In addition to regulating temperature, HVAC systems help control indoor humidity levels for optimal comfort and health.

In humid climates, the system removes excess moisture from the air through condensation or dehumidification, preventing mold growth, musty odors, and discomfort.

Conversely, in dry climates or during winter, when indoor air tends to be dry, the HVAC system may add moisture to the air through humidification, preventing issues like dry skin, static electricity, and respiratory irritation.

By maintaining balanced humidity levels, the HVAC system creates a more comfortable and healthy indoor environment for occupants throughout the year.

Some HVAC systems may integrate with gas hot water tanks to efficiently provide heating and domestic hot water needs.

What HVAC System Is Right for Me?

Choosing the right HVAC system depends on your home’s size and layout, climate, and budget. Some standard HVAC systems include:

1. Central Air Conditioning: Central air conditioning systems are suitable for larger homes where consistent cooling throughout the house is necessary.

These systems use ductwork to distribute cooled air efficiently to every room.

They offer excellent cooling performance and can be integrated with heating systems for year-round comfort. However, installation can be more complex and costly, especially if ductwork needs to be installed or upgraded.

2. Ductless Mini-Split: Ductless mini-split systems are ideal for smaller spaces or homes without existing ductwork.

They consist of an outdoor compressor unit and one or more indoor air-handling units connected by refrigerant lines.

These systems offer targeted heating and cooling, allowing you to set different temperatures for individual rooms or zones.

They are energy-efficient, easy to install, and provide flexibility in room-by-room temperature control.

3. Heat Pump System: Heat pump systems are versatile options providing heating and cooling capabilities in one unit.

Depending on the season, they work by transferring heat indoors and outdoors.

Heat pumps are highly efficient in moderate climates but may require a supplemental heating source in colder regions.

They are cost-effective regarding energy consumption and offer consistent comfort throughout the year.

4. Geothermal Heat Pump: Geothermal heat pumps utilize the ground’s stable temperature to provide heating and cooling for your home.

They are highly efficient and environmentally friendly, as they harness renewable energy from the earth. While geothermal systems have higher upfront costs, they offer significant long-term savings on energy bills and reduce greenhouse electric hot water tank vs gas emissions.

They require sufficient space for installation and are best suited for homeowners committed to sustainability.

5. Dual Fuel System: Dual fuel systems combine a heat pump with a furnace, offering flexibility and energy efficiency in varying climates.

They automatically switch between the heat pump and the furnace based on outdoor temperatures, optimizing performance and minimizing energy consumption.

Dual fuel systems are ideal for regions with fluctuating weather conditions, where a heat pump may struggle to maintain efficiency in extreme cold.

They provide reliable heating and cooling year-round, ensuring comfort regardless of the weather.

Conclusion

Regular maintenance is essential for keeping your Heating and air conditioning process system running smoothly.

By understanding the components of your HVAC system and how they work together, you can ensure optimal performance and comfort in your home or workplace.

Whether you need a new system or are looking to maintain an existing one, prioritizing HVAC maintenance will help extend the lifespan of your equipment and save you money in the long run.

Underfloor Heating: Everything You Need to Know

Are you tired of cold floors and high heating bills? Underfloor heating might be the solution for you!

This comprehensive guide will explore the workings of underfloor heating, the different types available, and their advantages and disadvantages.

How Does Underfloor Heating Work?

Underfloor heating uses heating elements installed beneath the floor surface to emit heat.

Depending on the type of underfloor heating system, these elements can be electrical cables or water-filled pipes.

When electricity flows through the wires, or warm water moves through the pipes, it heats the floor.

This warmth radiates upwards, heating the room evenly from the ground up.

The heat from underfloor heating systems is distributed more evenly than traditional radiators, creating a comfortable and cozy living space.

Electric or Water Underfloor Heating?

When choosing between Electric or Water Underfloor Heating, it’s crucial to consider cost, efficiency, installation requirements, and compatibility with your home’s heating system.

Electric heating systems use electrical cables or mats installed beneath the floor to generate warmth.

These infloor heating systems are usually simpler and cheaper to install than water-based ones, so many people prefer them for smaller areas or when renovating.

Electric underfloor heating systems offer a distinct advantage over other heating systems. They can respond quickly to temperature changes and provide individual room control through thermostats.

On the other hand, water-based systems, also known as hydronic systems, rely on a network of water-filled pipes installed beneath the floor.

These pipes are connected to a central heating system, such as Viessmann boilers, which circulates hot water to provide heat.

Despite their higher initial costs and more complex installation processes, water-based systems can be a wise investment in the long run.

Their energy efficiency and cost-effectiveness are significant advantages, especially in larger spaces or new constructions.

Deciding between electric and water-based systems depends on what you need, how much you want to spend, and what you like.

Electric systems may be ideal if you prioritize ease of installation, responsiveness, and individual room control.

However, if energy efficiency, long-term savings, and compatibility with existing heating systems are paramount, water-based systems could be the better option.

Regardless of the chosen type, both systems offer the benefits of even heat distribution, compatibility with various floor finishes such as laminate, and the potential to integrate with renewable energy sources like heat pumps.

Ultimately, it would help if you decided based on thinking carefully about what your home needs for heating.

Electric Underfloor Heating Systems

Electric underfloor heating systems are popular due to their ease of use and effectiveness in various settings.

These systems, which consist of electrical cables or heating mats installed beneath the floor, provide efficient and reliable warmth.

These systems use electrical cables or mats laid evenly beneath the floor finish, such as tiles, laminate, or wood.

When electricity flows through these elements, they generate heat, warming the floor above.

Installation typically requires the expertise of professionals, such as those from maple plumbing and heating, to ensure safety and effectiveness.

They carefully lay out the heating elements according to the floor plan and connect them to a thermostat to control the temperature.


One key advantage of these systems is their compatibility with various floor finishes, making them suitable for different types of flooring, including laminate and wood.

Unlike hydronic systems, electric ones can be easily retrofitted into existing homes without extensive plumbing work.

When combined with Viessmann or Viessman boilers, these solutions can provide efficient and sustainable home heating.

These boilers work seamlessly with the electric setup to ensure optimal performance and energy efficiency.

Electric systems offer a reliable and effective way to warm your home, providing even heat distribution and comfort throughout the space.

Proper installation and maintenance can enhance the ambiance of your living environment while reducing energy consumption and costs.

Electric underfloor heating – How it works

Electric underfloor heating uses electrical cables or mats installed beneath the floor surface to generate heat.

These heating elements are linked to an electrical power source and managed by an underfloor heating thermostat.

The process begins with installing the heating elements beneath the floor finish, such as tiles, laminate, or wood.

The cables or mats are evenly spaced to ensure uniform heat distribution throughout the room.

Once installed, electricity is supplied to the heating elements, causing them to generate heat.

As electricity passes through the cables or mats, they resist the flow of electrical current, converting electrical energy into heat energy.

This heat is then transferred to the floor surface, warming it up. The warmth radiates upwards, heating the room from the ground level.

An underfloor heating thermostat can control the temperature of the floor and the room, allowing for precise adjustments to suit individual preferences.

Some thermostats even offer programmable features, allowing users to set heating schedules based on their daily routines.

One key advantage of underfloor heating is its responsiveness to temperature changes.

Unlike traditional radiators, which can take time to heat up or cool down, electric underfloor heating systems can quickly adjust to changes in temperature, providing comfortable warmth when needed.

Electric underfloor heating systems are compatible with various floor finishes, making them suitable for almost any flooring material.

They are also relatively easy to install, particularly in retrofit projects or smaller spaces.

Electric underfloor heating is an efficient and effective way to heat your home, providing comfortable warmth and even heat distribution throughout the room.

It allows you to control temperatures precisely and is compatible with various floor finishes, making it a popular choice for modern homes.

Electric underfloor heating installation

Installing electric underfloor heating involves a few essential steps to ensure it works well and is safe.

Here’s a simple overview of what happens during the installation:

1. Planning and Design: Planning and designing everything carefully is essential before installing your underfloor heating system.

Consider factors such as the room’s size, the type of flooring, and any obstacles that may affect the installation process.

Determine the layout of the heating elements to ensure even heat distribution throughout the room.

2. Preparation: Clear the room of any furniture or obstacles to provide access to the floor surface.

Ensure that the subfloor is clean, level, and free of debris. Make any repairs or adjustments to the subfloor before proceeding with installation.

3. Installation of Heating Elements: Depending on the type of electric underfloor heating system chosen, install heating cables or mats according to the manufacturer’s instructions.

Lay the heating elements evenly across the floor surface, maintaining proper spacing between each component to ensure uniform heat distribution.

4. Connection to Power Supply: Once the heating elements are installed, connect them to the electrical power supply.

Follow the manufacturer’s guidelines and local electrical codes to ensure safe and proper wiring.

To avoid any electrical hazards, use a qualified electrician for this step.

5. Testing: Before proceeding with the final flooring installation, test the electric underfloor heating system to ensure it functions correctly.

Check for any defects or malfunctions and address them promptly.

6. Flooring Installation: Once the heating system has been tested and confirmed working, install the final flooring material.

This can include tiles, laminate, wood, or other suitable flooring options. Follow the manufacturer’s installation guidelines to ensure compatibility with the underfloor heating system.

7. Thermostat Installation: Conveniently install the underfloor heating thermostat within the room.

This device allows for temperature control and heating scheduled programming.

Follow the manufacturer’s instructions for installation and programming.

8. Final Checks: After finishing the installation, double-check everything to ensure everything works correctly.

Test the thermostat and heating system to verify proper operation. Make any necessary adjustments or repairs.

Benefits of using underfloor heating with heat pumps

Pairing underfloor heating with heat pumps offers several benefits, enhancing efficiency and sustainability while providing optimal home comfort.

1. Energy Efficiency: Heat pumps are super-efficient heaters using renewable energy from the ground or air to warm your home.

Combined with underfloor heating, they maximize energy efficiency by harnessing natural resources, reducing reliance on fossil fuels, and lowering carbon emissions.

2. Cost Savings: Underfloor heating with heat pumps can significantly reduce energy consumption and lower heating costs compared to traditional heating methods by utilizing renewable energy sources.

Heat pumps operate efficiently, converting a small amount of energy into a large amount of heat, resulting in lower utility bills over time.

3. Even Heat Distribution: Underfloor heating systems distribute heat evenly throughout the room, eliminating cold spots and ensuring consistent warmth from floor to ceiling.

This even heat distribution is enhanced when paired with heat pumps, providing a comfortable living environment without bulky radiators or forced-air systems.

4. Compatibility with Renewable Energy: Underfloor heating with heat pumps is compatible with renewable energy sources, making it an environmentally friendly heating solution.

This synergy aligns with sustainable living practices and reduces your home’s carbon footprint.

5. Year-Round Comfort: Underfloor heating with heat pumps provides efficient heating during the colder months and offers cooling capabilities during the summer.

Heat pumps can operate in reverse during warmer weather, extracting heat from your home and transferring it outside, keeping your living space comfortable year-round.

6. Quiet Operation: Heat pumps operate quietly compared to traditional heating systems, providing a peaceful and comfortable environment for your home.

This silent operation enhances your living space’s comfort and enjoyment without disruptive noise from heating equipment.

7. Long-Term Investment: Investing in underfloor heating with heat pumps is a long-term investment in your home’s comfort and energy efficiency.

With the proper setup and upkeep, these systems can provide dependable heating and cooling for a long time.

Pairing underfloor heating with heat pumps offers numerous benefits, including energy efficiency, cost savings, heat distribution, compatibility with renewable energy, year-round comfort, quiet operation, and long-term investment value.

This setup offers a green and cozy heating option for today’s houses by using renewable energy and improving heating technology.

Disadvantages of Underfloor Heating

While underfloor heating has many benefits, it’s essential to think about some possible downsides before putting it in your home:

1. Installation Costs: Installing underfloor heating might cost more than setting up traditional heating systems.

This is especially true for water-based underfloor heating, which may require extensive plumbing work and professional installation.

2. Retrofitting Challenges: Retrofitting underfloor heating into existing buildings can be challenging and costly.

It often involves lifting and replacing flooring, disrupting your living space, and adding to the project’s overall expense.

3. Flooring Constraints: Certain flooring materials may not be suitable for use with underfloor heating.

For example, thick carpets or materials with poor heat conductivity may inhibit heat transfer from the underfloor heating system, reducing its effectiveness.

4. Warm-Up Time: Underfloor heating systems typically take longer to warm up than traditional radiators or forced-air systems.

This means that it may take longer for the room to reach the desired temperature after the heating system is turned on.

5. Maintenance Requirements: While underfloor heating systems generally require less maintenance than traditional heating systems, they can still be prone to leaks or electrical faults.

Regular maintenance checks are essential to ensure the system keeps working well.

6. Limited Zoning Control: Zoning control allows you to independently adjust the temperature of individual rooms or areas of your home.

While underfloor heating systems can be zoned, the level of control may be more limited compared to traditional heating systems with separate radiators or thermostats for each room.

7. Incompatibility with Certain Flooring Types: Some flooring materials, such as certain types of hardwood or laminate, may not be compatible with underfloor heating due to concerns about expansion and contraction.

It’s essential to consult with an expert installer to determine the suitability of your chosen flooring material.

8. Potential for Overheating: Improper installation or usage of underfloor heating systems can lead to overheating, which may damage the flooring or other components of the system.

Following manufacturer guidelines and seeking professional installation is crucial to prevent such issues.

While these disadvantages are worth considering, many homeowners find that the benefits of underfloor heating outweigh the potential drawbacks. 

Conclusion

Whether electric or water-based, underfloor heating systems offer a modern and efficient solution for keeping your home warm and cozy.

Underfloor heating distributes heat evenly throughout the space, creating a comfortable environment for you and your family.

However, consulting with professionals like Life Mechanical is crucial to ensure proper installation and compatibility with your chosen flooring material.

With their expertise and knowledge, you can rest assured that your underfloor heating system will provide optimal performance and comfort for years.

Trust Life Mechanical for all your heating needs and transform your living space into a haven of warmth and relaxation.

Plumbing Essentials: How to Drain a Hot Water Tank Like a Pro

If you’re a homeowner, understanding how to maintain your water heater properly is crucial for its longevity and efficiency.

One essential aspect of water heater maintenance is draining the tank periodically. 

In this blog post, you’ll learn how to drain your hot water tank like a pro, ensuring it performs optimally and lasts longer.

How Often Should You Drain a Water Heater?

Determining how often you should drain your water heater depends on various factors, including water hardness, usage patterns, and the age of your system.

Typically, draining your water heater annually is advisable to uphold its peak performance and extend its longevity.

Water hardness plays a significant role in sediment buildup within the tankless water heater.

Over time, hard water, abundant in minerals such as calcium and magnesium, tends to separate and build up at the bottom of the tankless heater.

This sediment accumulation insulates the heating elements or burner, reducing efficiency and potentially leading to overheating or damage.

Moreover, usage patterns influence the frequency of draining.

Homes with high hot water demand or areas with particularly hard water may benefit from more frequent draining.

Signs that your water heater needs draining include decreased water temperature, unusual noises during operation, or visible sediment in the water.

The age of your water heater also impacts the necessity of draining.

Older units may require more frequent maintenance to ensure optimal performance.

Routine draining can help prevent corrosion, extend the life of your water heater, and reduce the likelihood of unexpected breakdowns.

Ultimately, while draining your water heater annually is a good starting point, monitoring your system’s performance and adjusting the frequency as needed is essential.

Regular maintenance, including draining, flushing, and inspecting the tank, is key to preserving your water heater’s efficiency and longevity.

Turn Off the Water Supply

Switching off the water supply is crucial in the process of draining a water heater, ensuring both safety and efficiency for plumbing and heating services. To begin, locate the cold water supply valve, typically found near the top of the water heater.

This valve controls the flow of water into the system, whether it’s a traditional or tankless water heater.

By turning the valve clockwise, you shut off the water supply, preventing any additional water from entering the heater during the draining process.

This step is essential for emergency furnace repair or water heater service, as it helps avoid potential leaks and ensures smooth drainage.

Moreover, turning off the water supply reduces the risk of damage to the heater and its surrounding area.

For gas water heaters, it’s equally important to turn off the gas supply before proceeding with the draining process, adding an extra layer of safety.

This straightforward yet crucial action lays the foundation for effective water heater maintenance, enhancing the durability and effectiveness of your plumbing system.

Turn Off the Water Heater

Turning off the water heater is crucial to draining it and maintaining its efficiency and longevity.

For electric water heaters, locate the circuit breaker connected to the heater and switch it off to cut the power supply. 

This prevents the heating elements from functioning during draining, ensuring safety and efficiency.

Similarly, locate the gas control valve for gas water heaters and turn it to the “off” position to shut off the gas supply.

This step is essential to prevent the burner from igniting while the tank is drained, reducing the risk of accidents. 

Turning off the gas to drain a water heater safely is crucial, as gas leaks can be hazardous.

Properly turning off the water heater before draining it can ensure a smooth and safe maintenance process.

Attach Hose to Drain Valve

When attaching a hose to the drain valve of your water heater, it’s essential to do so carefully to avoid leaks or damage, especially if your heater has a plastic valve.

Start by locating the drain valve near the bottom of the tank. 

Attach one end of a garden hose to the valve by screwing it on securely, ensuring a snug fit without over-tightening, which can damage the valve threads, especially in the case of a water heater with a plastic valve.

Position the other end of the hose in a floor drain, bucket, or outside where the water can safely drain away.

The hose is a conduit for the water to flow out of the tank, allowing you to direct it to a suitable drainage point.

Ensure the hose is securely attached to prevent leaks and that it is long enough to reach your chosen drainage area.

Once the hose is in place, you can proceed with draining the tank as per the rest of the instructions.

Open Hot Water Tap

Opening the hot water tap is crucial in draining a hot water tank. Doing so allows air to enter the tank, which helps facilitate the drainage process.

Opening a hot water tap elsewhere in your home, such as a sink or bathtub, creates a path for air to enter the tankless water heater, replacing the water as it drains out. 

This prevents the formation of a vacuum inside the tank, which can slow down or even stop the drainage process altogether.

Opening the hot water tap also helps to release any pressure that may have built up in the tank, ensuring a smooth and efficient draining process. 

Remember, keeping the hot water tap open throughout the draining process is essential for optimal results and how to drain a hot water tank effectively.

Allow the Tank to Drain Completely

Allowing the tank to drain completely is crucial in maintaining your water heater’s performance and longevity.

As sediment accumulates over time, it settles at the bottom of the tank, impeding heating efficiency and potentially causing damage. 

By thoroughly draining the tank, you effectively flush out this sediment, ensuring optimal functionality.

This process also helps prevent corrosion and extends the water heater life span.

However, the draining duration can vary depending on factors such as the size of the tank and the amount of sediment present. 

It’s crucial to exercise patience and ensure adequate time for the tank to empty.

Additionally, keeping a hot water tap open during draining facilitates airflow, expediting the process. 

Allowing the tank to drain entirely regularly as part of your water heater maintenance routine ensures a reliable hot water supply and minimizes the risk of costly repairs.

Turn on the Power/Gas Supply

After draining your hot water tank, it’s crucial to carefully restore the power or gas supply to ensure your water heater functions safely and efficiently.

For electric water heaters, locate the circuit breaker connected to the heater and switch it back to the “on” position.

This step reinstates the flow of electricity to the heating elements, allowing the tank to start heating water again.

If you have a gas water heater, locate the gas control valve and return it to the “on” position.

This action restores the gas flow to the burner, enabling it to ignite and heat the water. 

Turning on the power/gas supply completes draining and prepares your water heater to resume regular operation.

Remember to follow the manufacturer’s instructions carefully and double-check all connections to ensure safety and prevent potential hazards.

Close the Valve, Restart the Water Heater

After ensuring the tank has drained completely, it’s time to close the valve and restart the water heater.

This step is crucial to ensure the heater functions appropriately and safely. 

Closing the valve prevents any residual water from leaking out, maintaining the integrity of your plumbing system.

To restart the water heater, follow the manufacturer’s instructions carefully.

For electric heaters, flip the circuit breaker back on, and for gas heaters, turn the gas control valve to the “on” position. 

Do not rush this process; improper restart could cause damage or malfunction.

Double-check all connections for leaks once the power or gas supply is restored. 

This phase is critical to avoid potential hazards and maintain the efficiency of your water heater.

Restarting the water heater completes the draining process and ensures your system is ready to provide hot water efficiently.

Check for Leaks

After restarting the water heater, a critical step is to check for leaks to prevent potential water damage and ensure the system’s integrity.

Start by examining the area around the drain valve and connections for any signs of moisture or dripping. 

Take special care to inspect joints and fittings thoroughly, as leaks often occur at these points.

If necessary, use a flashlight to inspect dark or cramped spaces.

If you detect any leaks, promptly tighten the connections or replace damaged components, such as washers or seals, to prevent further leakage. 

Pay close attention to any unusual sounds or smells, as they can also indicate leaks or other issues within the system.

Finally, monitor the area after addressing any leaks to confirm that the problem has been resolved effectively, thus maintaining the efficiency and reliability of your water heater system.

Refill the Tank

Refilling the tank is the final step in draining and water heater maintenance.

After draining the tank and checking for leaks, it’s time to replenish the hot water supply.

Turn the cold water supply valve back on slowly to allow the tank to fill gradually.

This helps prevent sudden pressure surges that could damage the tankless water heater or plumbing system. 

As the tank refills, watch for any signs of leaks around the connections and drain valve.

Once the tank is full, turn off the hot water tap you opened earlier and check the water heater for proper operation.

Pay attention to unusual noises and ensure that hot water flows steadily from your faucets. 

Regularly refilling the tank after maintenance ensures a steady supply of hot water and prolongs the lifespan of your water heater.

Conclusion

Consistently draining your water heater is a straightforward yet vital upkeep chore.

It aids in prolonging the longevity of your water heater and guarantees a dependable flow of hot water throughout your household.

Following the steps outlined in this guide, you can drain a water heater like a pro and keep your heating radiator system running smoothly for years.

Safety should always be your top priority when working with plumbing or electrical systems.

If you’re uncomfortable or unsure about any part of the process, don’t hesitate to contact a professional plumber for assistance.

Life Mechanical provides invaluable guidance on draining a hot water tank efficiently and safely.

Their expertise is evident in their comprehensive step-by-step instructions, ensuring homeowners can confidently perform maintenance tasks. 

By following their recommendations, individuals can prevent potential damage to their water heaters and extend their lifespan.

Life Mechanical’s commitment to quality and customer satisfaction shines through in its detailed explanations and dedication to empowering homeowners with the knowledge they need to maintain their plumbing systems effectively.

8 Factors to Consider When Buying a Cold Climate Heat Pump

Choosing the right heating system is crucial when keeping your home warm in cold climates.

One option gaining popularity is the cold climate heat pump.

These innovative devices offer efficient heating even in extreme cold weather conditions. But before you invest in one, there are several factors to consider.

The Evolution and Efficiency of Cold Climate Heat Pumps

Over the years, cold climate heat pump technology has transformed remarkably, making these systems increasingly efficient and reliable in colder climates.

These heating and cooling solutions are custom-designed to address traditional heat pumps’ challenges in low-temperature settings.

In the past, heat pumps struggled to maintain efficiency and performance in frigid conditions, often requiring supplementary heating sources to maintain comfortable indoor temperatures.

However, the latest advancements in cold climate heat pump technology have addressed these limitations, revolutionizing how we approach heating in colder regions.

The key to the improved performance of cold-climate heat pumps is their advanced engineering and refrigerant technologies.

Manufacturers have developed innovative compressor designs, optimized airflow patterns, and implemented sophisticated control systems to enhance the systems’ ability to extract heat from the outdoor air, even when temperatures drop dramatically into tankless water heaters.

The result is a generation of cold-climate heat pumps that can maintain impressive efficiency ratings and often outperform conventional heating systems, even in extreme cold weather conditions.

Homeowners and businesses in colder climates can enjoy the benefits of an energy-efficient Right Heating System without sacrificing comfort or functionality.

As the demand for environmentally friendly and cost-effective heating solutions continues to grow, the evolution of cold climate heat pump technology has been a significant game-changer.

These advancements have made these systems a viable and attractive option for those seeking to heat their homes or buildings more sustainably and efficiently, further solidifying their position as a leading heating solution in colder regions.

Comparing Costs: Cold Weather Heat Pump Investments

When selecting a heating system for your home or business, the upfront cost is often one of the primary considerations.

Cold-weather heat pumps have historically had a higher initial investment than traditional heating options, such as furnaces or boilers.

However, this higher upfront cost should be weighed against these advanced heating systems’ long-term operating costs and potential savings.

One of the critical advantages of cold weather heat pumps is their energy efficiency.

These systems are engineered to draw warmth from the outdoor air, operate efficiently even in chilly conditions, and channel it indoors to provide heating for the space.

This method boasts a significantly higher efficiency than traditional heating techniques that depend on burning fossil fuels or creating heat using electrical resistance.

Due to this, individuals who own heat pumps in cold climates can experience significant reductions in their energy expenses all year long, gradually balancing out the initial cost of installation.

Besides saving energy, cold weather heat pumps also demand less maintenance than conventional heating systems.

The absence of a combustion process and the use of durable, high-quality components can result in fewer repairs and a longer lifespan for the equipment.

This reduces maintenance expenses throughout the system’s lifespan, enhancing the investment’s overall cost-effectiveness.

Furthermore, homeowners and businesses may be eligible for rebates, tax credits, or other financial incentives when installing cold-weather heat pumps in many regions.

These government-backed programs are designed to encourage the adoption of energy-efficient technologies, help reduce upfront costs, and make cold-weather heat pumps a more attractive option for those looking to upgrade their heating systems.

By carefully evaluating the initial costs, long-term energy savings, maintenance requirements, and available incentives, homeowners and business proprietors can thoroughly assess whether a cold-weather heat pump meets their heating requirements, enabling them to make a well-informed investment decision.

How Cold Climate Air Source Heat Pumps Work

Cold climate heat pumps rely on advanced cold climate air source heat pump technology.

These systems work by harnessing the heat in the outdoor air, even in freezing conditions, and transferring it indoors to heat the home or building.

The basic principle behind cold climate air source heat pumps is the ability to extract thermal energy from the surrounding environment and concentrate it to a higher temperature for heating purposes.

This process uses a refrigerant, a tailored fluid that transitions between liquid and gas phases to enable efficient heat transfer.

They usually comprise an exterior unit housing the compressor and heat exchanger, an indoor unit containing the second heat exchanger, and an air distribution system.

The outdoor unit pulls heat from the outdoor air, even in chilly conditions, and then the refrigerant carries this warmth to the indoor unit, which disperses it throughout the building.

The advanced engineering and refrigerant technologies used in cold-climate air source heat pumps allow them to maintain high-efficiency levels in extreme cold weather conditions.

These systems are designed to overcome the challenges of traditional heat pumps, which may struggle to extract sufficient heat from the outdoor air when temperatures drop significantly.

Cold-climate air source heat pumps provide efficient and reliable heating by harnessing the heat outdoors, even in frigid climates.

They reduce the reliance on traditional heating methods that consume more energy and contribute to higher greenhouse gas emissions.

This makes them a viable and eco-friendly option for homeowners and businesses in colder regions.

Choosing the Best Heat Pump for Cold Weather

When selecting a cold climate heat pump for your home or business, it’s crucial to consider various factors to ensure the system perfectly fits your needs and climate conditions.

Choosing the right cold-climate heat pump can have a vital impact on the system’s efficiency, performance, and long-term cost-effectiveness.

One key factor is the cold climate heat pump’s heating capacity.

This refers to the system’s ability to generate and distribute heat to maintain a comfortable indoor environment, even in extreme cold weather.

For optimal performance, selecting a model with the appropriate heating capacity is essential based on the size and insulation of your home or building.

In addition to heating capacity, the efficiency ratings of the cold climate heat pump should also be a top priority.

Search for systems with impressive SEER(Seasonal Energy Efficiency Ratio) and HSPF ( Heating Seasonal Performance Factor) ratings.

These ratings indicate the system can convert energy into heating and cooling with minimal waste.

Higher efficiency ratings can translate to significant energy savings and reduced operating costs over the system’s lifetime.

Another important consideration is the compatibility of the cold climate heat pump with your specific climate and home or building requirements.

Some models are designed to perform better in particular temperature ranges or work more effectively with certain types of ductwork or insulation.

Consulting with experienced HVAC professionals can help you identify the most efficient heating system for cold climates that aligns with your needs and provides the best overall performance.

Lastly, factors such as Air Quality and Efficiency should be evaluated to ensure the cold climate heat pump not only heats your space efficiently but also maintains a healthy indoor environment.

This may include advanced air filtration, humidity control, and efficient air circulation.

You can select the best heat pump for cold weather by meticulously evaluating these elements.

This will provide reliable, energy-efficient, and comfortable heating for your home or business, even in the harshest winter conditions.

The Cold Climate Heat Pump Challenge: Pushing the Limits

While cold-climate heat pumps have significantly improved performance, researchers and manufacturers are still working to address ongoing challenges, such as those seen in traditional gas furnace repair methods in colder environments.

As the demand for efficient and reliable heating solutions in colder regions continues to grow, the need to push the limits of cold-climate heat pump capabilities has become increasingly important.

Additionally, water heater installation processes have become more complex in such conditions, driving innovation across the industry.

One of the primary challenges cold-climate heat pumps face is maintaining optimal performance in highly low-temperature conditions.

Traditional heat pumps have struggled to extract sufficient heat from the outdoor air when temperatures drop dramatically, often requiring supplementary heating sources to maintain comfortable indoor temperatures, similar to how floor heating systems are employed in such circumstances.

Through innovative engineering and advanced refrigerant technologies, the latest generation of cold-climate heat pumps has made impressive strides in their low-temperature operation. However, there is still room for improvement as engineers strive to further enhance the systems’ ability to extract heat from the air, even in the harshest winter conditions.

Another challenge cold climate heat pumps face is maintaining their heating capacity as the outdoor temperature drops. In some cases, the systems may experience a reduction in their heating output, which can be a concern for homeowners and businesses needing consistent and reliable heating.

Manufacturers address this issue through refined compressor designs, improved airflow management, and advanced control systems. Reliability in extreme weather conditions is also a critical challenge that cold-climate heat pump developers are working to address.

Ensuring the systems can withstand heavy snowfall, icy conditions, and severe winter weather is crucial for widespread adoption in colder climates. As scientists and industry experts persist in advancing cold-climate heat pump technology, we anticipate the emergence of increasingly efficient, dependable, and versatile systems in the years ahead.

These advancements will further solidify the position of cold-climate heat pumps as the best solution for cold weather, providing homeowners and businesses with a viable and sustainable heating option for even the most demanding climates.

The Role of Heat Pumps in Sustainable Heating Solutions

Amidst the global shift towards environmental awareness, heat pumps emerge as pivotal components in sustainable heating solutions.

Heat pumps designed for cold climates are gaining popularity because they effectively deliver efficient and environmentally friendly heating solutions in chilly regions.

Heat pumps offer more energy efficiency and reduce greenhouse gas emissions than traditional heating systems, making them a valuable tool for sustainable heating.

Unlike furnaces or boilers that rely on fossil fuel combustion, heat pumps work by transferring heat from the outdoor air or the ground, using electricity to power the process.

This makes them a much more eco-friendly option, leading to lower energy bills and a smaller carbon footprint, especially in regions with harsh winters where traditional heating systems struggle to maintain efficiency.

Furthermore, as governments and policymakers implement initiatives to reduce emissions, the role of heat pumps in achieving these sustainable goals will become increasingly vital.

Cold climate heat pumps offer homeowners and businesses a reliable and environmentally friendly heating solution that can thrive even in the harshest winter climates.

Setting Up Your Heat Pump: Key Steps & Expectations

Properly installing and maintaining a cold climate heat pump is essential for optimal performance and longevity.

Homeowners and businesses should work closely with qualified HVAC professionals to ensure a seamless and successful installation process.

The first critical step is to ensure the cold climate heat pump is correctly sized for the specific home or building.

An improperly sized system leads to inefficient operation, raised energy consumption, and premature wear and tear.

HVAC experts can perform a thorough assessment to determine the proper heating and cooling capacity required.

Next, the cold climate heat pump must be carefully integrated with the existing heating and cooling infrastructure.

This includes correctly connecting the outdoor and indoor units, ensuring proper airflow, and integrating the control systems for efficient and coordinated operation.

Lastly, setting appropriate expectations and scheduling regular maintenance is crucial.

Cold climate heat pumps require periodic servicing to maintain their high efficiency and reliability, especially in extreme weather conditions.

By following these key steps, users can maximize the benefits of their investment and enjoy years of comfortable, energy-efficient heating.

Conclusion

When choosing a heating system for cold climates, a cold climate heat pump offers many advantages, including air quality and efficiency, lower long-term costs, and reduced environmental impact.

You can select the best cold climate heat pump for your home’s needs by considering system efficiency, compatibility, and installation.

With proper maintenance and realistic expectations, a cold climate heat pump can provide reliable heating even in the coldest winters.

Life Mechanical provides crucial support for cold climate heat pumps through professional installation, maintenance, and repair services.

Their expertise ensures that cold-climate heat pumps are correctly sized and installed for optimal performance in freezing temperatures.

Regular maintenance by Life Mechanical technicians maximizes efficiency and prevents breakdowns, ensuring reliable heating even in the coldest weather conditions.

Additionally, their prompt repair services address any issues that may arise, minimizing downtime and keeping homes warm and comfortable throughout the winter.

With Life Mechanical’s support, cold climate heat pumps can operate at peak efficiency, providing sustainable heating solutions for cold climates.

Homeowner’s Guide: How to Properly Drain Your Water Tank

Embarking on the journey of home maintenance unfolds a treasure trove of tasks, some hidden like gems waiting to be discovered.

Among these, the care and upkeep of your hot water tank emerge as a pivotal yet often overshadowed hero in the saga of home comfort.

This guide isn’t just about how to drain a water heater quickly; it’s an odyssey through preserving the heart of your home’s warmth.

Drain hot water in your tank is akin to giving your home a refreshing sip of rejuvenation, ensuring that the warmth it provides is pure, efficient, and enduring.

Why Is Draining Your Water Heater Important?


Imagine your drain hot water tank as a venerable cauldron, brewing water and vitality for your home.

Over time, this cauldron gathers sediments akin to old tales, muddying the waters of your comfort.

If left unchecked, these sediments become the silent adversaries of efficiency and longevity, casting shadows over your tank’s performance and water heater’s lifespan.

Draining the hot water tank valve is the spell that clears these shadows, ensuring that the warmth it brews is as refreshing as the first day it flows.

How Do You Drain a Water Heater?


The quest to drain hot water tank might seem fraught with complexity but fear not.

With the right tools and the map of knowledge, it’s a journey well within your grasp.

Each step, from turning off the power to refilling the tank, is a milestone that leads you closer to the treasure of efficiency and reliability.

Whether your tank sits in the shadowed nooks of the basement or the sun-kissed corners of your utility room, a drain hot water tank breathes new life into its steel-bound heart.

Tools Required:


Your toolkit, a collection of mundane yet mighty instruments, is crucial.

A garden hose is not just a conduit for a lifespan water heater but a bridge between stagnation and flow.

A flathead screwdriver, the key to unlocking the gates of renewal. And a bucket, the humble vessel that stands ready to catch the remnants of the past, preparing your tank for a future of clarity and warmth with how to drain a water heater when it doesn’t drain.

Turn Off the Power:


Turning off the power or setting the gas to ‘pilot’ is not merely a safety measure but a respectful nod to the elemental forces that fuel your home’s warmth.

It’s the first step in a dance of precision and care, ensuring the elements are in harmony as you embark on this renewal task.

Turn Off the Cold Water Supply:


Halting the inflow of cold water is like pausing the sands of time, creating a stillness that allows you to cleanse the depths of your tank without the ongoing rush of the new.

It’s a moment of calm, preparing the stage for the act of draining and the promise of rejuvenation that follows.

Attach a Hose to the Drain Valve:


The coupling of the hose to the drain valve is a union of purpose, a tangible connection between the need to expel the old and the pathway to renewal.

This simple act is a thread in the larger tapestry of maintenance, weaving together safety, efficiency, and care.

Place the Other End of the Hose:


Where the other end of the hose lays is not just a matter of practicality but of responsibility.

It’s a decision that respects the sanctity of your home and the environment, ensuring that the water’s journey from tank to termination is thoughtful and harm-free.

Open a Hot Water Faucet:


Opening a drain hot water tank faucet within your home serves as an invitation for air, the unseen ally in this process.

It whispers through your pipes, easing the flow of water from the tank to the hose, a silent conductor orchestrating the symphony of drain hot water tank lifespan.

Open the Drain Valve:


Turning the drain valve is a gesture that bridges intent and action. It’s the moment when the stagnant waters begin their journey toward renewal.

It’s a release, not just of water but of the sediments of time, clearing the way for a fresh start with a drain hot water tank.

Allow the Tank to Drain Completely:


The drain hot water tank is a transition period, a visible measure of progress as the old makes way for the new.

It’s a time of patience and observation, ensuring every remnant of sediment is washed away in the waters of change.

Close the Drain Valve:


Closing the drain valve signifies the end of one chapter and the beginning of another.

It’s a reaffirmation of containment, a promise that the waters that fill your tank henceforth are the bearers of cleanliness and efficiency.

Disconnect the Hose:


The disconnection of the hose is the severing of the old from the new, a final farewell to the waters and sediments that once were.

It’s a step towards finality, ensuring the path the old exited is clear, signifying readiness for a new beginning.

Close the Hot Water Faucet:


Closing the hot water faucet in your home is the final note in the maintenance symphony.

This subtle yet significant gesture signals the completion of the water heater’s renewal.

It is the moment when equilibrium is restored, and the flow of hot water resumes its steady, reliable course, unburdened by the weight of accumulated sediments in the drain hot water tank.

Turn On the Power:


Restoring power to your water heater or reigniting the gas flame is the spark that rekindles the warmth within your home.

This step transcends the mere flick of a switch or turn of a dial; it is the reawakening of your water heater’s soul, ready to fulfill its purpose with renewed efficiency and a heart free from the remnants of yesteryear.

Check for Leaks:


In the aftermath of the drain hot water tank odyssey, the vigil for leaks becomes a testament to your diligence.

It’s not just about ensuring the integrity of the connections but about safeguarding the harmony between your water heater and your home.

Each drop that doesn’t escape is a victory, a silent affirmation of the success of your endeavors. It ensures that the warmth within your home remains unchallenged, the drain hot water tank.

Refill the Tank:


The gradual refilling of the tank is the crescendo of this maintenance symphony, a period of anticipation and fulfillment.

It’s a visual and auditory testament to the cycle of renewal as the rising levels of water herald the return of your water heater to its prime.

When the tank embraces the fresh influx of water, this moment is a pledge of continued warmth and comfort for your home, a silent oath that speaks volumes of the care you’ve invested.

Close the Valve, Refill the Tank, Restart the Water Heater


Close the drain valve, remove the hose, and turn on the cold water supply.

The tank will begin to fill. Go back to the hot water tap opened earlier.

Once cold water begins to flow from the tap, turn it off.

Turn the gas valve back on from the pilot position or turn the electricity back on to the tank.

Be sure to check the valve opening once it’s closed to ensure there are no water leaks and how to quickly drain an electric water heater.

Caution: Some tanks must be full to avoid damage to the gas burner or radiator heating system elements.

Always read and follow all manufacturer’s directions and warnings for your drain hot water tank.

How to Increase Your Home’s Water Pressure


Don’t let poor water pressure in your home floor heating systems bring you down.

Take these steps to test the water flow around your home and start identifying the cause of the issue. Can you drain a water heater by running a hot water tank?

A water heater service impacts many aspects of your home, from slow-filling bathtubs to washing machines that seem to take forever.

You might notice your garden hose lacks the pressure to cast water deep into flower beds, or that showerheads and faucets dribble weakly.

Changes in water pressure can occur suddenly or gradually over time.

While it might take a bit of investigation to determine the cause, improving water pressure in and around your home is often simple and inexpensive.

First, consider supply and demand.

When multiple systems are in use, such as filling the bathtub while also watering the garden, it may appear that your home’s water pressure is low when it’s just a temporary imbalance.

Speak to your neighbors about their water pressure.

If you all share the same municipal water source and they’re experiencing the same issues, it could point to a service issue rather than something exclusive to your property.

If the issue is isolated to your home, continue troubleshooting by running tests—especially on components like the gas furnace repair system, which can sometimes affect overall water pressure in unexpected ways.


Test Your Home’s Water Pressure


Testing your home’s water pressure and flow rate is easy and inexpensive.

A water pressure test gauge can be purchased for a few dollars and fit onto an outdoor faucet.

When you turn on the hose faucet, the gauge’s needle dial will read your home’s water pressure.

A measurement of 40 to 60 pounds per square inch (PSI) is normal, but anything less than 40 PSI proves that your home has low water pressure, and the reasons should be explored further.

This initial test is a good way to baseline your water pressure.

How to Improve Your Water Pressure


Beyond testing water pressure and flow rate, a homeowner can do several other things to identify issues and improve water pressure in the home.


Check for Leaks


Water travels harder through damaged pipes.

The easiest way to tell if damaged plumbing affects your water flow is to check for leaks.

Inspect all visible pipes for moisture and signs of buildup or corrosion.
Galvanized steel pipes are particularly vulnerable to corrosion, while plastic or copper pipes are more damage-resistant.

While it may be costly, pipe replacements do more than increase water pressure.

It will also reduce the chance of future leaks and the risk of contaminated drinking water.


Check for Clogs


Over time, mineral deposits in hard water can build up and reduce water pressure.

While clogs can happen anywhere in the pipeline, homeowners can most easily find and correct clogs in showerheads and sink faucets.


Performing a flow test on your showerhead is a great way to determine if your showerhead itself is the culprit for your lousy water pressure.

Start by removing the showerhead and setting a stopwatch to 10 seconds.

Hold a bucket directly beneath the shower arm and turn on the water for 10 seconds.

If you collect between 1-1/3- and 1-2/3 gallons, your water pressure is normal so that the showerhead may be clogged.

Take the necessary steps to clean your showerhead.

If the flow you collected in the bucket is less than that, clean or replace the shower valve itself.

The faucet aerator or water restrictor is a thin mesh filter that disperses water flow on a sink faucet or kitchen sprayer.

The mesh can build up with mineral deposits over time. You can unscrew the end of your faucet or locate the filter just inside the spout and easily rinse it clean to improve water flow.


Conclusion:

The art of draining a hot water tank is more than just a routine maintenance task; it’s a ritual of renewal, an ode to the heart of your home’s warmth.

This guide, enriched with engaging and bulky insights, not only explains how to quickly drain a hot water tank without a drain valve or an electric water heater but also imbues the process with a deeper sense of purpose and satisfaction.

Remember, the essence of home maintenance lies not just in our actions but in the comfort, efficiency, and peace of mind they foster.

As you close this chapter, know that your efforts have breathed new life into your water heater, ensuring that it continues to serve as a steadfast beacon of warmth and comfort in your home.

Should you need professional assistance or advice with your water heater or any other aspect of home mechanical systems, LIFE MECHANICAL is here to help.

Based in Victoria, BC, Canada, we’re just a phone call away at 250 418 5139, or you can visit us online at https://lifemechanical.ca/ for more information on our services. Our team of experts is dedicated to ensuring your home remains a sanctuary of comfort and reliability.

Maintaining Your Tankless Water Heater Tips for Longevity

tankless water heater

Tankless water heaters are integral to modern homes, providing hot water for showers, cleaning, and cooking.

Like any appliance, they require daily maintenance to operate efficiently and safely.

One critical water heater maintenance task is draining the tankless water heater to remove sediment buildup, which can affect the heater’s performance and lifespan water heater. 

Understanding Sediment Buildup

Sediment buildup in a tankless water heater is a common issue caused by naturally occurring water minerals, such as calcium and magnesium.

When water is heated, these minerals precipitate and settle at the bottom of the tank, forming sediment.

This sediment can insulate the Viessmann tankless water heater source from the water, reducing efficiency.

Over time, sediment accumulation can also cause damage to the tank and heating elements, increasing the need for furnace service and repair and potentially impacting Viessmann tankless water heater prices.

The Importance of Draining Your Water Heater


Regularly draining your tankless water heater helps to remove this sediment buildup, ensuring that the heater operates efficiently and prolongs the lifespan of your water heaters.

Draining the tank can also prevent issues such as reduced water flow, inconsistent water temperature, and potential damage to the heating elements.

For those using a boiler heating service, maintaining your tankless water heater through routine draining and descaling can complement the overall heating system, ensuring both your water heating and space heating functions run smoothly.

  • Reduced heating efficiency
  • Longer recovery times for hot water
  • Increased energy consumption
  • Potential overheating and damage to the tank
  • Unpleasant noises due to sediment interaction with heating elements.

How Often Should You Drain Your Water Heater?

The frequency of draining your tankless water heater, especially after a water heater replacement, depends on several factors, including hard water levels, the amount of hot water used, and the manufacturer’s guidelines for tankless water heater installation.

It’s generally advisable to drain and flush your water heater at least once a year to ensure optimal performance and longevity.

However, if you have hard water or high sediment content, more frequent draining may be necessary to have a tankless water heater rental for the water heater life span.

Step-by-Step Guide to Draining Your Water Heater

Draining a water heater is a straightforward process that homeowners can often do themselves.

Here’s a step-by-step guide:

1. Turn Off the Water Supply and Power Source

  • Turn the gas valve to the “PILOT” for gas heaters.
  • For an electric tankless water heater, switch off the circuit breaker.

2. Prepare for Draining

  • At the bottom of the tank, you can find the drain valve. Connect a garden hose to this valve for draining purposes.
  • Run the other end of the hose to a suitable drain or outside.

3. Open the Drain Valve

  • Allow the water to flow out of the tank. Be cautious, as the water may be hot.

4. Flush the Tank

  • After the tank drains, briefly turn on the cold water supply to flush any remaining sediment.

5. Refill the Tank

  • Please ensure that the drain valve is securely closed before removing the hose.
  • The water supply needs to be turned on, and the tank should be allowed to refill.

6. Restart the Heater

  • For gas heaters, turn the gas valve back to its original position and relight the pilot if necessary.
  • For electric heaters, turn the circuit breaker back on.

Tips for Successful Water Heater Draining

  • Safety First: Ensure the tank has cooled down before draining to avoid scalding.
  • Check for Leaks: Inspect the drain valve and other connections for leaks after completing the process.
  • Consider a Sediment Filter: Installing a sediment filter on the incoming water line can reduce sediment buildup.
  • Annual Inspection: Combine draining with a yearly inspection of the anode rod, pressure relief valve, and other components.

Benefits of Regular Maintenance

Regular draining and maintenance of your water heater have several benefits, including:

  • Improved Efficiency: Reduced sediment buildup allows for more efficient heating to high-life heating.
  • Extended Lifespan: Preventing corrosion and damage to the tank and components can significantly extend the lifespan of a water heater.
  • Energy Savings: Efficient operation means less energy consumption and lower utility bills.
  • Consistent Hot Water Supply: Ensures a reliable hot water supply without unexpected interruptions.

Conclusion

Draining your tankless water heater is an essential maintenance task that should be considered.

Following the steps outlined in this guide and maintaining a daily maintenance schedule, you can ensure that your water heater remains efficient, safe, and long-lasting.

Remember, if you need clarification on any part of the process or encounter issues, it is advisable to seek a professional plumber’s assistance to guarantee your water heater’s safety and efficiency.

Troubleshooting Electric Water Heater Element Issues

The reliability of your electric water heater is paramount to maintaining a comfortable and convenient home environment.

The electric water heater element is central to its operation, a critical component that, when faulty, can lead to hot water and other inconveniences.

Understanding the intricacies of water heater elements, including their types, wattage, installation, and joint problems, is essential for any homeowner.

This comprehensive guide aims to demystify water heater element 3000-watt issues, offering a step-by-step approach to troubleshooting, replacement procedures, and the importance of regular maintenance.

Types of Elements

Electric water heaters typically use one or two heating elements to heat water.

These elements convert electrical energy to heat, which is then transferred to the water in the tank.

When seeking water heater service, it’s important to know that the two primary elements in electric water heaters are the flange (or bolt-in) type and the screw-in type.

The choice between these types often depends on the water heater’s make and model and the household’s specific heating requirements.

Proper maintenance and timely water heater service can ensure efficient heating and extend the lifespan of your unit.

Wattage and Voltage

The performance of an electric water heater element is significantly influenced by its wattage and voltage.

A standard element often has a 3000-watt capacity, which balances efficient heating and energy consumption, making it suitable for various applications, including floor heating solutions.

The voltage requirement for the electric water heater element typically matches the household’s electrical supply, commonly 240 volts in many regions.

It’s crucial to match the wattage and voltage of the replacement element to those of the existing one to ensure optimal performance and avoid electrical issues, especially when integrating into systems like floor heating solutions.

Installation

Installing an electric water heater element requires precision and adherence to safety protocols.

It involves draining the tank, removing the old element, installing the new one, and ensuring a tight seal to prevent leaks.

While some homeowners may feel comfortable performing this task, consulting with a professional, especially for complex models, areas with specific regulations like Victoria, BC.

when dealing with additional services like a boiler repair service, is advisable to ensure everything is done safely and correctly.

Common Problems

Common issues with electric water heater elements include sediment buildup, corrosion, and electrical faults.

Hard water is a notable culprit, accumulating minerals on the elements, which can significantly reduce their efficiency and lifespan.

Symptoms of a failing component include inconsistent water temperatures, a complete lack of hot water, and unusually high electricity bills.

Replacement Procedure

Replacing an electric water heater element involves several steps, including turning off the power supply, draining the tank, and carefully unscrewing the faulty component.

When selecting a replacement, it’s vital to consider the electric water heater element price, ensuring it aligns with your budget and the quality standards you seek.

The electric water heater element replacement cost can vary based on the element’s quality, the complexity of the installation, and labor fees if a professional is hired.

Energy Efficiency

Choosing the best electric water heater element can significantly impact the unit’s energy efficiency.

Modern elements are designed to heat water more efficiently, lower energy consumption, and lower utility bills.

When considering a replacement, look for elements that balance performance and energy efficiency.

Maintenance

Daily maintenance is crucial in extending the lifespan of water heaters and their components.

This periodically flushing the tank to remove sediment, checking the anode rod, and inspecting the elements for signs of wear or damage.

Proper maintenance can significantly extend a water heater’s lifespan, typically between 8 and 12 years.

Safety Tips

Safety should always be a priority when dealing with electric water heaters.

This includes ensuring the power supply is turned off before performing any maintenance or replacement tasks, using the correct tools, and following the manufacturer’s instructions carefully.

In cases of uncertainty or complex issues, seeking professional assistance is an eco-peak water heater.

Material Comparison

Electric water heater elements are made from various materials, including copper, stainless steel, and titanium.

Each material offers different benefits in terms of durability, resistance to corrosion, and suitability for other water types.

For instance, titanium elements are highly resistant to the corrosive effects of hard water, making them an ideal choice for areas with high mineral content in the water supply.

Hard Water Effects

The impact of hard water on electric water heater elements cannot be overstated.

The minerals in water can lead to scale buildup on the components, reducing their heating efficiency and increasing the risk of overheating and failure.

Water-softening solutions can help mitigate these effects and prolong the elements’ lifespan.

Tankless Options

For those considering an upgrade or replacement, viessmann tankless water heater electric water heaters offer an alternative to traditional tank models.

These heat water on demand, eliminating the need for a storage tank and energy consumption.

While the initial cost may be higher, the long-term savings and efficiency can be significant.

Troubleshooting Guide

A comprehensive troubleshooting guide can be invaluable for diagnosing and addressing common electric water heater element issues.

This guide should cover the steps to identify symptoms, test the elements and thermostats, and replace faulty components.

Always refer to the manufacturer’s manual for model-specific guidance and troubleshooting tips.

Energy Efficiency and Cost Savings

Modern electric water heater elements are designed with energy efficiency in mind.

Innovations in element design, such as low-watt density elements coated with a protective material, help reduce electricity consumption by distributing heat more evenly and minimizing sediment buildup.

This not only extends the lifespan of the component but also contributes to significant cost savings over time.

When selecting a new element, consider the price of long-term energy savings alongside the electric water heater element to ensure you make a cost-effective choice.

Professional Installation vs. DIY

While many homeowners may consider replacing an electric water heater element a DIY project, assessing your skill level and understanding of your water heater’s operation is essential.

Professional installation can offer peace of mind, especially in complex systems or where local regulations require certified expertise, such as Victoria, BC.

When hiring a professional, the electric water heater element replacement cost includes labor but ensures a safe and correct installation.

Based on your situation, weigh the pros and cons of DIY versus professional installation.

Lifespan of Electric Water Heater Elements

The lifespan of electric water heater elements can vary widely depending on several factors, including water quality, frequency of use, and maintenance practices.

Generally, elements in areas with hard water may have a shorter lifespan due to mineral buildup.

Daily maintenance, including flushing the tank and checking the anode rod, the lifespan of a water heater and its components can be prolonged with some maintenance. 

Comparing Electric with Alternative Water Heating Solutions

While electric water heaters are standard, it is beneficial to compare them with alternative solutions like gas water heaters or solar-powered systems.

Each option has its advantage of tankless water heater and disadvantages, such as the initial setup cost, operating expenses, and environmental impact.

For instance, while gas water heaters offer lower operating costs in some areas, they also have considerations like venting requirements and potential cons about using natural gas fireplace glass cleaner.

Environmental Considerations

As we become more environmentally conscious, the impact of our water heating choices becomes more pertinent.

Electric water heaters, especially those powered by renewable energy sources, can offer a more environmentally friendly option than fossil fuel-based systems.

Consider the source of your electricity and explore options for integrating solar power or other renewable energy sources into your home’s energy mix with tankless water heater benefits.

Maintenance Tips for Optimal Performance

Daily maintenance is critical to ensuring the longevity and efficiency of your electric water heater and its elements.

This includes routine checks for leaks, sediment flushes, thermostat tests, and inspections of the heating elements for any signs of wear or damage.

Consider scheduling annual professional inspections to catch any issues early and ensure your system works efficiently.

Safety Precautions

Safety must be addressed when dealing with electric water heating systems.

Always ensure the power is turned off before attempting repairs or maintenance.

Use caution when draining the tank, as the water can be boiling. If you’re ever in doubt about a procedure, consult a professional to avoid personal injury or damage to your system.

Conclusion

Troubleshooting electric water heater element issues doesn’t have to be a daunting task.

With a basic understanding of the types of elements, their installation, joint problems, and maintenance practices, homeowners can effectively address many of the challenges associated with electric water heaters.

Whether opting for a DIY approach or seeking professional assistance, the key is to prioritize safety, efficiency, and regular maintenance to ensure reliable access to hot water in your home.

Remember, the best electric water heater element suits your needs, offers energy efficiency, and aligns with your budget.

With the proper care and attention, your electric water heater can provide years of dependable service, keeping your showers warm and your dishes clean.

How To Clean A Fireplace Glass

How To Clean As Fireplace Glass

Maintaining clean glass on your gas fireplace is crucial not only for aesthetic reasons but also for the efficient operation of your fireplace. A clear view of the flickering flames enhances the ambiance and warmth of your living space.

However, over time, the glass can become marred with soot, carbon deposits, and a white film, which can obscure the beauty of the fire and potentially impact the fireplace’s performance.

Understanding how to clean gas fireplace glass stains and addressing what causes white film on gas fireplace glass is vital to preserving the integrity and safety of your fireplace.

Regular cleaning not only ensures an unobstructed view but also contributes to the longevity of the glass and the overall health of your fireplace system.

This guide aims to provide practical strategies and solutions, from homemade gas fireplace glass cleaner recipes to the best commercial cleaner for gas fireplace glass, ensuring that your gas fireplace remains a cherished feature in your home.

Understanding the Composition of Gas Fireplace Glass

Composition of Gas Fireplace Glass

Gas fireplace glass is specifically engineered to withstand extreme temperatures, making it different from typical glass in windows or doors.

This high-temperature tolerance is due to the ceramic or tempered glass used in fireplace doors, designed to resist thermal shock and prevent breakage under heat stress.

The robust nature of this glass necessitates specific cleaning methods to avoid damage. Harsh chemicals or abrasive tools can scratch or weaken the glass, leading to potential safety hazards.

It’s essential to choose cleaning solutions that are effective yet gentle, such as a homemade gas fireplace glass cleaner or a commercially available best cleaner for gas fireplace glass formulated specifically for the unique properties of fireplace glass.

Understanding the glass’s composition helps select the appropriate cleaning techniques that won’t compromise its integrity, crucial not only for aesthetic reasons but also for ensuring the efficiency of associated plumbing and heating services.

Whether tackling how to clean gas fireplace glass with vinegar for routine maintenance or addressing more stubborn issues like cleaning gas fireplace glass stains, the right approach will ensure the glass remains clear and intact, offering a safe and beautiful view of your gas fireplace.

Safety Precautions Before Cleaning

Safety Precautions Before Cleaning

Before embarking on cleaning your gas fireplace glass, prioritizing safety is paramount. Ensure the fireplace is completely turned off and the glass is cool to the touch to prevent burns.

Disconnecting the gas supply adds an extra layer of safety, eliminating any risk of gas leakage. Protective gloves are advisable to protect your hands not only from the cleaning agents, which can be harsh on the skin but also from the sharp edges of the glass panel.

Safety goggles can also protect against accidental splashes of cleaning solutions. Working in a well-ventilated area is essential, especially when using homemade gas fireplace glass cleaner solutions like vinegar, which can emit strong odours.

These precautions are not just for personal safety but also to prevent any damage to the fireplace. When removing gas fireplace glass stains or attempting to clean fireplace glass with ash, being mindful of the materials and tools you use will ensure that the cleaning process is safe for you and your fireplace.

Gather Necessary Cleaning Supplies

Gather Necessary Cleaning Supplies to gas firplace

Gathering the right supplies before you start is crucial to clean your gas fireplace glass effectively. You’ll need a soft, lint-free cloth or paper towels for wiping, a non-abrasive scrub pad for tackling tougher stains, and a suitable cleaning solution.

When it comes to choosing a cleaner, there are several options. A homemade gas fireplace glass cleaner made from vinegar and water is an eco-friendly and cost-effective solution.

Alternatively, for more stubborn stains, how to clean gas fireplace glass with baking soda provides a gentle yet abrasive action that can lift grime without scratching the glass.

Commercially available cleaners explicitly designed for fireplace glass, like Imperial gas fireplace glass cleaner, can also be effective, especially for removing the white film on gas fireplace glass, which is often caused by mineral deposits from the combustion process.

It’s important to avoid using products with ammonia or harsh chemicals, as these can damage the glass and the interior of the fireplace. Having the right supplies on hand not only makes cleaning smoother but also ensures that you can effectively remove stains and buildup without causing damage.

Regular maintenance, including furnace repair and service, is crucial to keep your heating system efficient and safe.

Step 1: Preparing the Fireplace for Cleaning

The first step in cleaning your gas fireplace glass is to prepare the fireplace properly. This involves ensuring that the fireplace is completely relaxed and that no residual heat could pose a risk during cleaning.

If your fireplace has a removable glass front, carefully detach it according to the manufacturer’s instructions, which might involve loosening screws or clips. Place the glass on a flat, stable surface with a soft cloth to prevent scratches.

If the glass is not removable, ensure that you have clear access to the interior side of the glass. This preparation stage is crucial for a thorough clean, allowing you to address every inch of the glass, including the corners and edges where grime often accumulates.

For those tackling how to clean gas fireplace glass doors specifically, this preparation ensures that the door’s framework does not obstruct your cleaning efforts.

Proper preparation sets the stage for a successful cleaning process, ensuring that all areas of the glass are accessible and that you can work safely and efficiently.

Step 2: Removing Surface Debris and Buildup

Before applying any liquid cleaner, removing any loose debris from the glass surface is essential. A dry cloth or a soft brush can gently remove any surface dust, ash, or soot.

This initial step prevents scratching the glass when you start the wet cleaning. For fireplaces that have been used extensively, you might notice a layer of soot or a black film on fireplace glass; this is normal and can be lightly brushed off.

This stage is about preparing the glass for a deeper clean by removing particles that could create abrasions when scrubbing with a cleaning solution. It’s also an opportunity to inspect the glass for any signs of damage or wear that might need professional attention.

By ensuring the glass is free from loose debris, you set the foundation for more effective cleaning, making it easier to tackle the more stubborn stains and buildup in the subsequent steps.

Step 3: Choosing the Right Cleaning Solution

Selecting the appropriate cleaning solution is pivotal in effectively cleaning your gas fireplace glass without causing damage. For those seeking a natural gas approach, how to Clean Gas Fireplace Glass with vinegar presents a safe, eco-friendly option.

Vinegar’s acidic nature makes it excellent for dissolving the stubborn white film that can accumulate on fireplace glass, often resulting from mineral deposits in the gas.

Another DIY option is how to clean gas fireplace glass with baking soda, which, when made into a paste with water, acts as a mild abrasive suitable for scrubbing away tough stains without scratching the glass.

Commercial cleaners explicitly formulated for fireplace glass, like the Imperial gas fireplace glass cleaner, can be effective for more persistent or tough stains.

These products are designed to tackle the unique buildup found on gas fireplace glass, including soot, carbon deposits, and white film on gas fireplace glass.

When choosing a cleaner, avoiding products containing ammonia or harsh abrasives is essential, as these can damage the glass and the seals around the fireplace door.

Whether opting for a homemade gas fireplace glass cleaner or a commercial product, it’s crucial to read and follow the manufacturer’s instructions for the safest and most effective use.

Step 4: Applying the Cleaning Solution to the Glass

After choosing your cleaning solution:

  1. Apply it gently to the fireplace glass. If using a homemade gas fireplace glass cleaner like a vinegar solution, spray or dab it onto the glass, avoiding over-saturation, which can lead to drips and streaks.
  2. For those using baking soda, apply the paste directly onto the stained areas, allowing it to sit for a few minutes to loosen the grime.
  3. When using commercial cleaners, such as the best cleaner for gas fireplace glass, follow the product’s instructions, typically spraying the cleaner onto the glass or a cloth before wiping.

This step is crucial for addressing specific concerns, such as how to clean gas fireplace glass stains effectively without causing damage to the glass or the fireplace’s interior.

The application method can influence the cleaning’s effectiveness, with direct application to stains often yielding the best results for tough grime.

However, for overall cleaning, a sprayed or wiped application ensures an even distribution of the cleaning solution, facilitating a thorough and efficient cleaning process. Patience during this step can enhance the cleaner’s effectiveness, especially for stubborn stains or buildup.

Step 5: Scrubbing and Removing Stubborn Stains

With the cleaning solution applied, the next step involves scrubbing the glass to remove stubborn stains. Using a soft, non-abrasive scrub pad, gently work the cleaner into the glass in a circular motion, paying extra attention to areas with significant buildup.

For those using a homemade gas fireplace glass cleaner like a baking soda paste, the gentle abrasive quality of the baking soda can help lift stubborn stains without scratching the glass surface.

When tackling how to clean gas fireplace glass with vinegar, the acidic nature of the vinegar helps break down the grime, making it easier to scrub away. It’s particularly effective for removing the white film on gas fireplace glass, often due to mineral deposits from combustion.

For extremely stubborn stains, such as a thick black film on fireplace glass, allowing the cleaning solution to sit longer before scrubbing can help loosen the buildup, making it easier to remove.

Apply only gentle pressure throughout this process to avoid damaging the glass. Regular checks while scrubbing can help you assess the progress and determine if additional applications of the cleaner or more scrubbing are needed. 

Step 6: Rinsing and Drying the Glass Surface

With the scrubbing complete, it’s time to rinse the gas fireplace glass to remove any remaining cleaning solution and residue. Using a clean, damp cloth or sponge, carefully wipe the glass surface to remove traces of the cleaning solution, ensuring thorough rinsing.

Be sure to rinse the cloth or sponge frequently to prevent spreading dirt or residue back onto the glass. Once the glass has been thoroughly rinsed, use a dry, lint-free cloth or towel to dry the surface carefully, removing any remaining moisture or streaks.

Be sure to work methodically, starting from one corner of the glass and gradually moving across its entire surface to ensure thorough drying. By rinsing and drying the glass properly, you can remove any remaining cleaning solution and residue and achieve a sparkling clean finish.

Step 7: Polishing the Glass for a Sparkling Finish

With the gas fireplace glass clean and dry, it’s time to add the finishing touches by polishing the glass to restore its clarity and shine.

Using a clean, dry microfiber cloth or newspaper, gently buff the glass surface in circular motions to remove any remaining streaks or smudges. Be sure to work methodically, starting from one corner of the glass and gradually moving across its entire surface to ensure thorough polishing.

Additionally, be sure to use a dry cloth or newspaper to prevent leaving behind lint or moisture that may detract from the glass’s appearance.

By polishing the glass properly, you can achieve a crystal-clear finish and enjoy an unobstructed view of the mesmerizing flames in your gas fireplace. Incorporating Gas Fireplace Ideas into your design can further enhance the ambience and aesthetics of your living space.

Tips for Preventing Future Buildup

tips

To maintain the cleanliness and clarity of your gas fireplace glass, it’s essential to implement preventative measures to minimize future buildup of soot, stains, and residue.

One effective strategy is to clean the glass regularly, ideally after every use, to prevent dirt and grime from accumulating and becoming more challenging to remove.

Additionally, ensuring proper ventilation in the fireplace area can help minimize the formation of soot and residue by allowing for better airflow and combustion of gases.

Using high-quality fuel sources and avoiding burning materials that produce excessive smoke or residue can also help reduce buildup on the glass surface.

By incorporating these preventative measures into your fireplace and boiler repair service maintenance routine, you can prolong the intervals between cleanings and keep your gas fireplace glass looking clean and clear for years.

Troubleshooting Common Cleaning Challenges

Troubleshooting Common Cleaning Challenges for gas firplaces

Despite your best efforts, you may encounter stubborn stains, residue, or other cleaning challenges when cleaning your gas fireplace glass. Fortunately, you can try several troubleshooting techniques to address these issues effectively.

For persistent stains or residues, consider using a specialized glass cleaner formulated explicitly for gas fireplace glass, as these products are designed to tackle tough stains without damaging the glass surface.

Alternatively, you may opt for alternative cleaning methods, such as baking soda, water paste, or vinegar to dissolve mineral deposits. Be sure to test any new cleaning products or processes on a small, inconspicuous glass area first to ensure they are safe and effective.

Additionally, if you encounter any difficulties or are unsure how to proceed, feel free to seek advice from a professional fireplace technician or glass cleaner.

With the right approach and techniques, you can overcome common cleaning challenges and restore the clarity and shine of your gas fireplace glass.

Alternative Cleaning Methods and Solutions

Alternative Cleaning Methods and Solutions

In addition to traditional cleaning methods and solutions, you can try several alternative approaches to effectively clean your gas fireplace glass.

One popular alternative is to use ash from your fireplace as a mild abrasive cleaner to remove stubborn stains and residue from the glass surface.

Simply dip a damp cloth or sponge into the fireplace ash and gently scrub the glass in circular motions, focusing on areas with visible stains or buildup.

The abrasive nature of the ash helps to loosen dirt and grime without scratching or damaging the glass, making it an effective and eco-friendly cleaning solution.

Additionally, some homeowners have successfully used specialized cleaning tools or accessories, such as magnetic cleaners or razor scrapers, to remove stubborn stains and residue from gas fireplace glass.

These tools are designed to safely and effectively remove dirt and grime from the glass surface without scratching or damaging it, providing a convenient alternative for tackling tough cleaning jobs.

By exploring alternative cleaning methods and solutions, you can find the best approach for you and achieve a clean and clear finish on your gas fireplace glass.

Conclusion

In conclusion, maintaining clean glass on your gas fireplace is not just about aesthetics—it’s essential for safety, efficiency, and the overall enjoyment of your fireplace experience.

By following the steps outlined in this guide and utilizing the appropriate cleaning methods and solutions, you can ensure that your gas fireplace glass remains crystal clear, providing an unobstructed view of the mesmerizing flames within.

From understanding the composition of gas fireplace glass to taking safety precautions before cleaning, each aspect plays a crucial role in achieving optimal results.

Whether you opt for a homemade gas fireplace glass cleaner using vinegar or baking soda, or you prefer a commercial product like Imperial gas fireplace glass cleaner, the key is to choose a solution that effectively removes stains and buildup without damaging the glass or the fireplace.

By incorporating regular maintenance into your fireplace care routine and implementing preventive measures to minimize future buildup, you can prolong the lifespan of your gas fireplace glass and ensure its continued performance and visual appeal.

So, embrace the warmth and ambience of your gas fireplace with confidence, knowing that with proper care and attention, you can enjoy a clear view and a cozy atmosphere for years to come.

Here’s to many delightful evenings spent gathered around your beautifully maintained gas fireplace, creating cherished memories with family and friends amidst the dancing flames

How efficient Are Mini Split ACs for Heating?

Comparative efficiency chart of mini split ACs and traditional heating systems in a modern living room setting Mini Split ACs for Heating

As energy efficiency becomes increasingly paramount in our homes and workplaces, the adoption of mini split air conditioning systems for cooling and heating purposes has surged.

Known for their versatility and efficiency, mini splits offer a compelling solution for those looking to enhance their climate control.

This blog delves into the efficiency of mini split ACs when used for heating, exploring various aspects contributing to their performance.

1. What is Mini Split Heating

Mini Split Heating

Mini-split heating, a key component of split system heating and cooling, utilizes ductless AC mini-split systems to deliver efficient warmth to indoor spaces.

These systems, integral to a mini split AC system, feature an outdoor compressor/condenser unit paired with one or more indoor air-handling units linked by a conduit.

This innovative design allows mini splits to function effectively without extensive ductwork, making them perfect for retrofitting older structures or heating in new additions.

2. Seasonal Energy Efficiency Ratio (SEER) Rating

Seasonal Energy Efficiency Ratio

The SEER rating is a crucial metric for evaluating the cooling efficiency of air conditioning units, including ductless AC heating and cooling systems, throughout a typical cooling season.

Although SEER is primarily linked to cooling performance, a higher SEER rating indicates a unit’s superior overall energy conversion efficiency. This enhanced efficiency benefits cooling and significantly impacts the heating efficiency of ductless AC systems.

Consequently, the SEER rating becomes essential when considering ductless ac heating and air solutions, highlighting the system’s ability to provide energy-efficient heating and cooling.

This dual efficiency makes ductless air conditioning and cooling systems an attractive option for optimizing their home’s energy usage and ensuring a comfortable indoor environment year-round.

3. HSPF Ratings

 Heating Seasonal Performance Factor

The Heating Seasonal Performance Factor (HSPF) is the counterpart to SEER for heating performance.

It measures the heat pump’s efficiency (which mini splits use) in converting electricity into heating over the heating season. A higher HSPF rating signifies greater efficiency.

4. Inverter Technology

Inverter Technology

Modern mini splits often incorporate inverter technology, allowing the compressor to adjust its speed dynamically.

This technology ensures that the system operates efficiently by maintaining consistent temperatures without the frequent on-off cycling of traditional systems.

5. Variable Speed Compressors

Variable Speed Compressors

Variable speed compressors can adjust their output to match the heating demand, significantly improving efficiency.

This leads to reduced energy consumption and lower utility bills, as the system avoids the energy-intensive start-stop cycles of fixed-speed compressors.

6. Zoning Capabilities

Mini-splits excel in zoning capabilities, allowing different home areas to be heated to varying degrees.

This targeted heating ensures energy is well-spent on unoccupied or less frequented spaces, enhancing overall efficiency.

7. Heat Pump Operation

Heat Pump Operation

Heat Pump Operation in Mini Splits Mini-split systems, renowned for their dual functionality in mini-split heating and cooling, predominantly operate as heat pumps.

This innovative approach involves extracting heat from the external environment and channelling it indoors, a process that epitomizes the essence of a ductless mini-split.

Such systems utilize the ambient air’s thermal energy, making them an exceptionally efficient option for climate control, particularly in areas with mild to moderate temperatures.

The versatility of mini splits extends to various models, including small heat pumps designed for less spacious areas and high SEER mini split units offering superior energy efficiency.

These systems, often called split-level AC or AC-split-type ductless systems, are equipped with split heat pumps that excel in heating and cooling, adapting to the seasonal demands of indoor spaces.

Implementing mini splits as heat pumps highlights their capability to provide a sustainable and efficient heating solution, bypassing the need for conventional heating methods that rely on combustion or electrical resistance.

This efficiency is further enhanced in systems characterized by a high SEER rating, ensuring users benefit from reduced energy consumption and lower operational costs.

Mini splits, with their compact size and potent performance, stand as a testament to the advancements in ductless heating and cooling technology, offering a versatile and energy-efficient solution for modern living spaces.

Moreover, mini splits contribute to improving Indoor Air Quality and Efficiency with Heat Recovery Ventilators (HRVs), as they facilitate the exchange of stale indoor air with fresh outdoor air while recovering the heat energy from the outgoing air.

This not only ensures a constant supply of fresh air but also helps maintain comfortable indoor temperatures, thereby enhancing the overall indoor environment.

8. Cold Climate Performance

Advancements in mini-split technology have significantly improved their performance in cold climates. Modern units can extract heat

from outdoor air even at very low temperatures, making them a viable primary heating source in diverse climates.

9. Insulation and Air Sealing

Insulation and Air Sealing

The efficiency of a mini-split system can be significantly influenced by the building’s insulation and air sealing. Adequately insulated

and sealed homes require less heating, allowing mini splits to operate at peak efficiency.

10. Installation Quality

mini split ac

The efficiency and effectiveness of mini-split systems heavily depend on the installation quality. Incorrect sizing or placement can lead

to inefficiencies, underscoring the importance of professional installation.

11. Maintenance Considerations

Maintenance Considerations

Regular maintenance, such as cleaning filters and checking refrigerant levels, is crucial for maintaining the efficiency of mini-split

systems. Neglect can lead to decreased performance and higher energy consumption.

12. Energy Saving Features

Energy Saving Features

Many mini-splits come equipped with features such as programmable thermostats, sleep modes, and eco-friendly settings that

contribute to their energy efficiency, helping users save on heating costs.

13. Comparative Analysis

Comparative Analysis

Compared to traditional heating systems like forced air furnaces or baseboard heating, mini splits often offer superior efficiency due to

their ductless design, inverter technology, and precise temperature control.

14. Real-World Efficiency Examples

Real-World Efficiency Examples

Case studies and consumer reports frequently highlight the significant energy savings achieved with mini-split systems, often noting

energy use and costs are reduced by 30% or more compared to conventional heating methods.

15. Future Trends and Innovations

The future of mini-split systems looks promising, with ongoing innovations aimed at enhancing efficiency, expanding low-temperature

heating capabilities, and integrating with smart home technologies for even greater control and energy savings.

Conclusion

Mini split ACs stand out as highly efficient solutions for heating, offering a combination of advanced technology, flexible installation options, and user-friendly features.

For new constructions, retrofits, or as supplements to existing heating systems, mini splits offer a compelling choice for those prioritizing energy efficiency and comfort.

For those in Victoria, BC, looking to explore mini split heating and cooling solutions, LIFEMECHANICAL is your go-to provider.

With a commitment to quality and customer satisfaction, we offer expert advice, installation, and maintenance services to ensure your mini-split system operates at peak efficiency.

Contact us at 250 418 5139 to discuss how we can enhance your home’s heating and cooling efficiency with the latest in mini split technology.